Baserow and Pipedream - Automate with Webhooks and REST API
Pipedream connects to Baserow through the free REST API and webhooks: a Baserow webhook fires a workflow whenever rows change, and Node.js or Python code steps call the Baserow API to move data to thousands of other services - no dedicated server and no paid gateway required.
Overview
Pipedream lets you automate Baserow workflows without managing servers. When data changes in your Baserow tables, Pipedream workflows can automatically trigger actions in other apps, or vice versa. You can write custom code in Node.js or Python to transform data, apply business logic, and integrate with over 4,000 services.
What you can do
| Feature | Description |
|---|---|
| Webhook triggers | Run workflows when Baserow rows are created, updated, or deleted |
| API actions | Use any Baserow API endpoint in Node.js or Python |
| Data transformations | Map and transform data between Baserow and other apps |
| No-code + code | Build with visual steps or write custom code |
Supported Operations in Pipedream
Trigger
- New or Updated Row
Custom Actions
- Build any Baserow API request
- Use any Baserow API in Node.js
- Use any Baserow API in Python
Pre-built Actions
- Create Row
- Delete Row
- Get Row
- List Rows
- Update Row
Prerequisites
Before you begin, make sure you have:
- a Pipedream account ;
- a Baserow account with at least one database and table;
- a Baserow API token from your account settings.
How to Set Up a Baserow Workflow in Pipedream
Step 1: Build a New Workflow
In Pipedream, workflows must be created inside projects. Create a new project, then create a new workflow inside it.
Configure GitHub sync for the project to enable git-based version control: develop in branches, commit to or pull changes from GitHub, view diffs, and open pull requests.
Step 2: Configure the Trigger
Next, Pipedream opens the workflow builder and prompts you to add a trigger. Clicking the trigger opens a menu to select it: choose the New or Updated Row Baserow trigger or New HTTP / Webhook Requests.
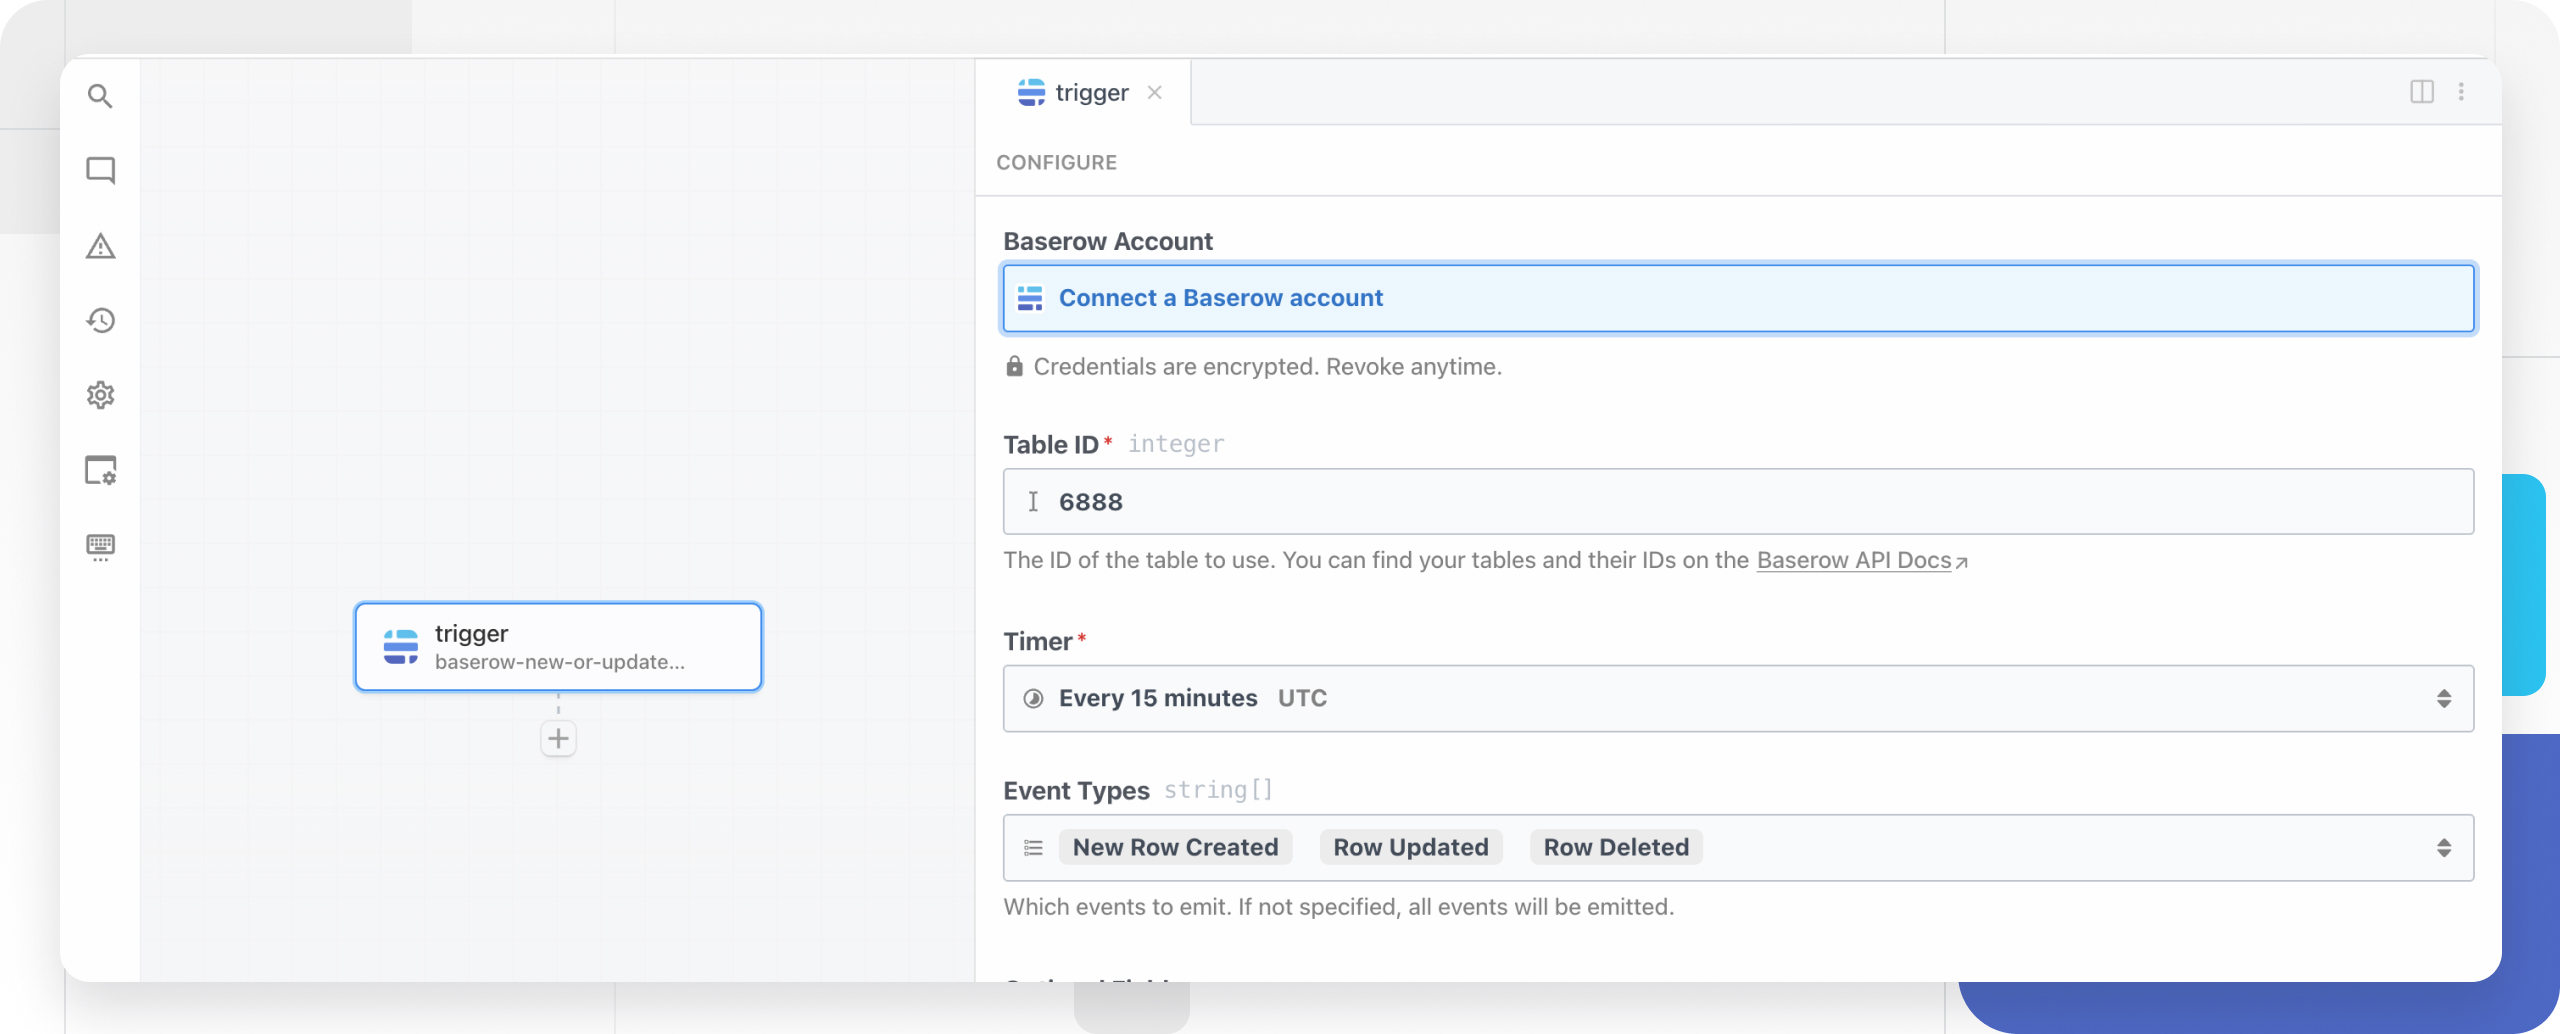
Step 3: Authenticate with Baserow
You need to generate an API token to create a new connection. Pipedream stores the token securely for future use.
Click Connect Account and select Baserow. Enter your Baserow API token .
By default, https://api.baserow.io/api is used. If Baserow is self-hosted, replace https://api.baserow.io/api with the base URL of that instance, for example https://my-domain.com/api.
For a new webhook request, Pipedream generates a unique URL that triggers this workflow. Customize the event data, response, and filters as needed. Copy the generated webhook URL - you’ll use it in Baserow. Once the workflow is deployed, it runs on every request to that URL.
Step 4: Connect a Baserow Webhook to Pipedream
For a new webhook request, generate a test event to make it easier to build the workflow.
In Baserow, open the database and go to the table you want to monitor. Create a webhook and enter the Pipedream URL. Choose which events trigger the webhook (create, update, delete). Test the webhook by creating or modifying a row in Baserow.
See Webhooks for the full setup details.
Step 5: Verify the Webhook Trigger Data
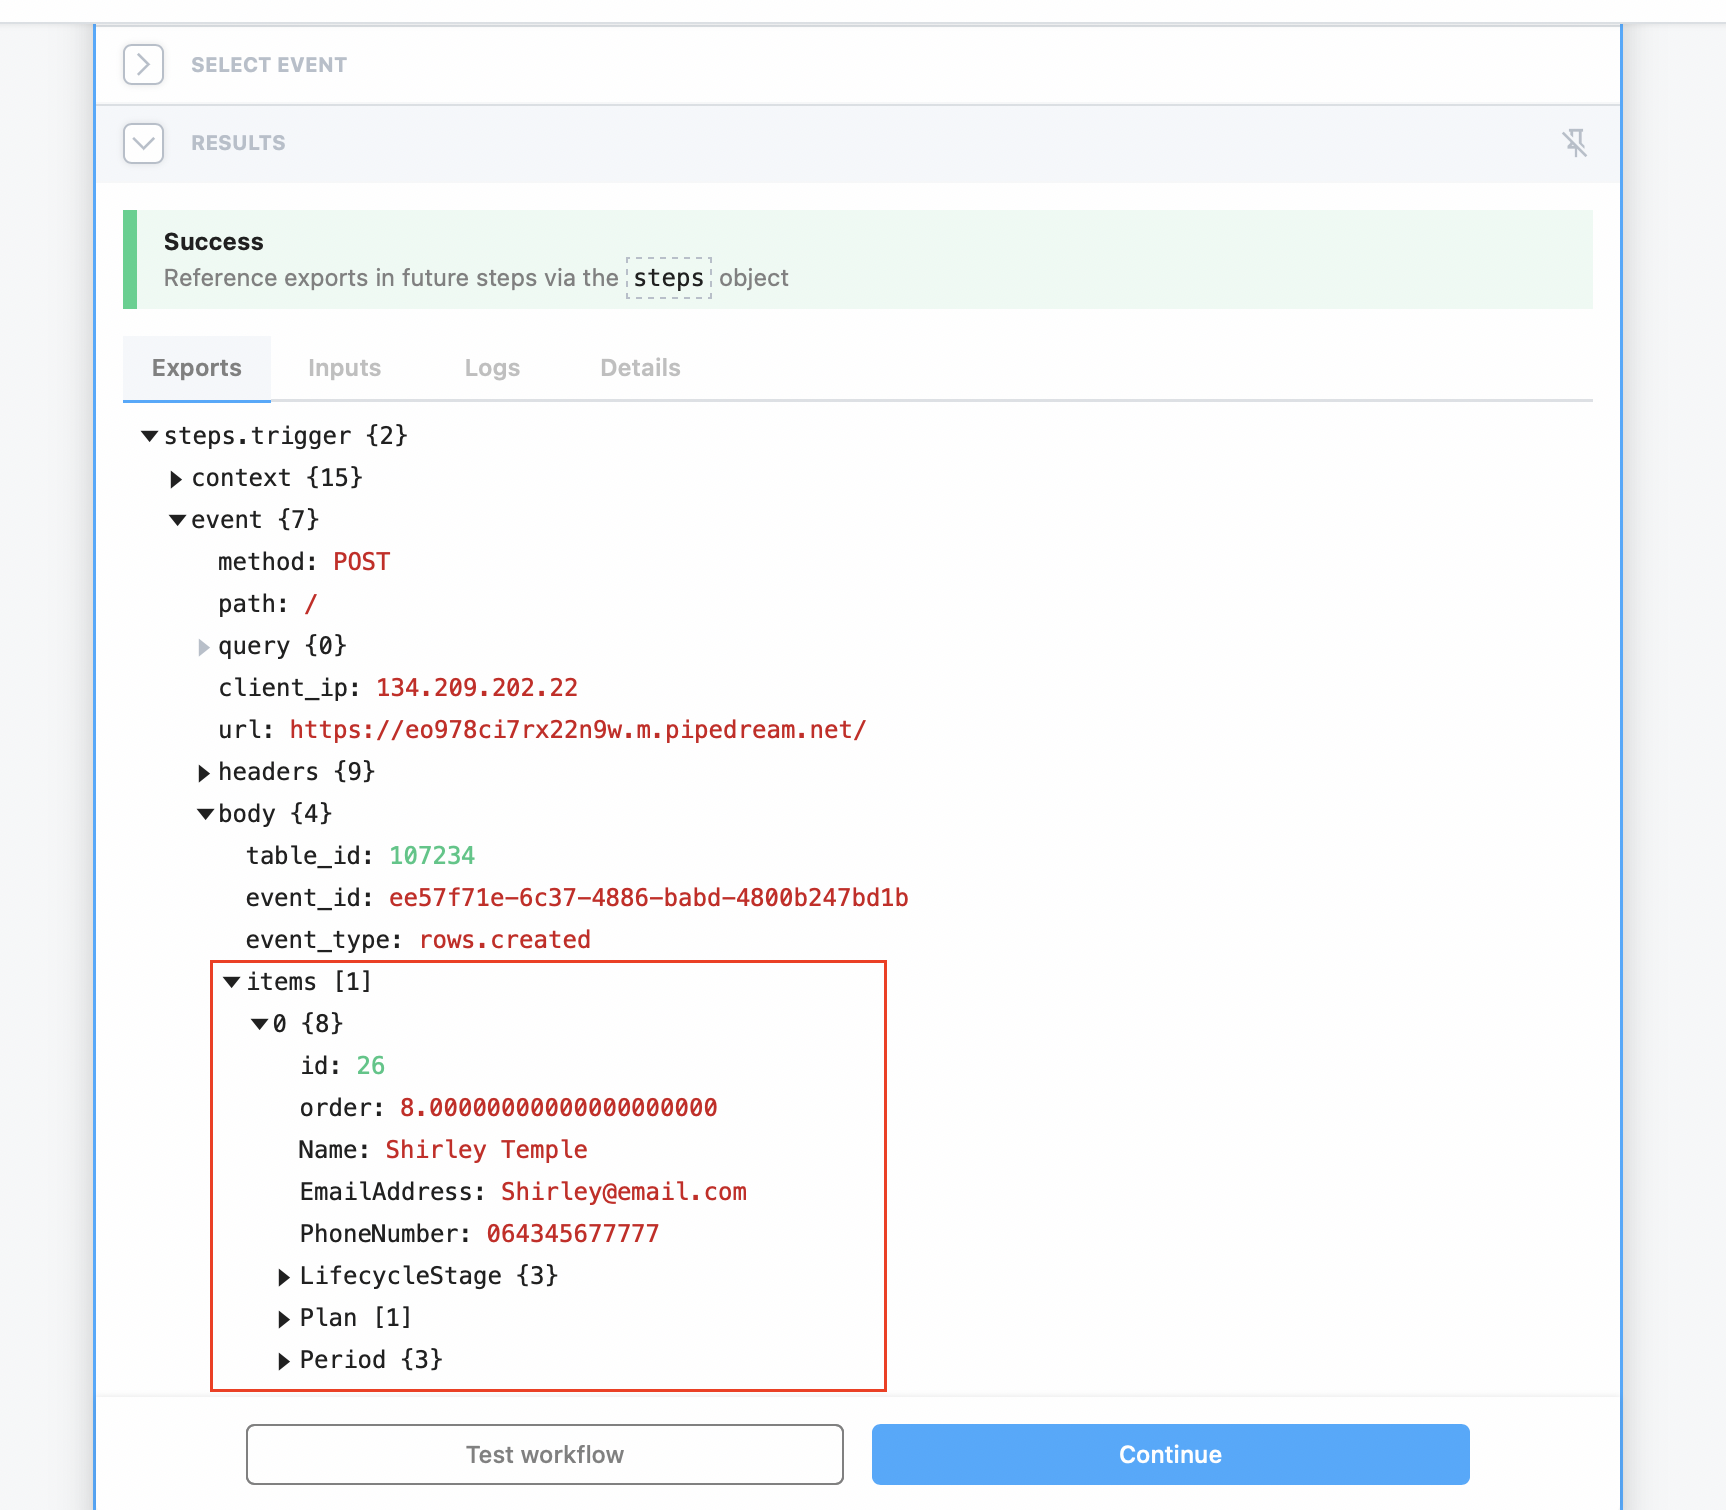
Return to Pipedream and select the incoming event from the list. Expand the body object to see the data sent from Baserow.
Pipedream automatically selects and displays the contents of the chosen event. Confirm the message arrived inside the event’s body - this data is available in every subsequent workflow step.
To monitor webhook activity and troubleshoot failed requests, open the webhooks section in Baserow and review the request and response logs for each call.
Step 6: Add a Baserow Action
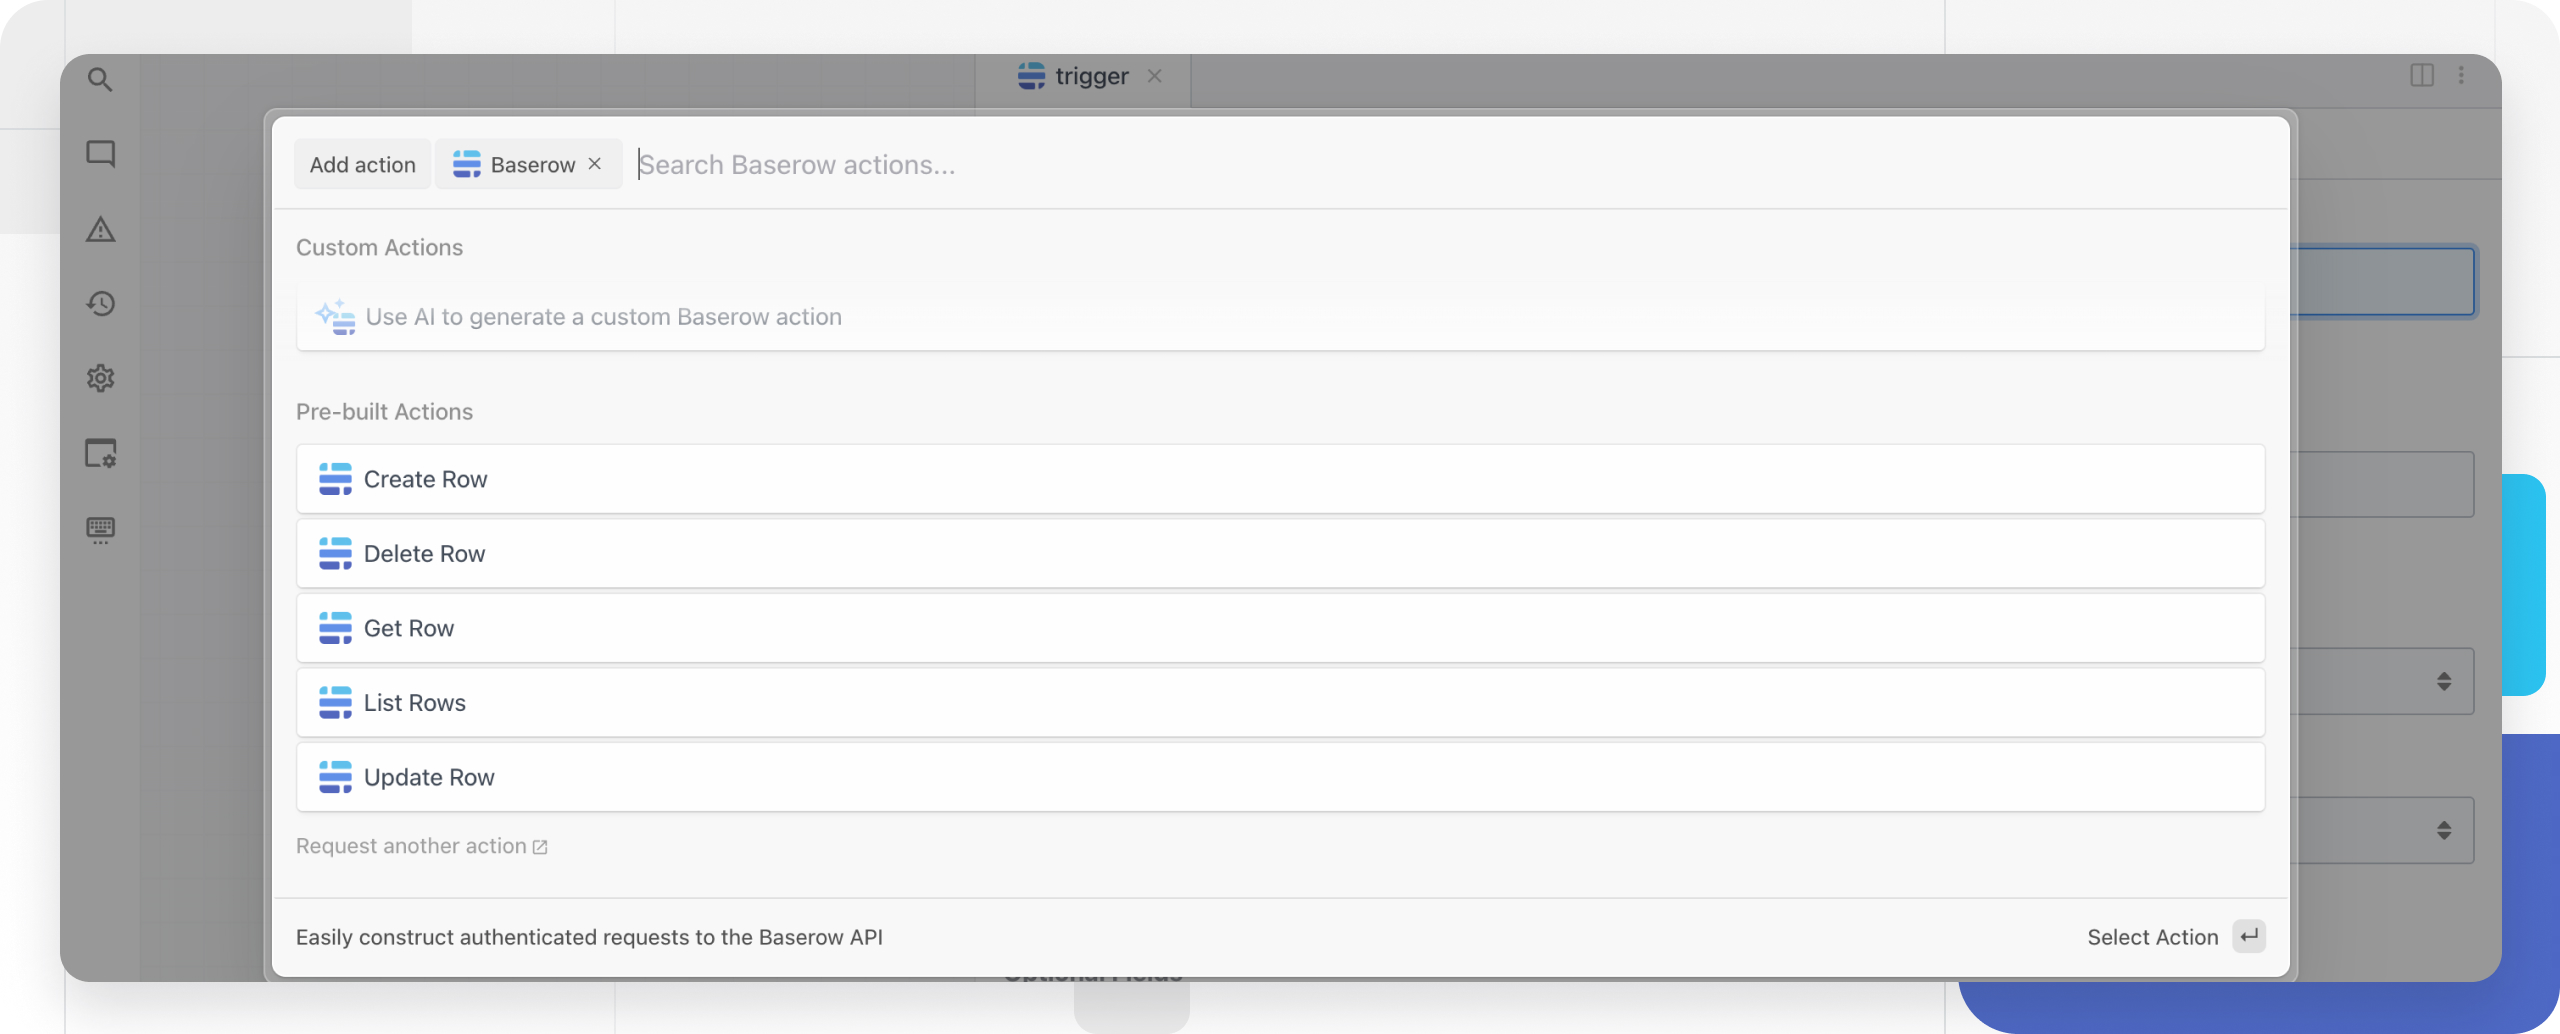
Click + to add a new step. Search for and select the Baserow app.
Select any Baserow custom or pre-built action.
Use Any Baserow API in Node.js
Select the Use any Baserow API in Node.js action to connect your account and customize a Baserow API request.
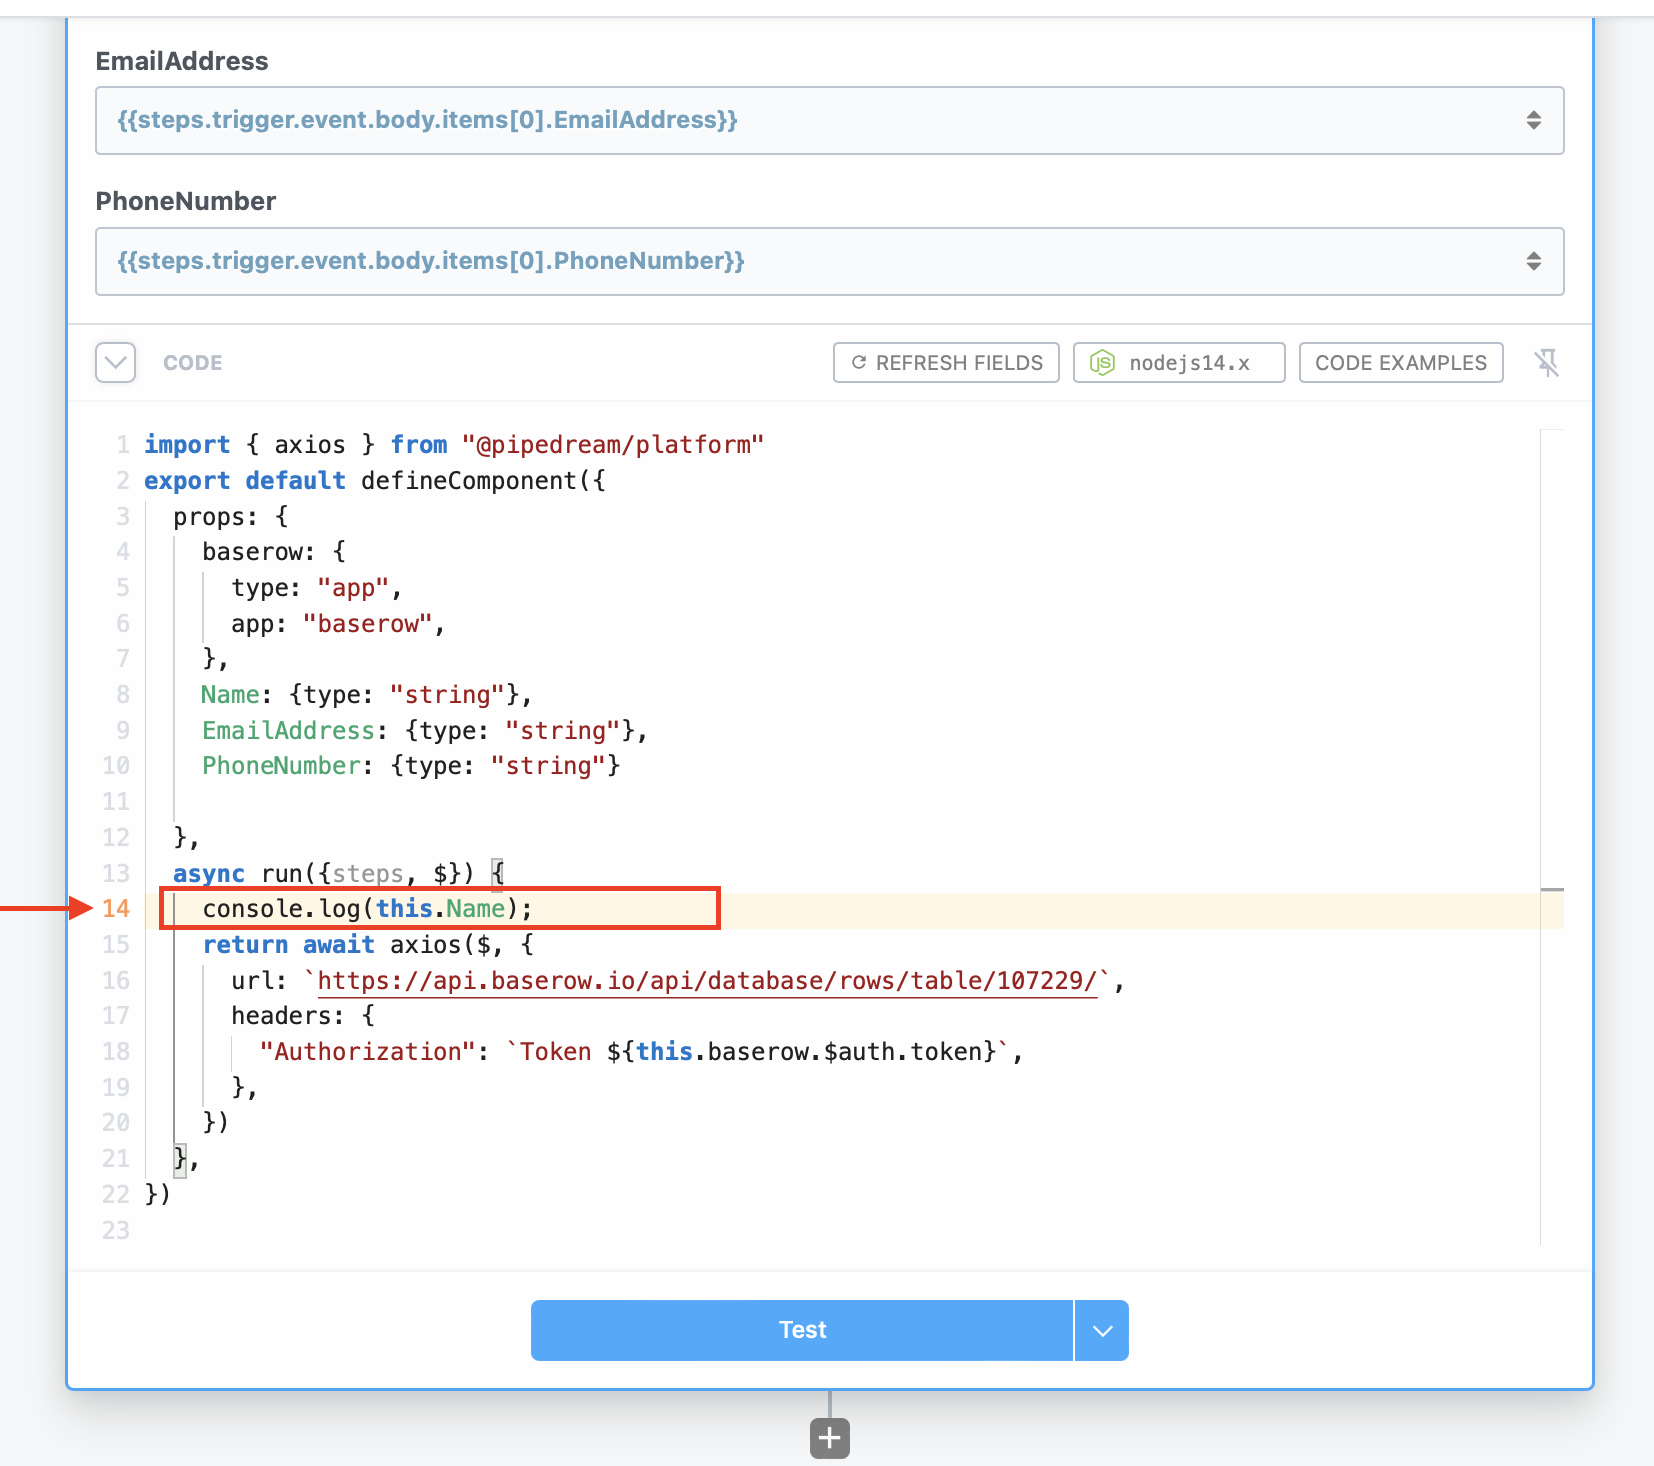
Pipedream code steps drive the logic of your workflow and let you write custom Node.js code. The workflow builder accepts text input to populate the step.
Click Refresh fields to generate props from previous steps.
Use the object explorer to map data from steps.trigger.event.body. Write your API call using this.propName to reference dynamic values. Replace [Table_ID] with your actual Baserow table ID.
Step 8: Test and Deploy
Once the configuration is complete, click Test to validate this step. When the test finishes, you’ll see a success message and a summary of the action performed.
Next, return to the Pipedream workflow and click Deploy so it runs on every trigger event.
To confirm the workflow behaves as expected, send a new request to it. The event appears instantly in the event list - select it to inspect the workflow run.
Frequently Asked Questions
What triggers can I use with Baserow in Pipedream? You can trigger Pipedream workflows from Baserow using the Baserow trigger or webhooks for row creation, updates, or deletions. Pipedream also supports scheduled (cron) triggers and HTTP requests.
Do I need to write code to use Pipedream with Baserow? No. Pipedream offers pre-built actions for common tasks. Custom code steps in Node.js or Python give you full control over data transformations and API calls when you need it.
How do I find my Baserow table ID? Open the table in Baserow and check the URL - the table ID appears after /table/ in the address bar. Alternatively, use the Baserow API documentation
to list all tables.
Can I connect multiple Baserow databases in one workflow? Yes. You can add multiple Baserow steps in a single workflow, each authenticated with the same or a different API token depending on how your workspace is set up.
Related Content
- Webhooks in Baserow
- Baserow API tokens
- Baserow API documentation
- Zapier integration
- Make integration
- n8n integration
Next, read SureTriggers integration for another no-code way to connect Baserow to outside services through webhooks.