Figure 1. OpenVPN-client-export Installation
2. Once the package is installed, the user can proceed with the configuration. Navigate to "VPN --> OpenVPN" and select "Wizards". In this example, "Local User Access" will be selected for authentication (see Figure 2). 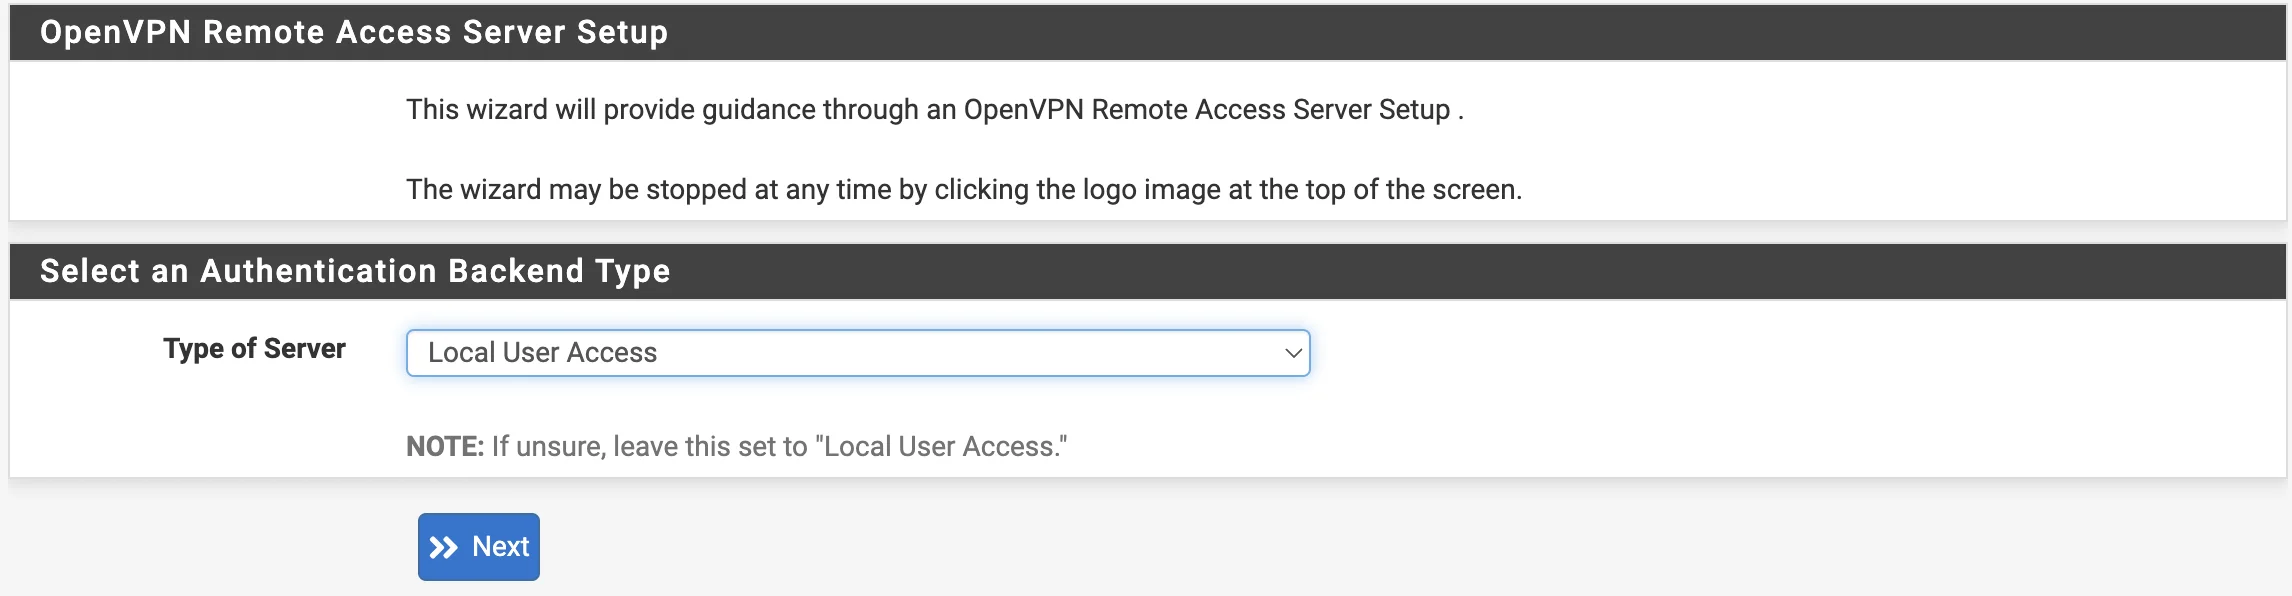Figure 2. Setting up Openvpn-client-export
The user should click the “Next” button and, on the following screen, create a Certification authority (see Table 1). | Name | Description | |---------------------|--------------------------------------------------------| | Descriptive name | Common name | | Common Name | Internal name, if empty, Descriptive name will be used | | Country Code | Two-letter country code | | State or Province | Full name of the state/province | | City | City Name | | Organization | Name of organization | | Organizational Unit | Division/Department Name |Table 1. Certification authority
After entering all the required data, click the “Add new CA” button and repeat the same steps for the "Server Certificate". 3. Once the certificates are created, the user can move on to configuring the OpenVPN server. The first step is to fill in the "Description" field (see Figure 3). Figure 3. Enter the General Server Information
4. The next step is to select the Protocol, Interface, and Local Port for the server (see Figure 4). 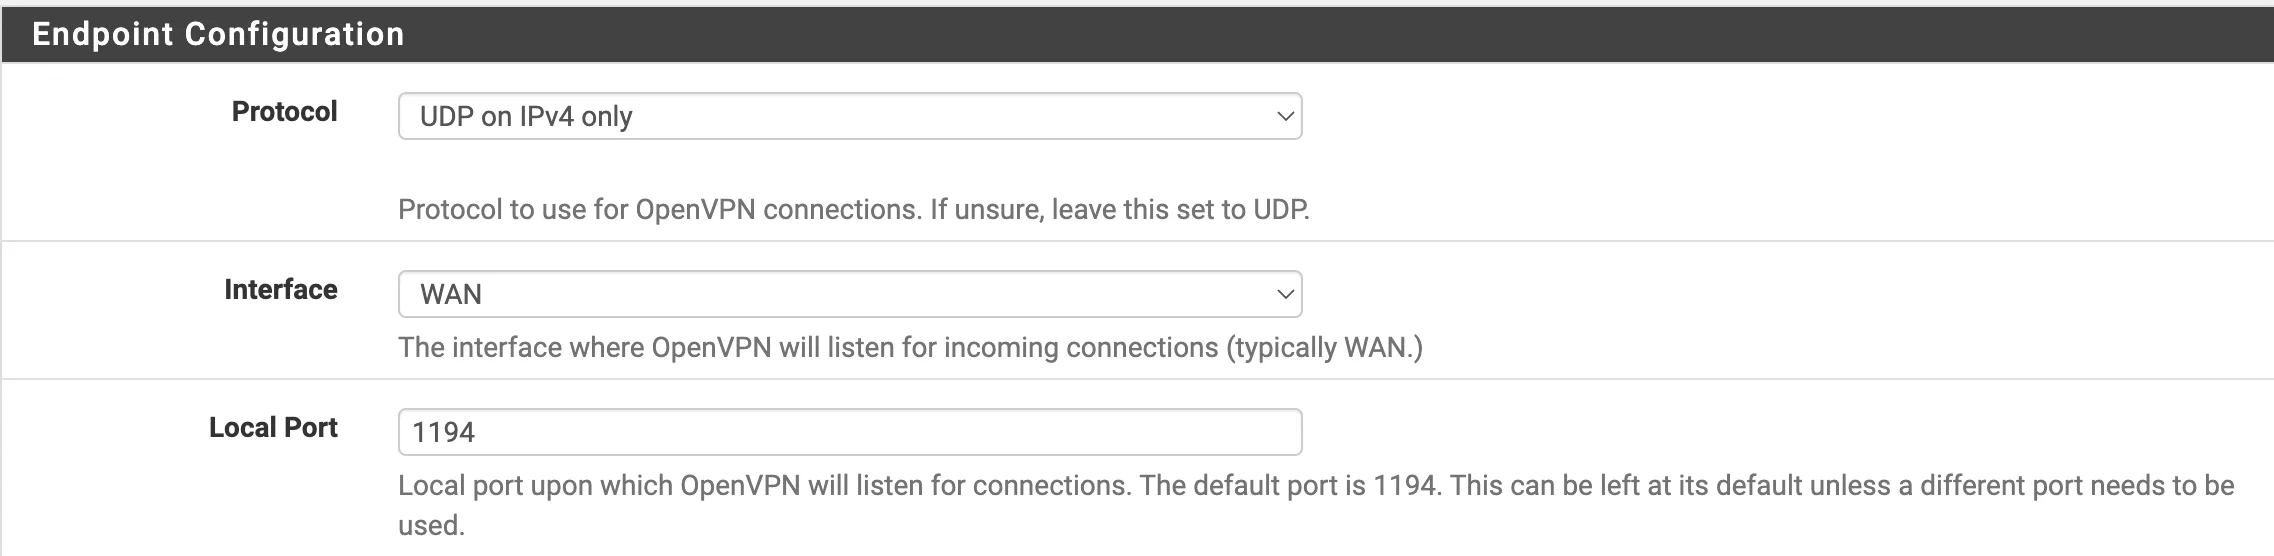Figure 4. Protocol, Interface, and Port Information
5. The user needs to configure the tunnel (see Figure 5). 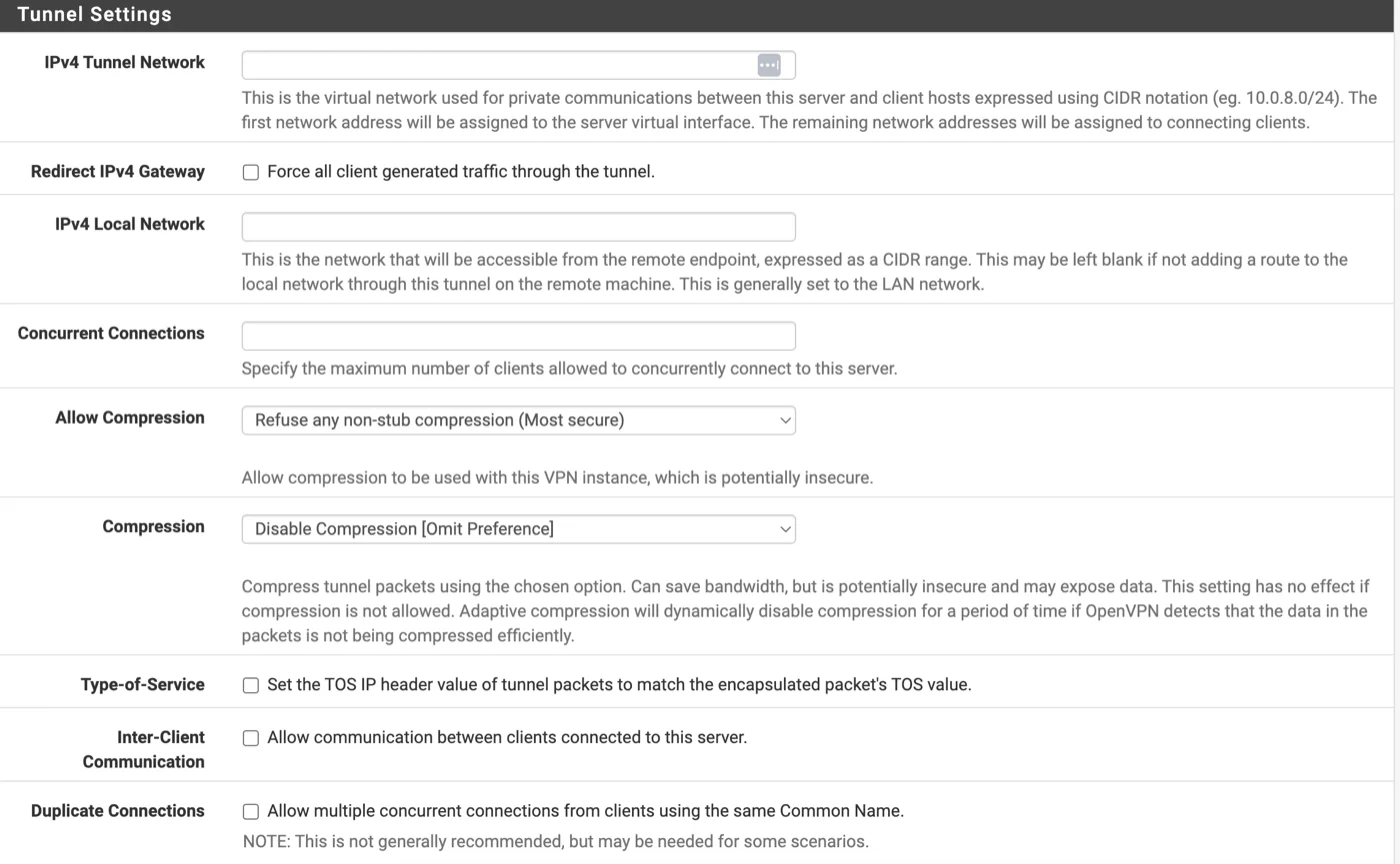Figure 5. Tunnel Configuration
The following parameters must be completed: - **IPv4 Tunnel Network**: Specifies the network range allocated to the clients. Ensure that it does not overlap with the user's existing networks. - **IPv4 Local Network**: Defines the network that will be accessible from the VPN network. All other settings can be customized as needed. Once all required settings are configured, click the Next button to proceed. 6. The next step is to select the Firewall Rule and OpenVPN rule (see Figure 6). 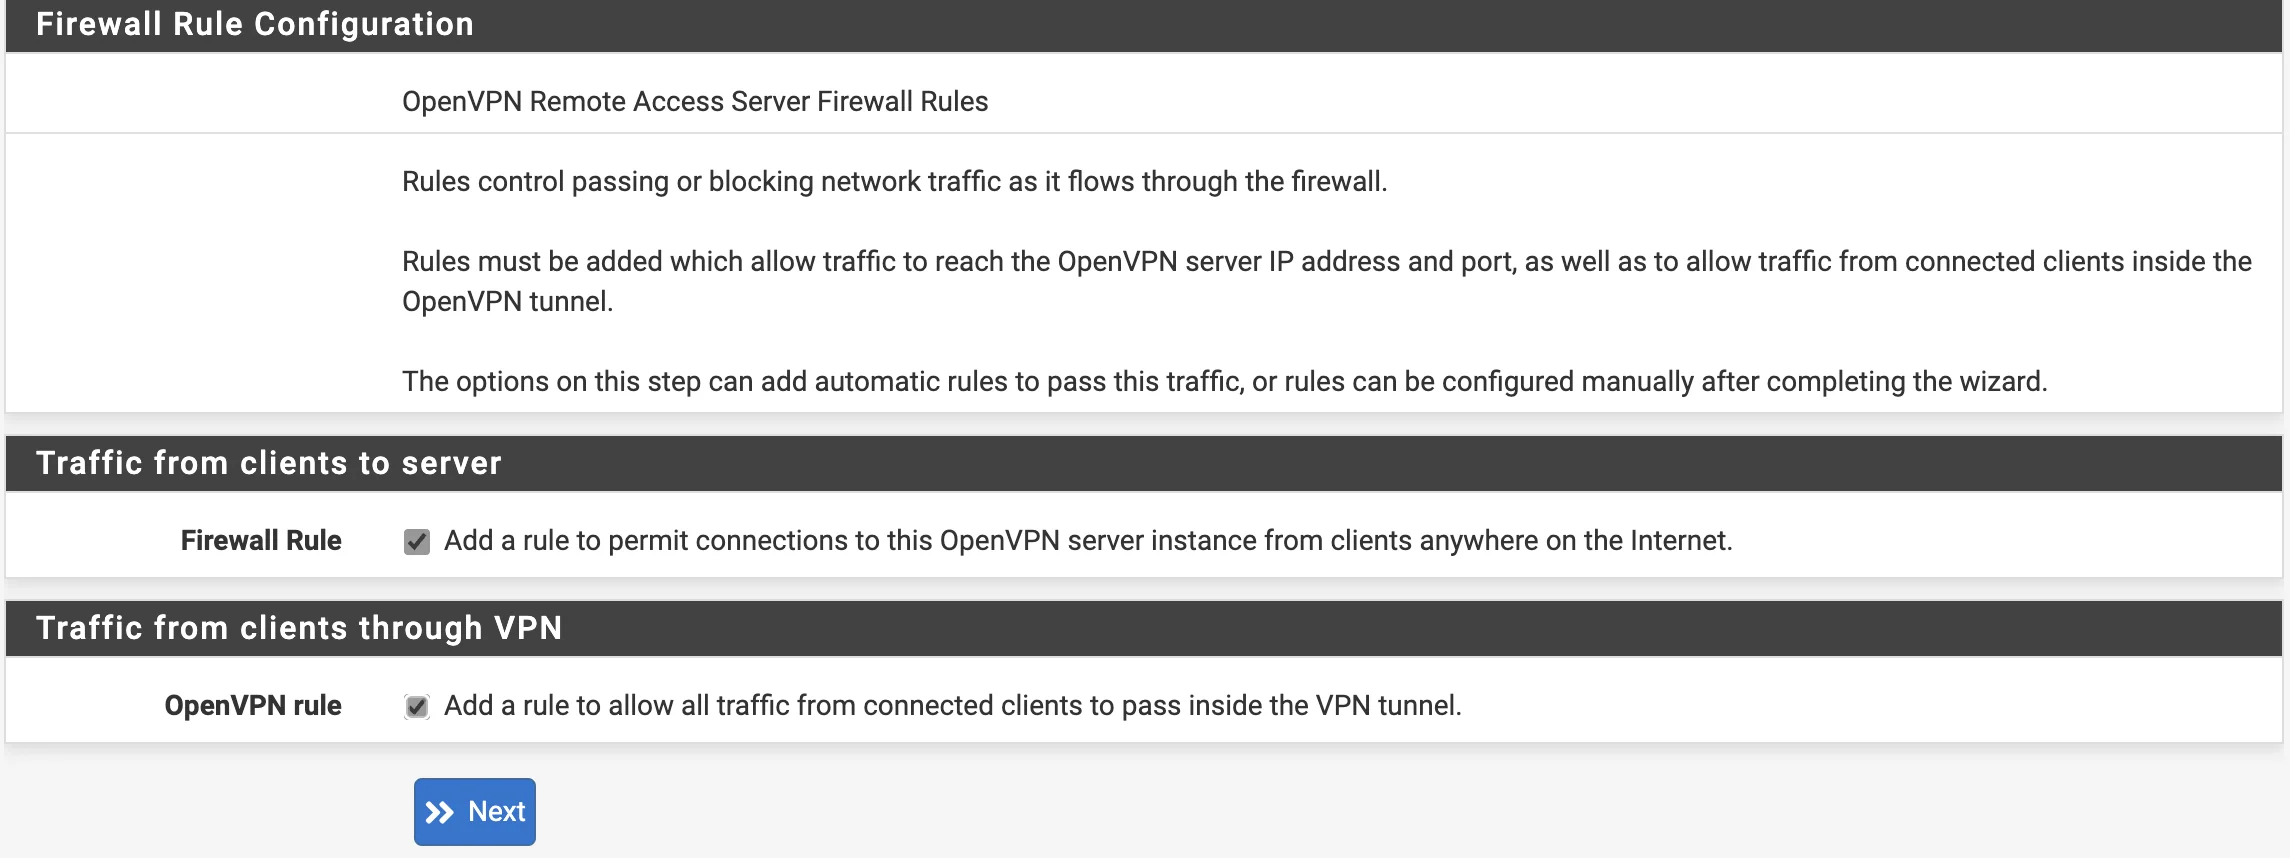Figure 6. Configuring Firewall and OpenVPN
Click “Next” and then “Finish”. After these steps, the new server should appear in the list (see Figure 7). 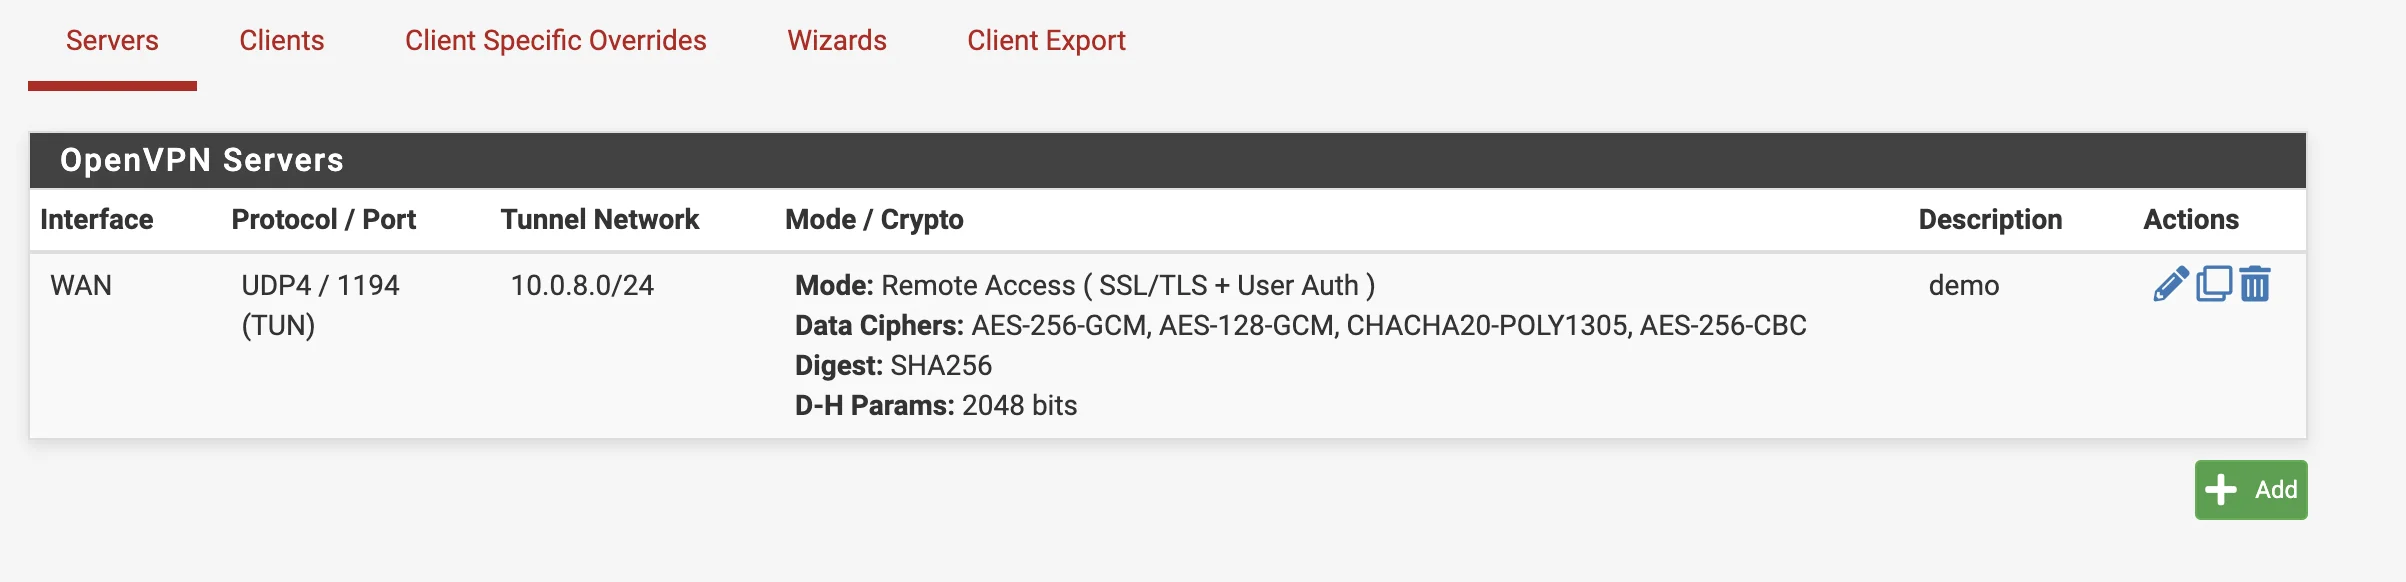Figure 7. OpenVPN Servers Window
7. Navigate to "System → User Manager → Users" and click the "Add" button. Enter the desired username and password for the new user (see Figure 8). 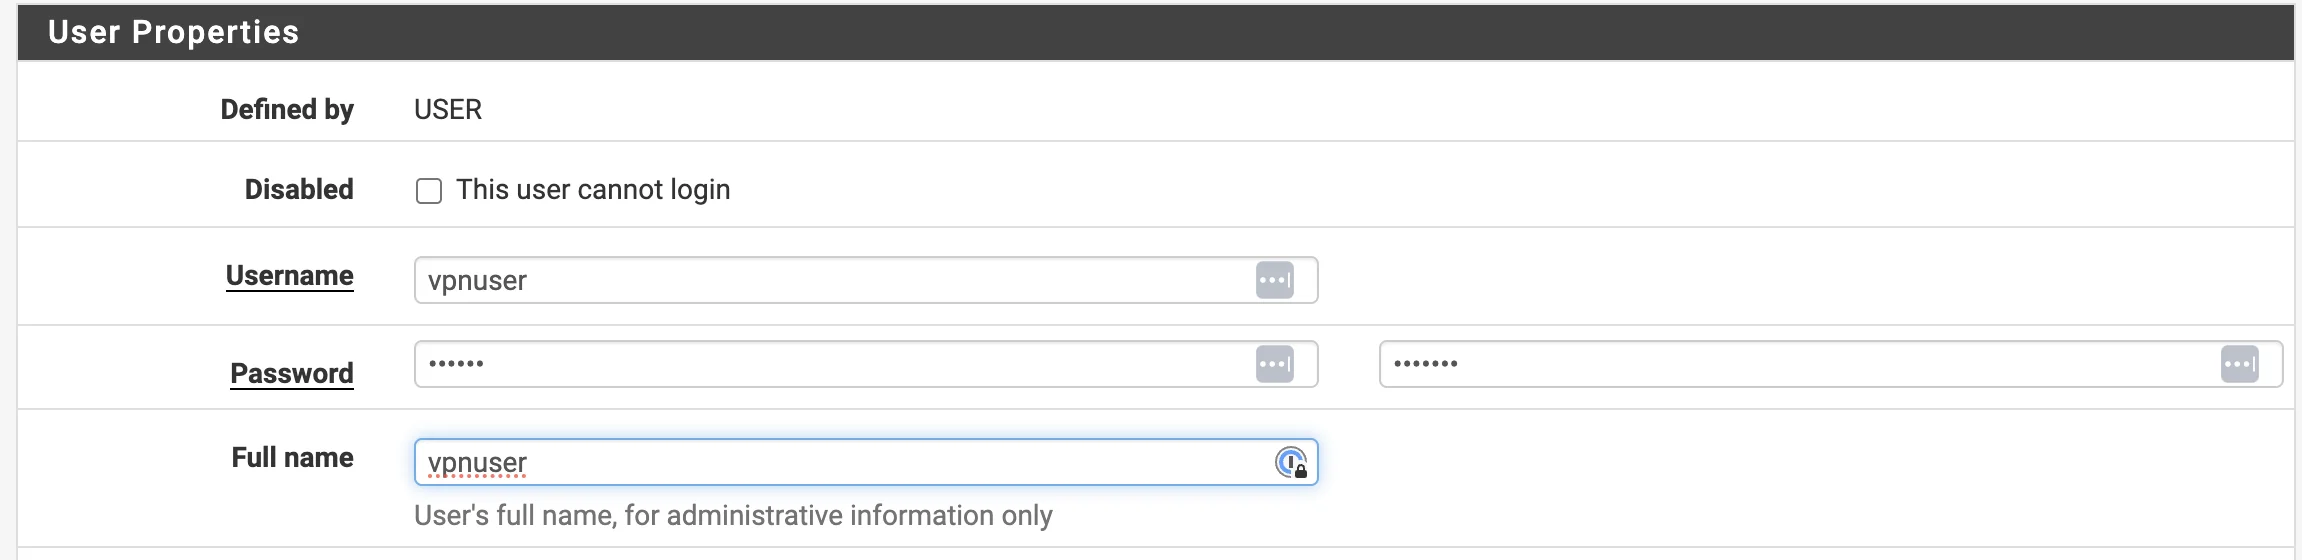Figure 8. Adding a new User
8. It is necessary to configure the certificate. To do this, fill in all fields in the Create Certificate for Users window and select the Certificate Authority that was created during the OpenVPN server configuration (see Figure 9). 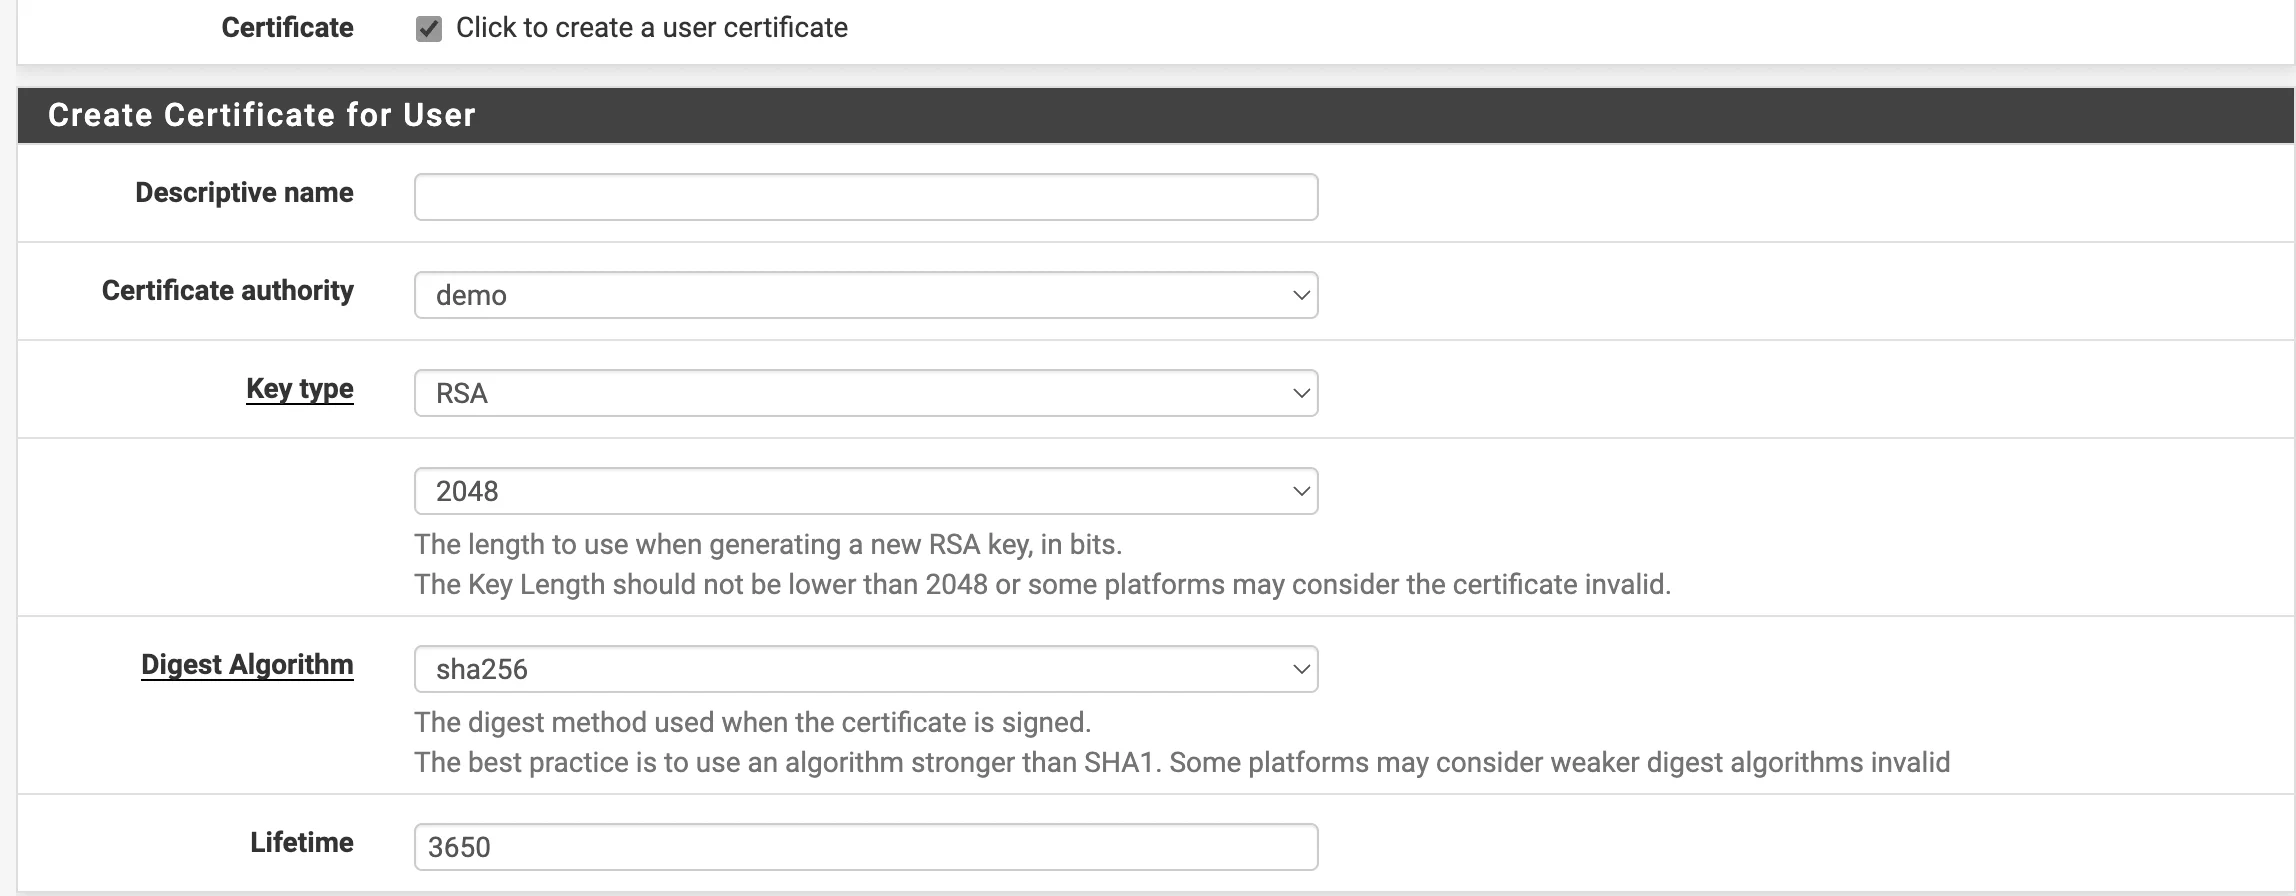Figure 9. Creating a Certificate
After completing all the fields, the user must click the Save button. To continue with the configuration, navigate to "VPN → OpenVPN" and open the "Client Export" tab. In the "Client Connection Behavior" section, select "Other" and enter the public IP address or domain name, if available (see Figure 10). 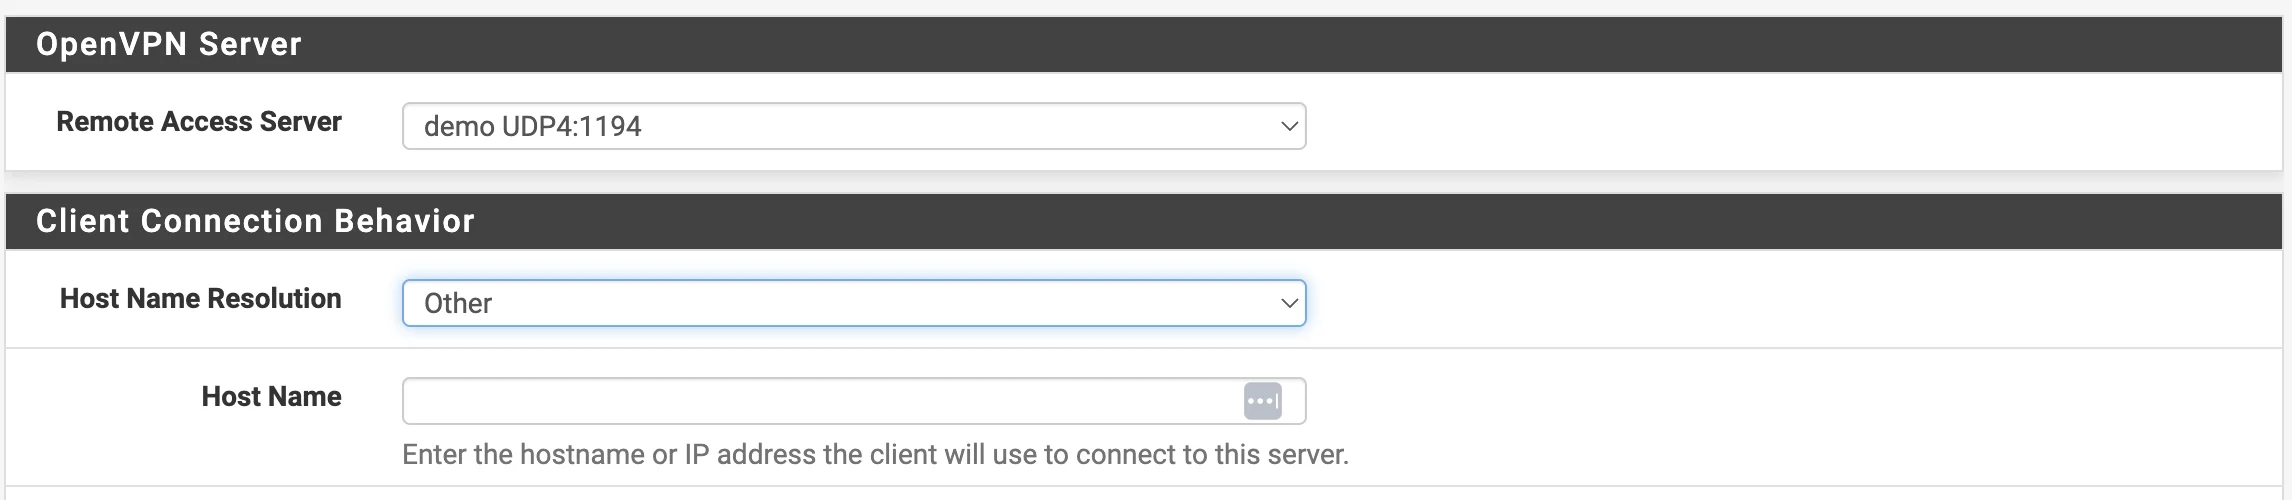Figure 10. Configuring Connection Behavior for Clients
Next, select our user and export the configuration. 9. In the OpenVPN Clients window, the user must select the newly created user and export the configuration (see Figure 11). 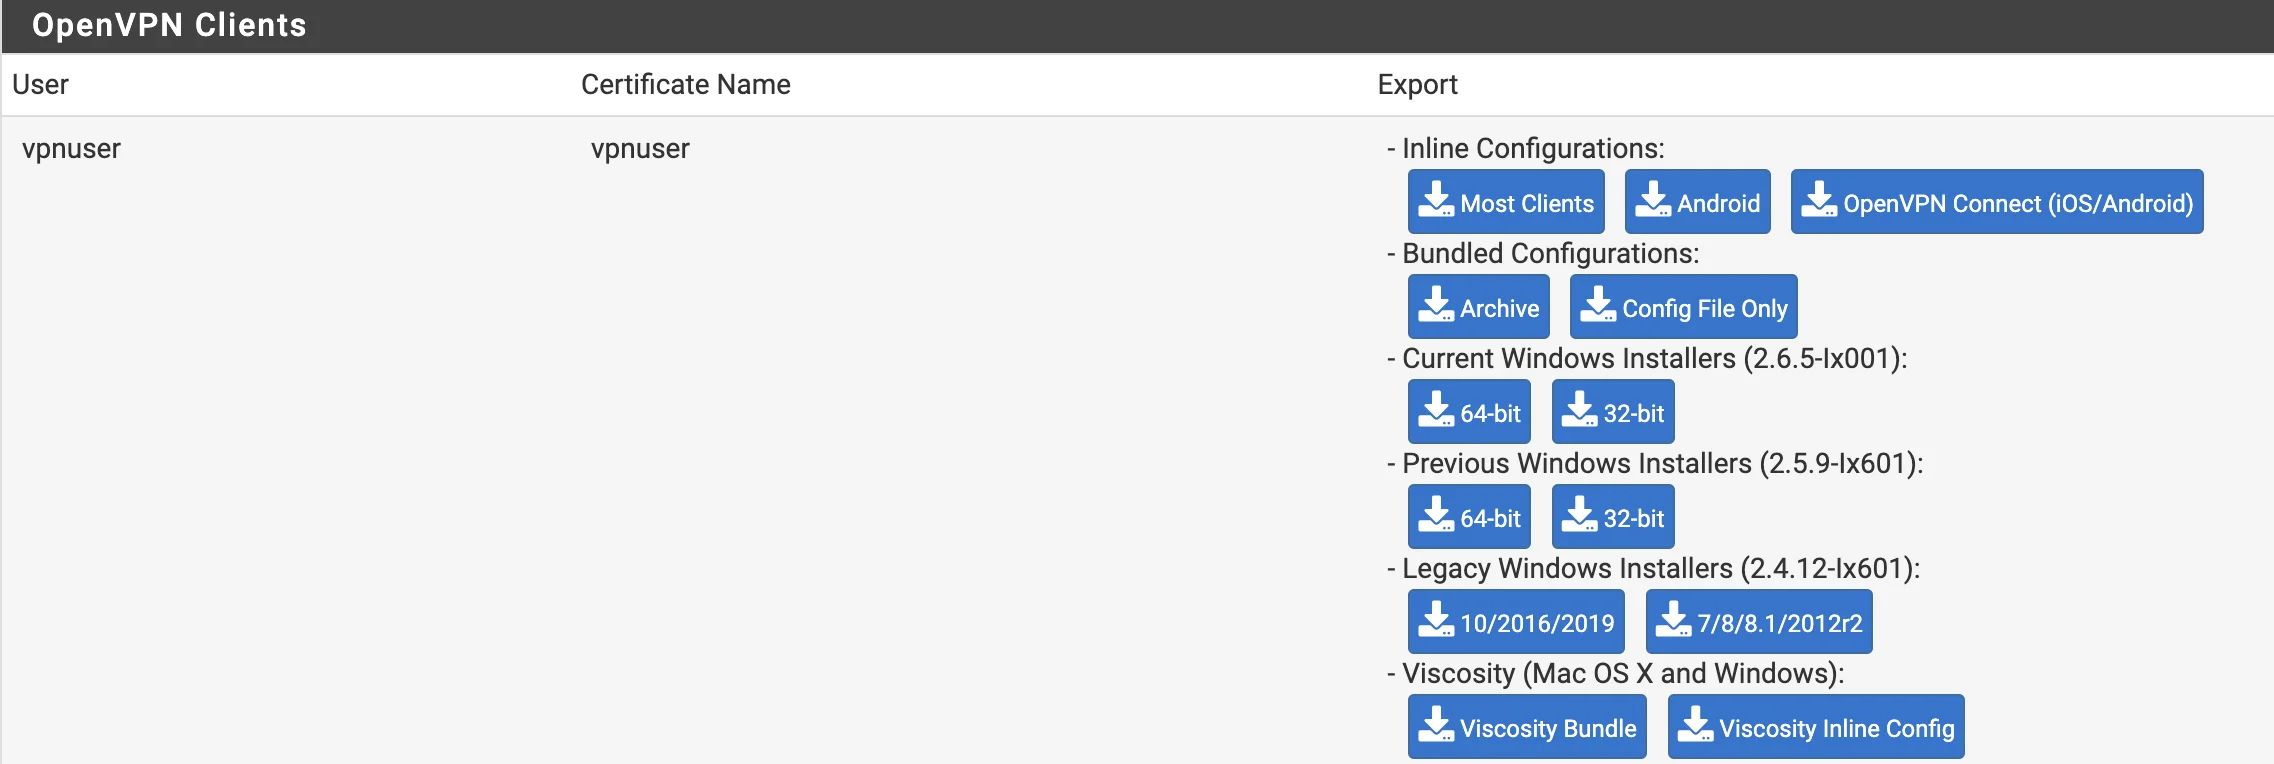Figure 11. OpenVPN clients Window
The client is configured according to the user's OS.