Figure 1. Install the openvpn-client-export
The user must wait for the installation to complete. 2. After the installation finishes the user can proceed to the settings. Click on VPN --> OpenVPN and select Wizards. In our example, we will use local users (see Figure 2). 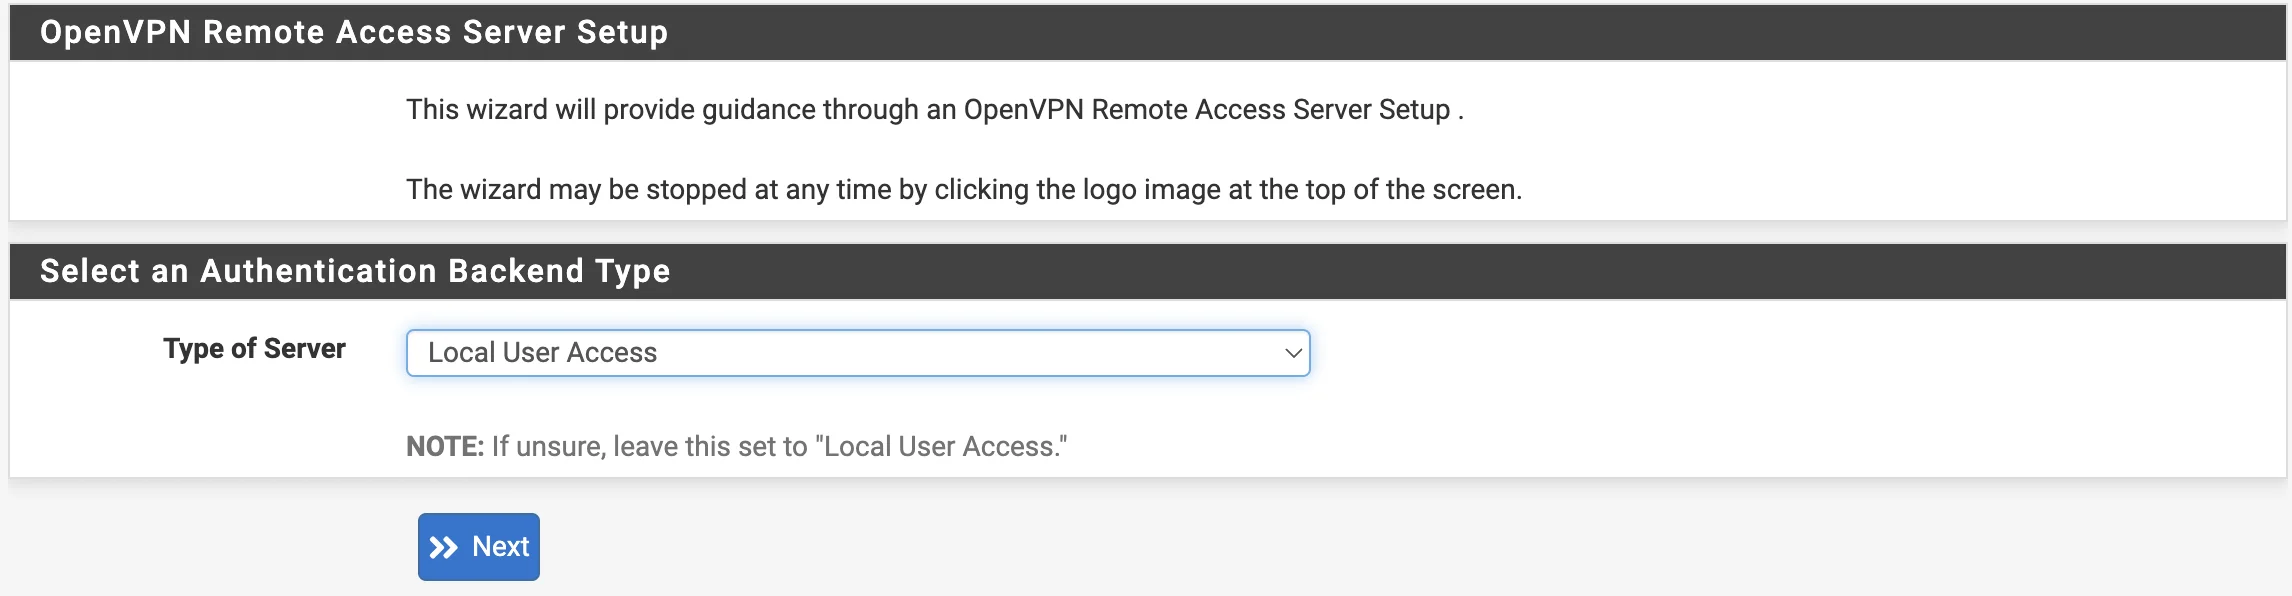Figure 2. Configuring openVPN-client-export
The user should click the “Next” button and create a Certification Authority (CA) on the next screen. The certificate parameters are shown in Table 1. | Name | Description | | ------------------- | --------------------------------------------------------------------- | | Descriptive name | Descriptive name | | Common Name | Internal name, if empty, Descriptive name will be used | | Country Code | Two-letter country code | | State or Province | Full name of the state/province | | City | City Name | | Organization | Name of organization | | Organizational Unit | Division/Department Name |Table 1. CA parameters
3. The user can configure the OpenVPN server once the certificates are created. The first step is to fill in the Description (see Figure 3). Figure 3. OpenVPN Server Information
The next step is to select the Protocol, Interface, and Local Port for the new server (see Figure 4). 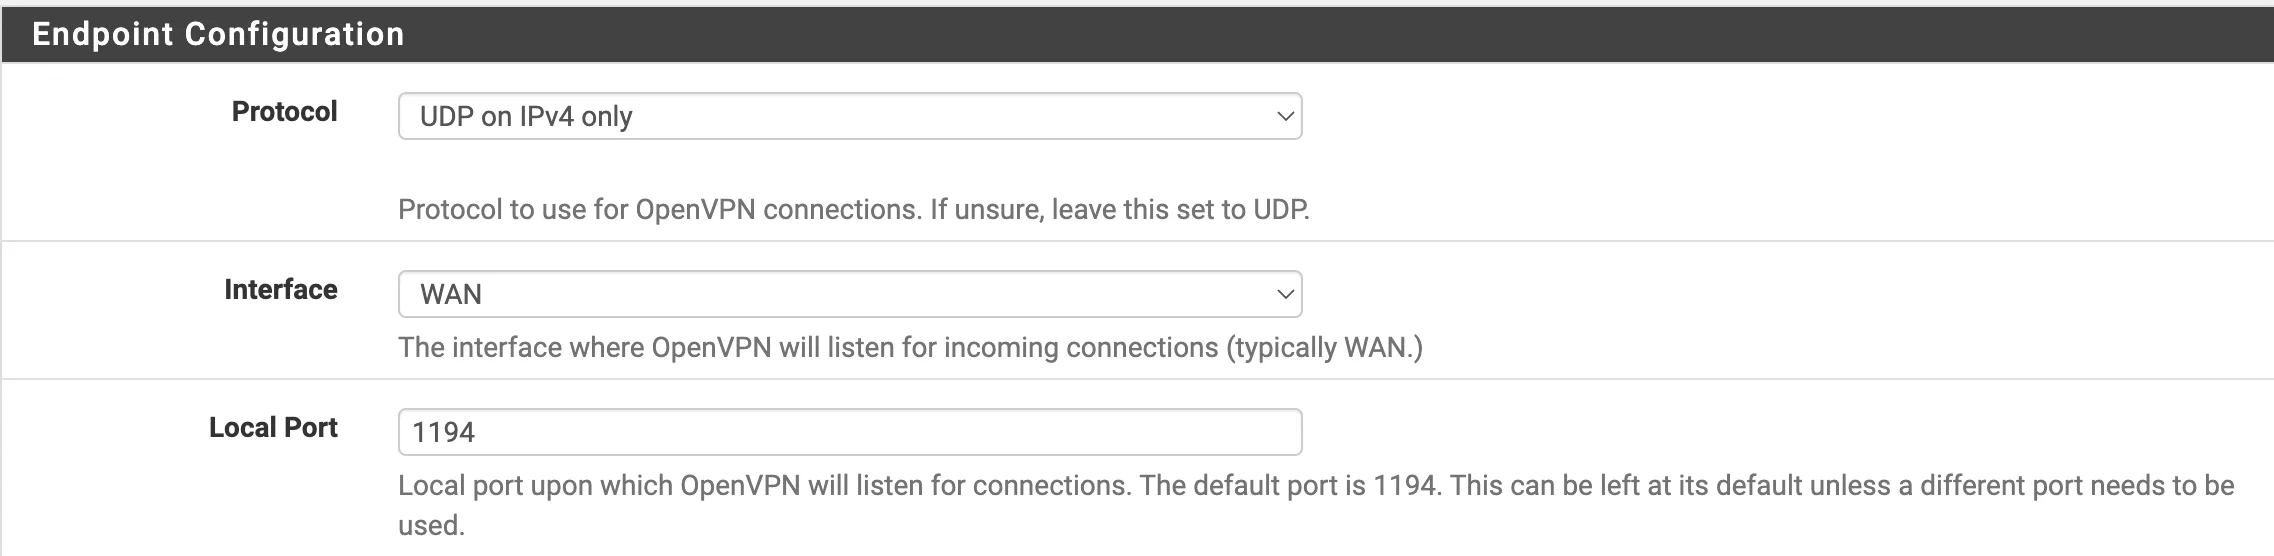Figure 4. Protocol, Interface, and Port Selection
The Cryptographic Settings are set according to the specified requirements. 4. The user needs to configure the tunnel (see Figure 5). 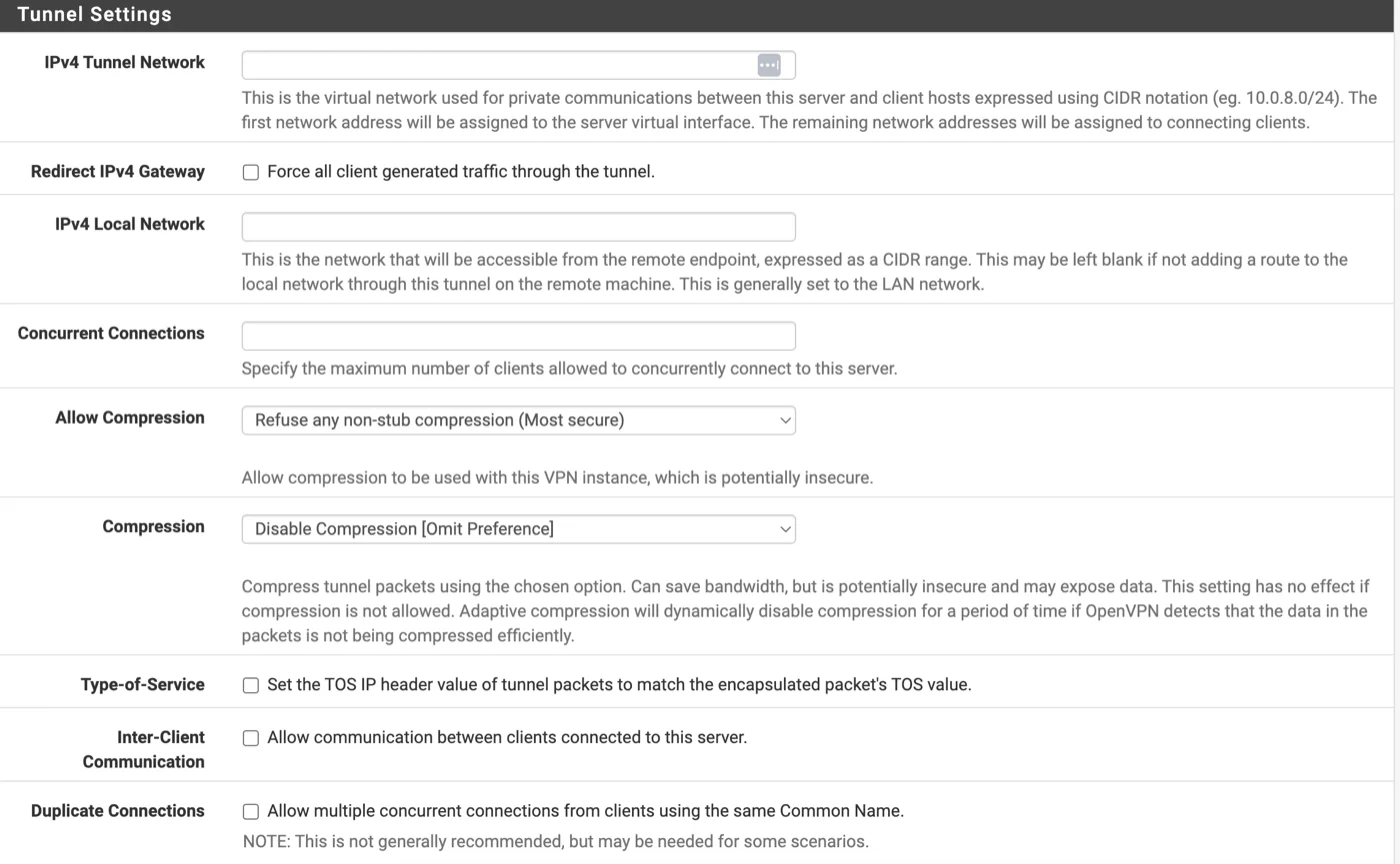Figure 5. Tunnel Settings
The following parameters need to be filled in: - IPv4 Tunnel Network - the network allocated to clients. It must not overlap with the user's networks. - IPv4 Local Network - The network or networks that will be accessed from the VPN network. Other settings are set according to the user's needs. The user needs to click Next after filling in all the required parameters. 5. The next step is for the user to check the Firewall Rule and the OpenVPN Rule (see Figure 6). 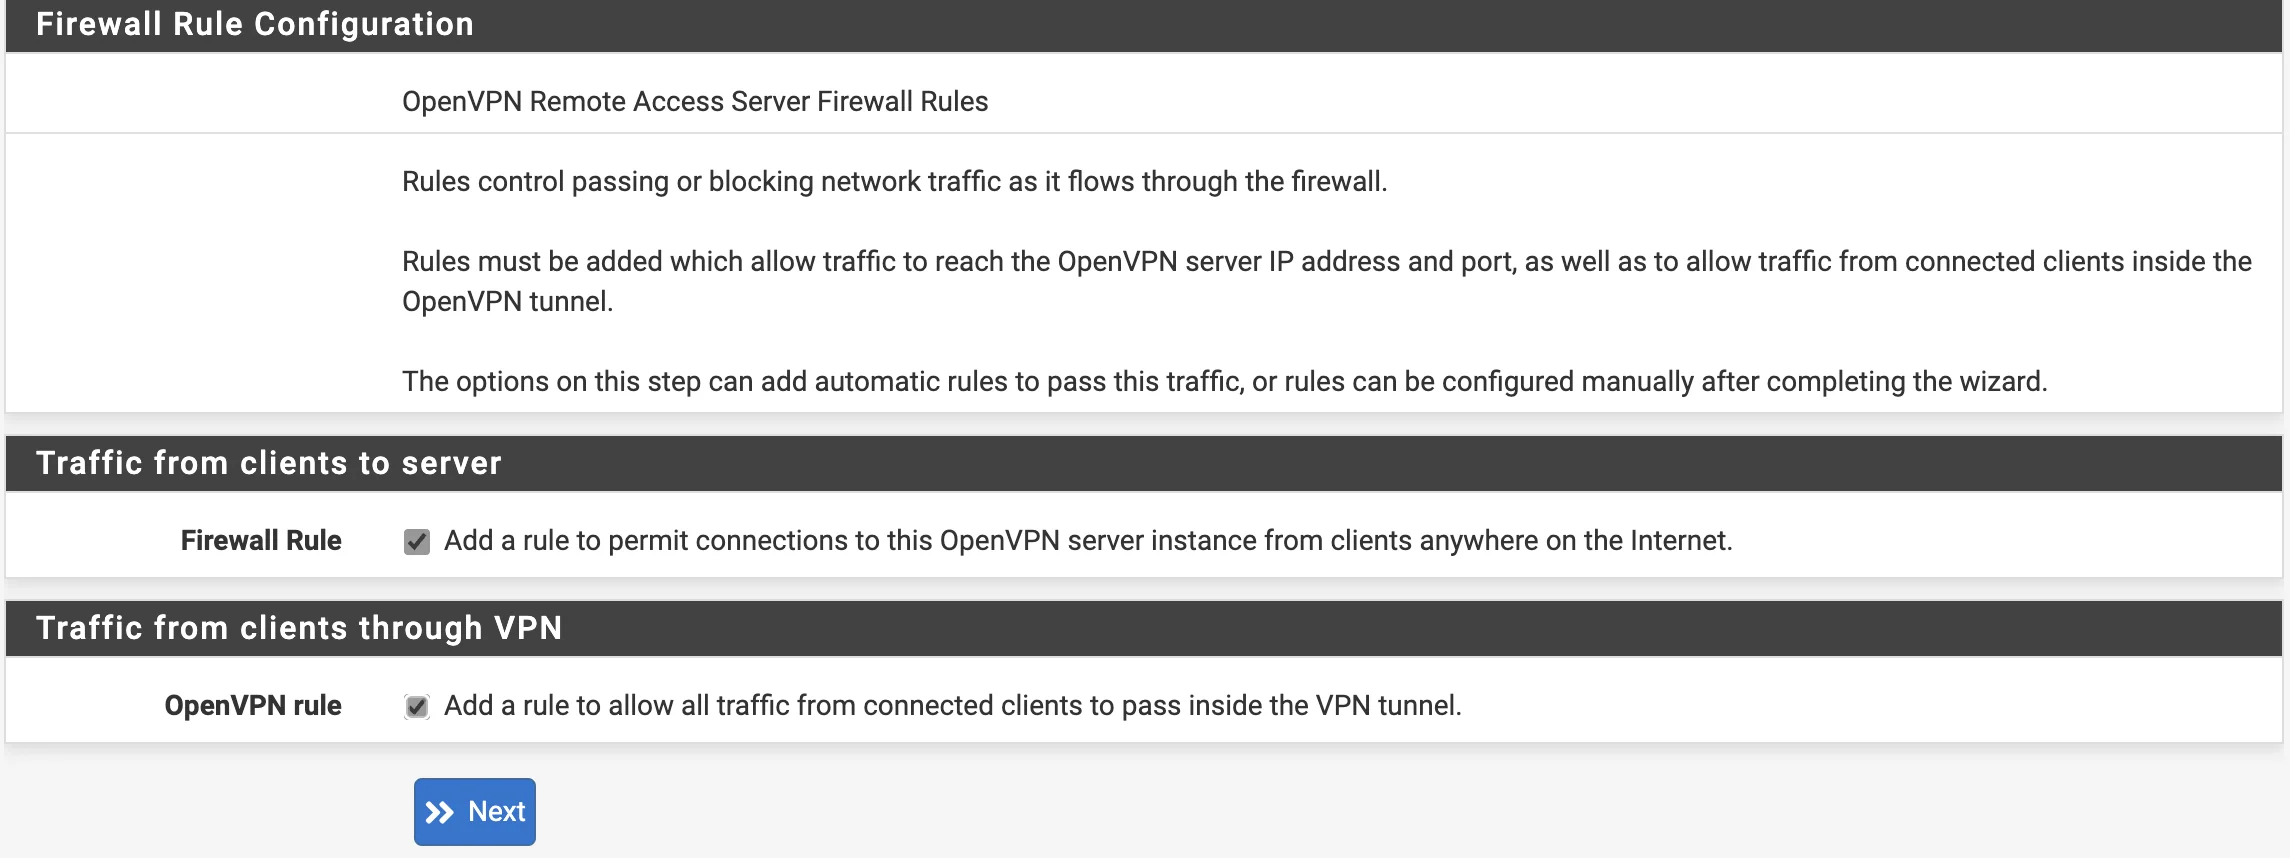Figure 6. Firewall rule configuration
After the user sets the required parameters, it is necessary to click “Next” and then “Finish”. After these actions, the new server should appear in the servers list (see Figure 7). 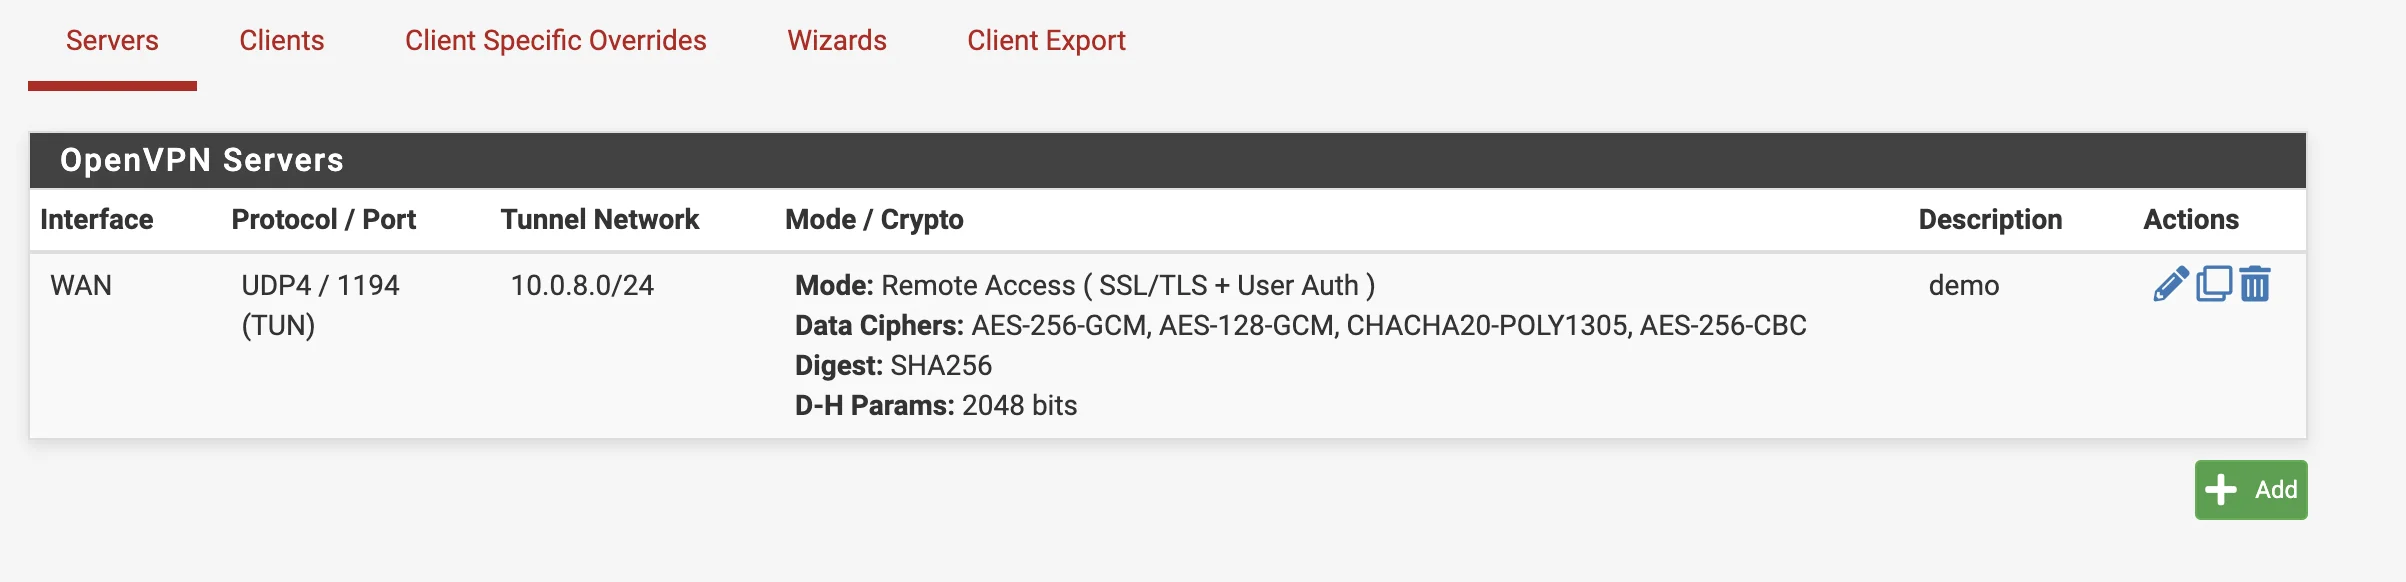Figure 7. Servers List
6. The next step is to create a new user. Select "System -> User Manager -> Users" and click the “Add” button to do this. It is necessary to specify a username and a password for it (see Figure 8). 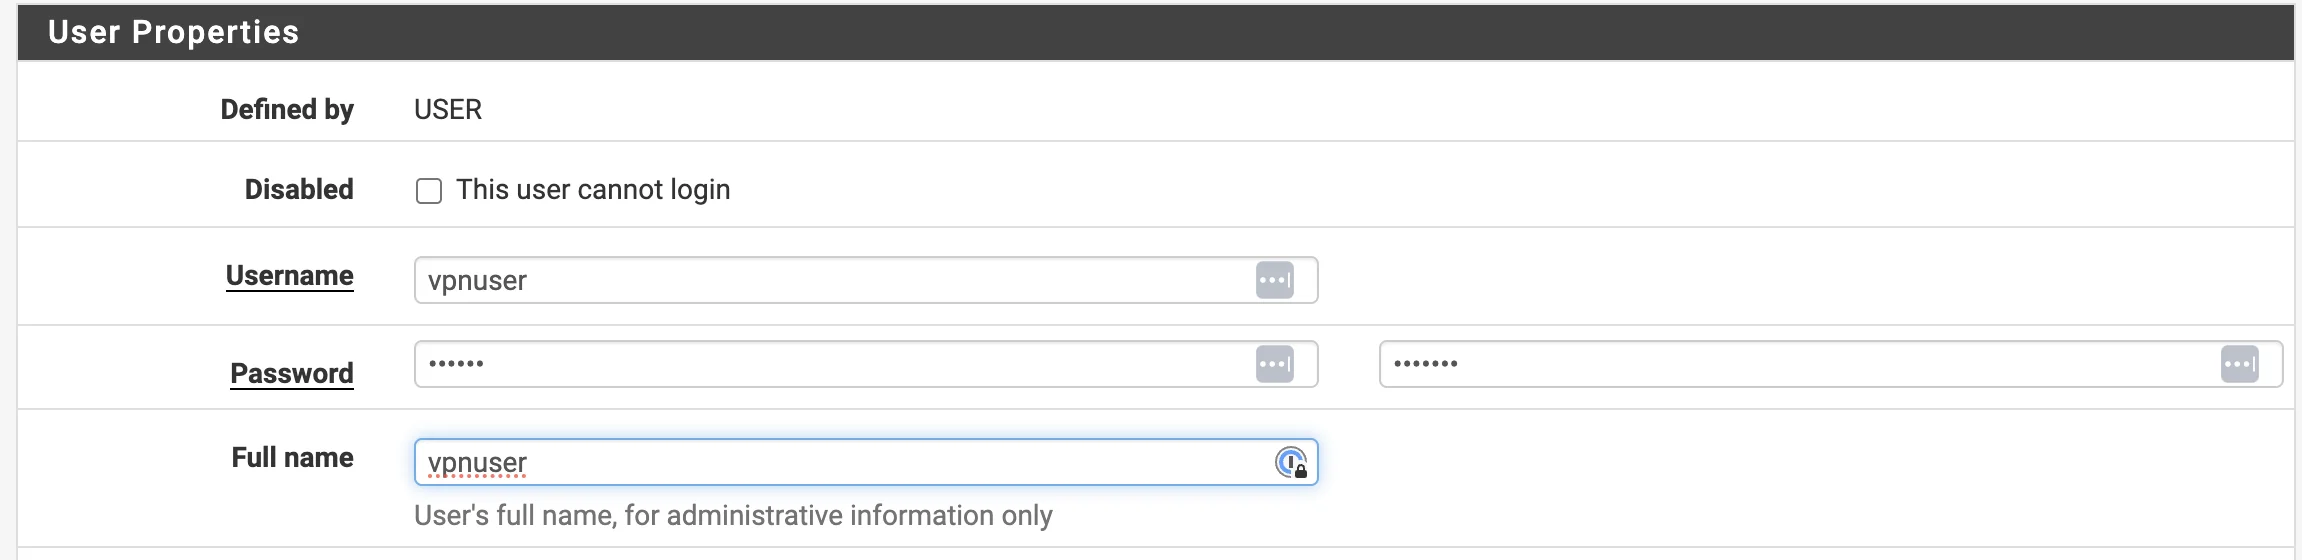Figure 8. Adding a new user
7. It is necessary to configure the certificate for the user. To do this, in the “Create Certificate for Users” window, fill in all fields and select the certificate that was created during the OpenVPN server configuration (see Figure 9). 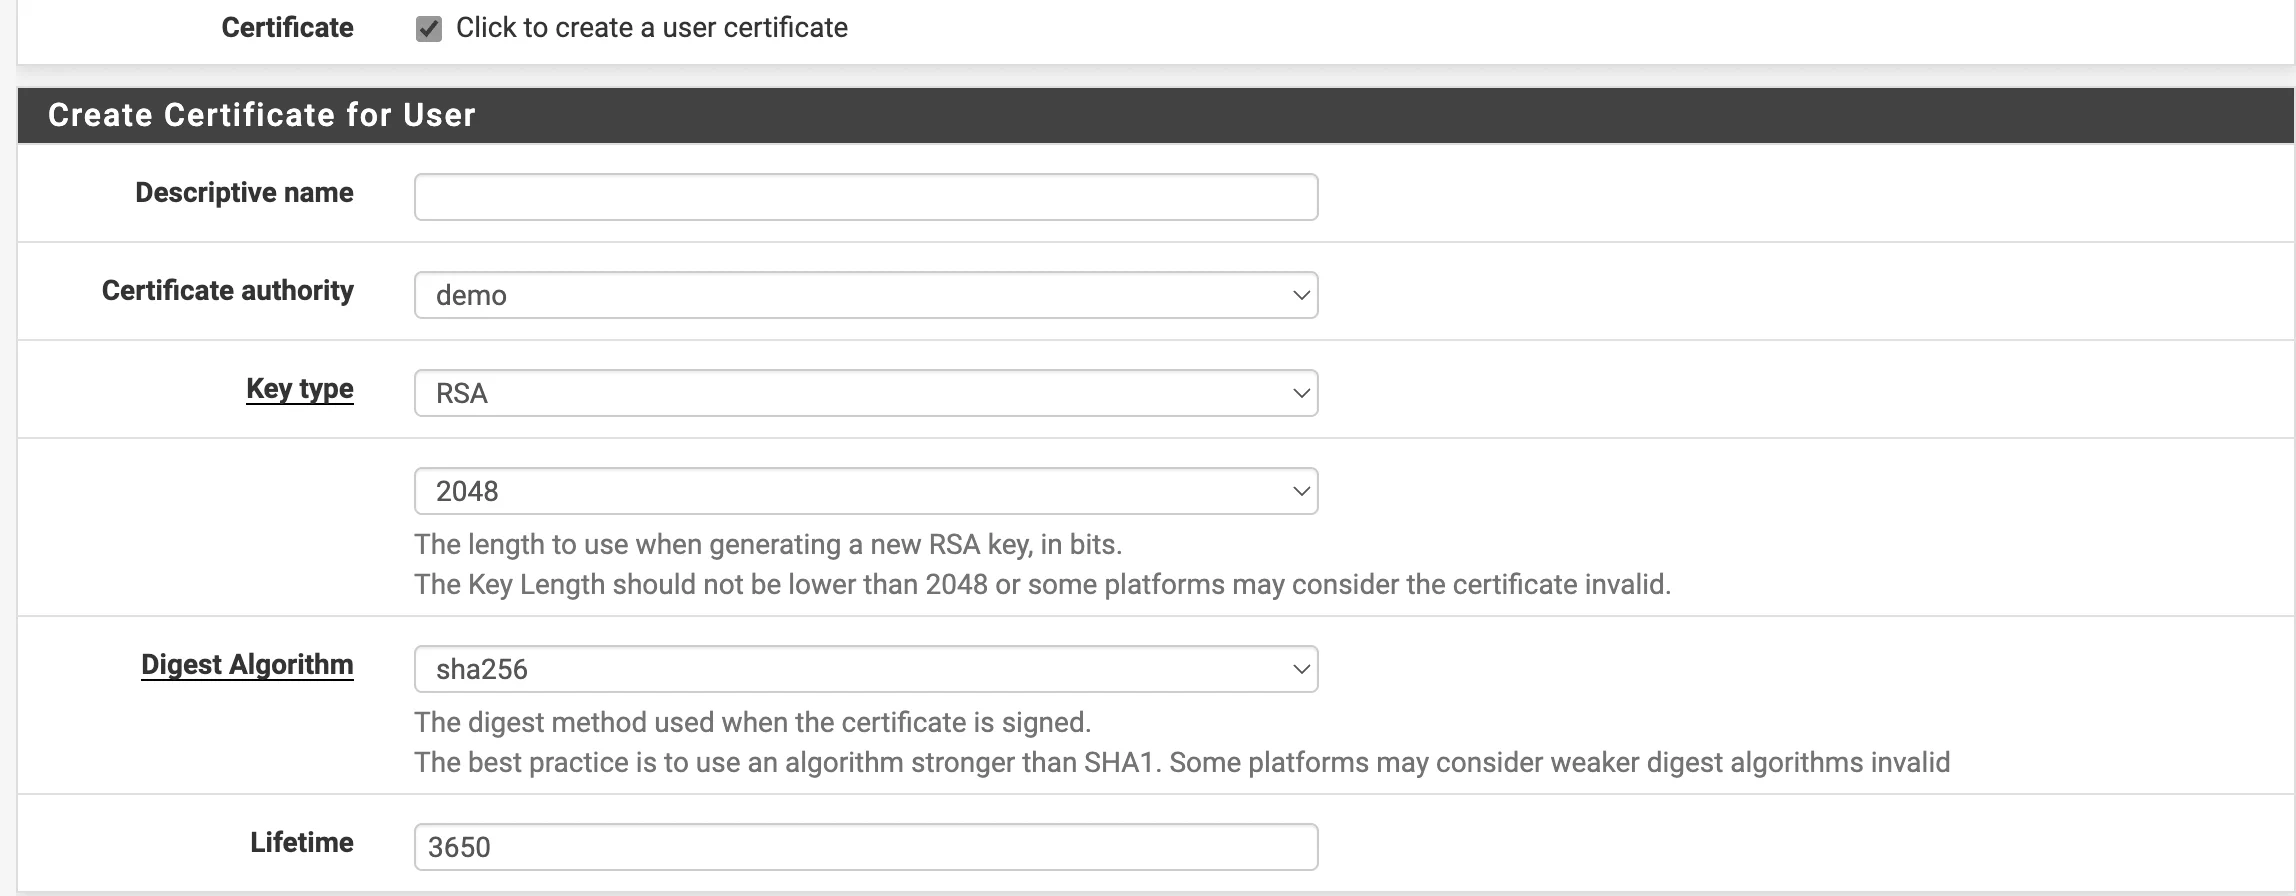Figure 9. Certificate Setting
After filling in all the fields the user is required to click the “Save” button. For further configuration, the user needs to go to "VPN --> OpenVPN" and open the “Client Export” tab. In the “Client Connection Behavior” section select “Other” and specify the Public IP or domain name if it is available (see Figure 10). 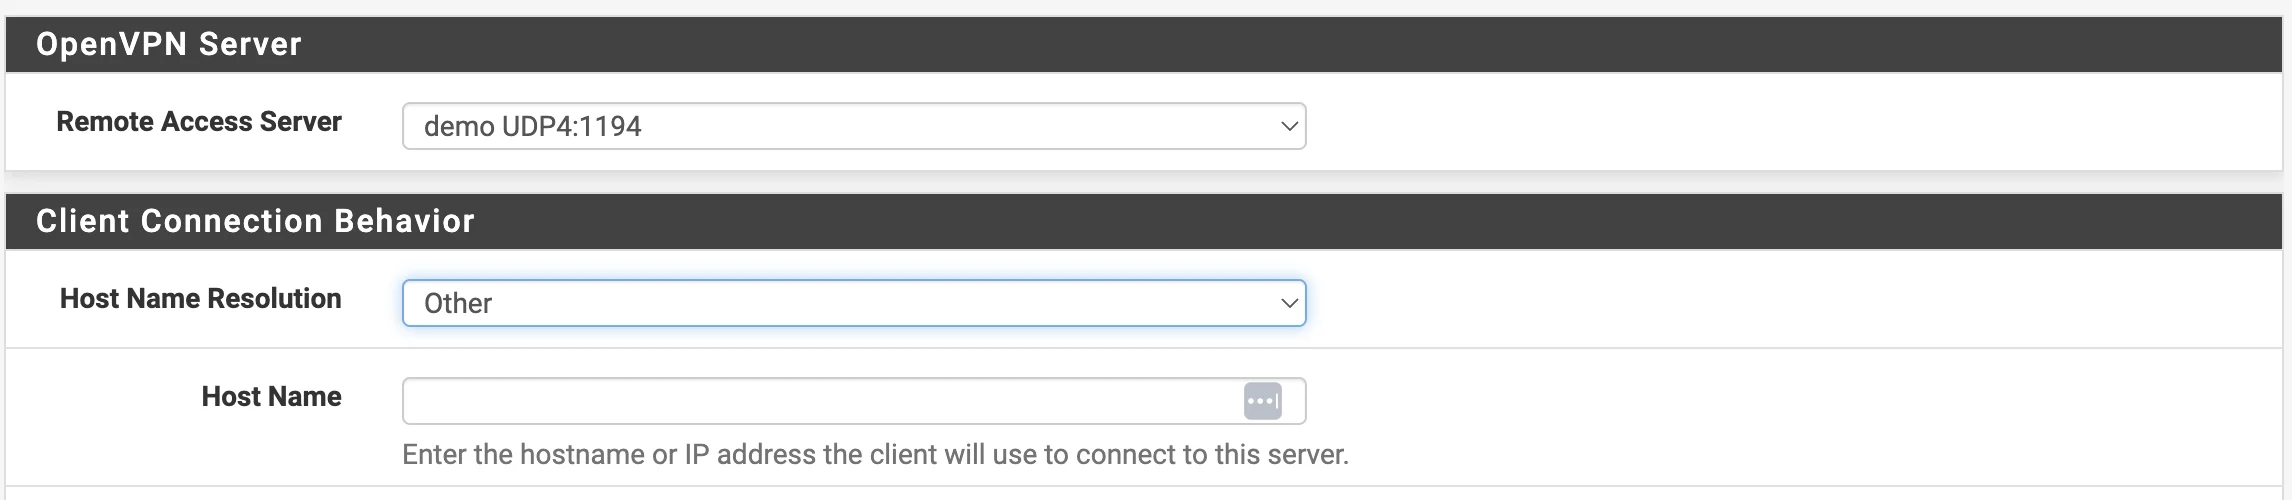Figure 10. Configuring Client Connection Behavior
The OpenVPN Clients window requires you to select the newly created user and then export the configuration (see Figure 11). 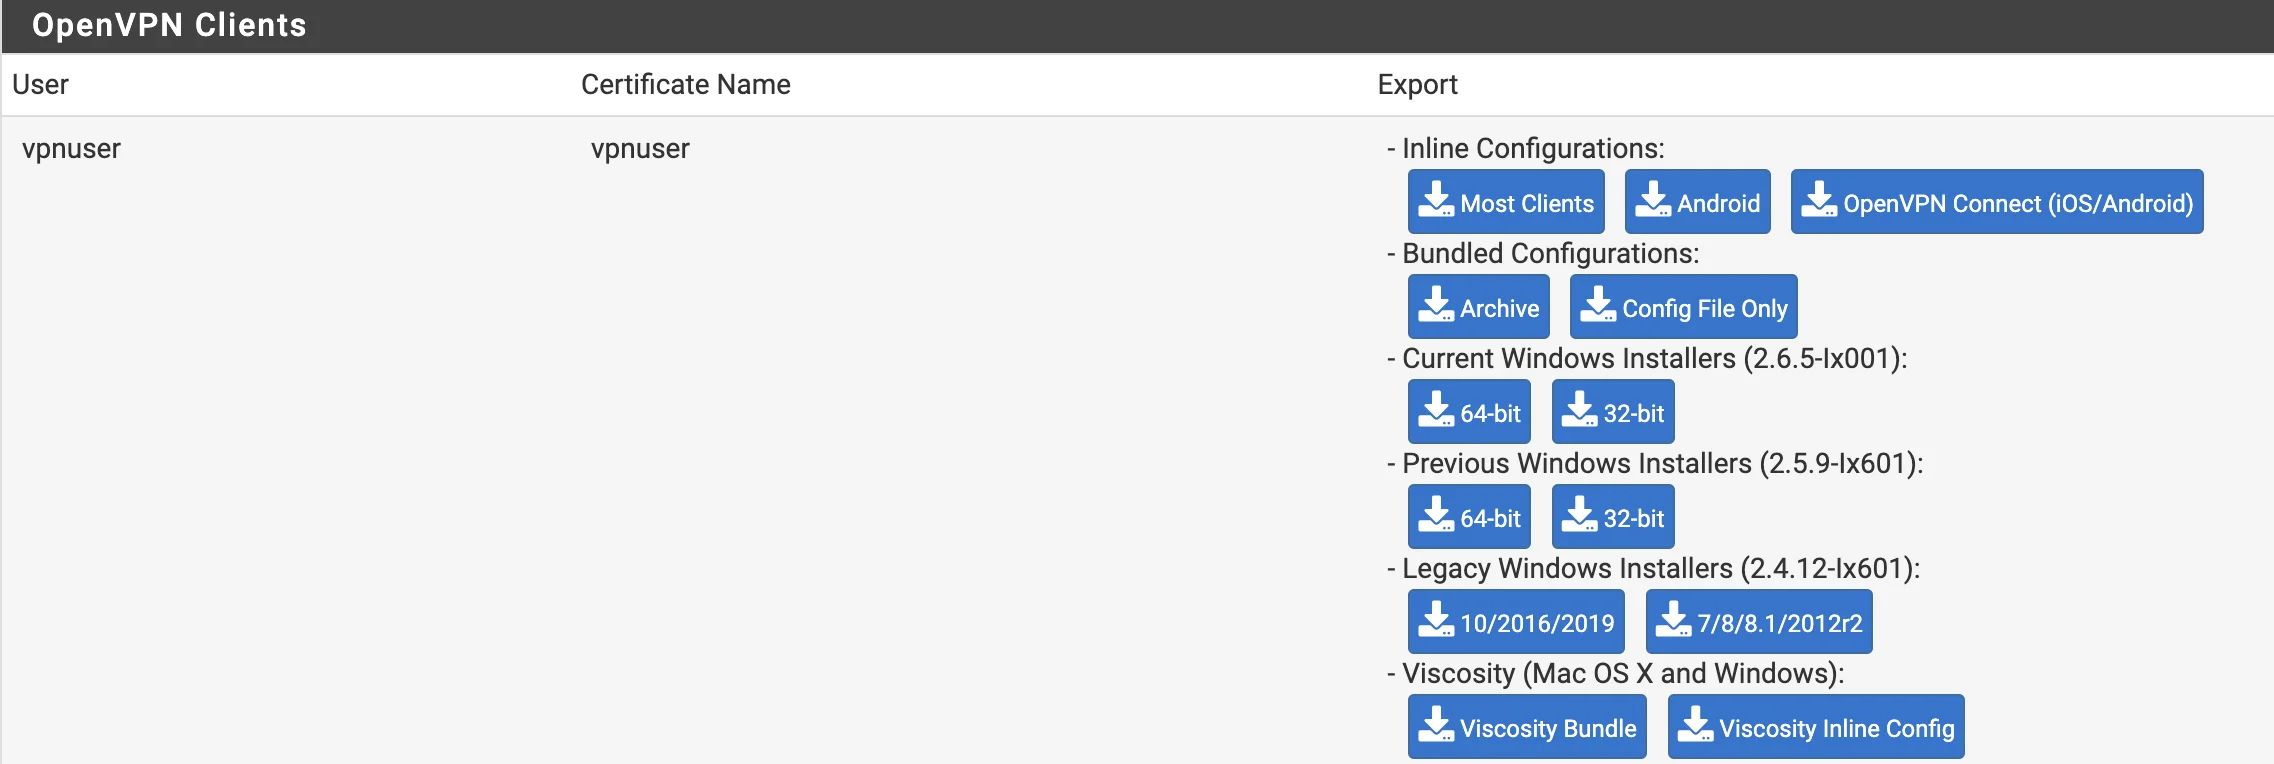Figure 11. OpenVPN Clients
The client is configured according to the required OS. For this guide, the test will be performed on a virtual machine without a public IP address. Once configured, it should be accessible with a VPN connection. ```shell ssh ubuntu@10.128.0.26 Welcome to Ubuntu 22.04.3 LTS (GNU/Linux 5.15.0-79-generic x86_64) * Documentation: https://help.ubuntu.com * Management: https://landscape.canonical.com * Support: https://ubuntu.com/advantage System information as of Wed Aug 30 08:59:32 AM UTC 2023 System load: 0.0 Processes: 131 Usage of /: 23.5% of 17.63GB Users logged in: 0 Memory usage: 16% IPv4 address for eth0: 10.128.0.26 Swap usage: 0% * Strictly confined Kubernetes makes edge and IoT secure. Learn how MicroK8s just raised the bar for easy, resilient and secure K8s cluster deployment. https://ubuntu.com/engage/secure-kubernetes-at-the-edge Expanded Security Maintenance for Applications is not enabled. 0 updates can be applied immediately. Enable ESM Apps to receive additional future security updates. See https://ubuntu.com/esm or run: sudo pro status *** System restart required *** Last login: Wed Aug 30 08:59:33 2023 from 10.0.8.2 ubuntu@test-vm:~$ ``` The user also needs to make sure that pfSense has started tracking packets. To do this, run the following commands: Check External IP: ```shell ubuntu@test-vm:~$ curl -4 icanhazip.com 51.250.89.142 ubuntu@test-vm:~$ ``` Checking that pfSense has become the gateway for the virtual machine: ```shell ubuntu@test-vm:~$ traceroute google.com traceroute to google.com (64.233.165.102), 30 hops max, 60 byte packets 1 _gateway (10.128.0.1) 0.821 ms 0.801 ms 0.792 ms 2 * * * 3 pfsense.ru-central1.internal (10.128.0.11) 1.161 ms 1.151 ms 1.142 ms ``` As we can see after gateway 10.128.0.1 there is a LAN interface of pfSense. This completes the configuration.