pfSense as NAT instance
After creating a virtual machine in VK Cloud, you will be able to use SSH to connect and get the password to access the pfSense firewall web interface.
Connect via ssh
ssh freebsd@public_vm_public_ipPress 8 to access the console
The file with the new password is available at
/conf/root_password With this password you can log in to the web interface at https://публичный-ip-vm.
Username: admin
Password: from file
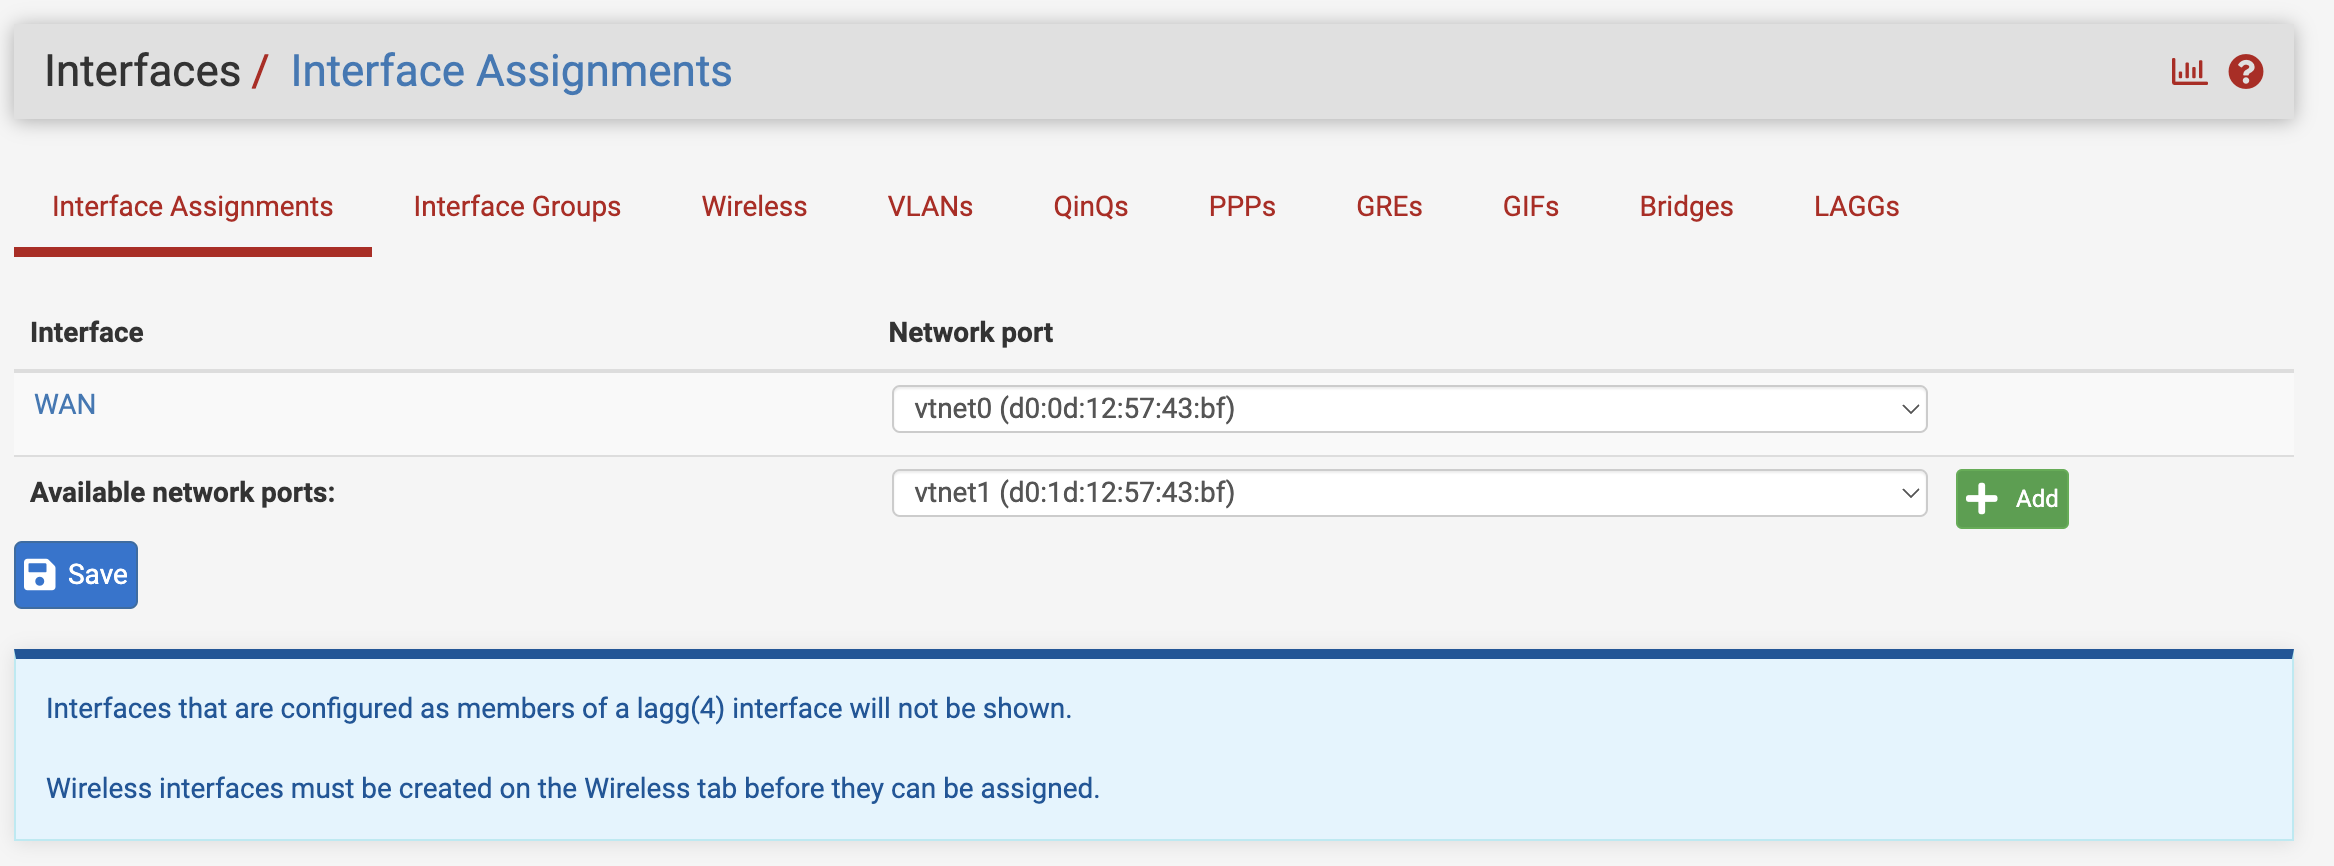
After successful authorization you can proceed to basic configuration, for this go to Interfaces –> Assignments and click Add
After adding the static IP address, check the “Enable” checkbox.
For IPv4 Configuration Type we select Static IPv4.
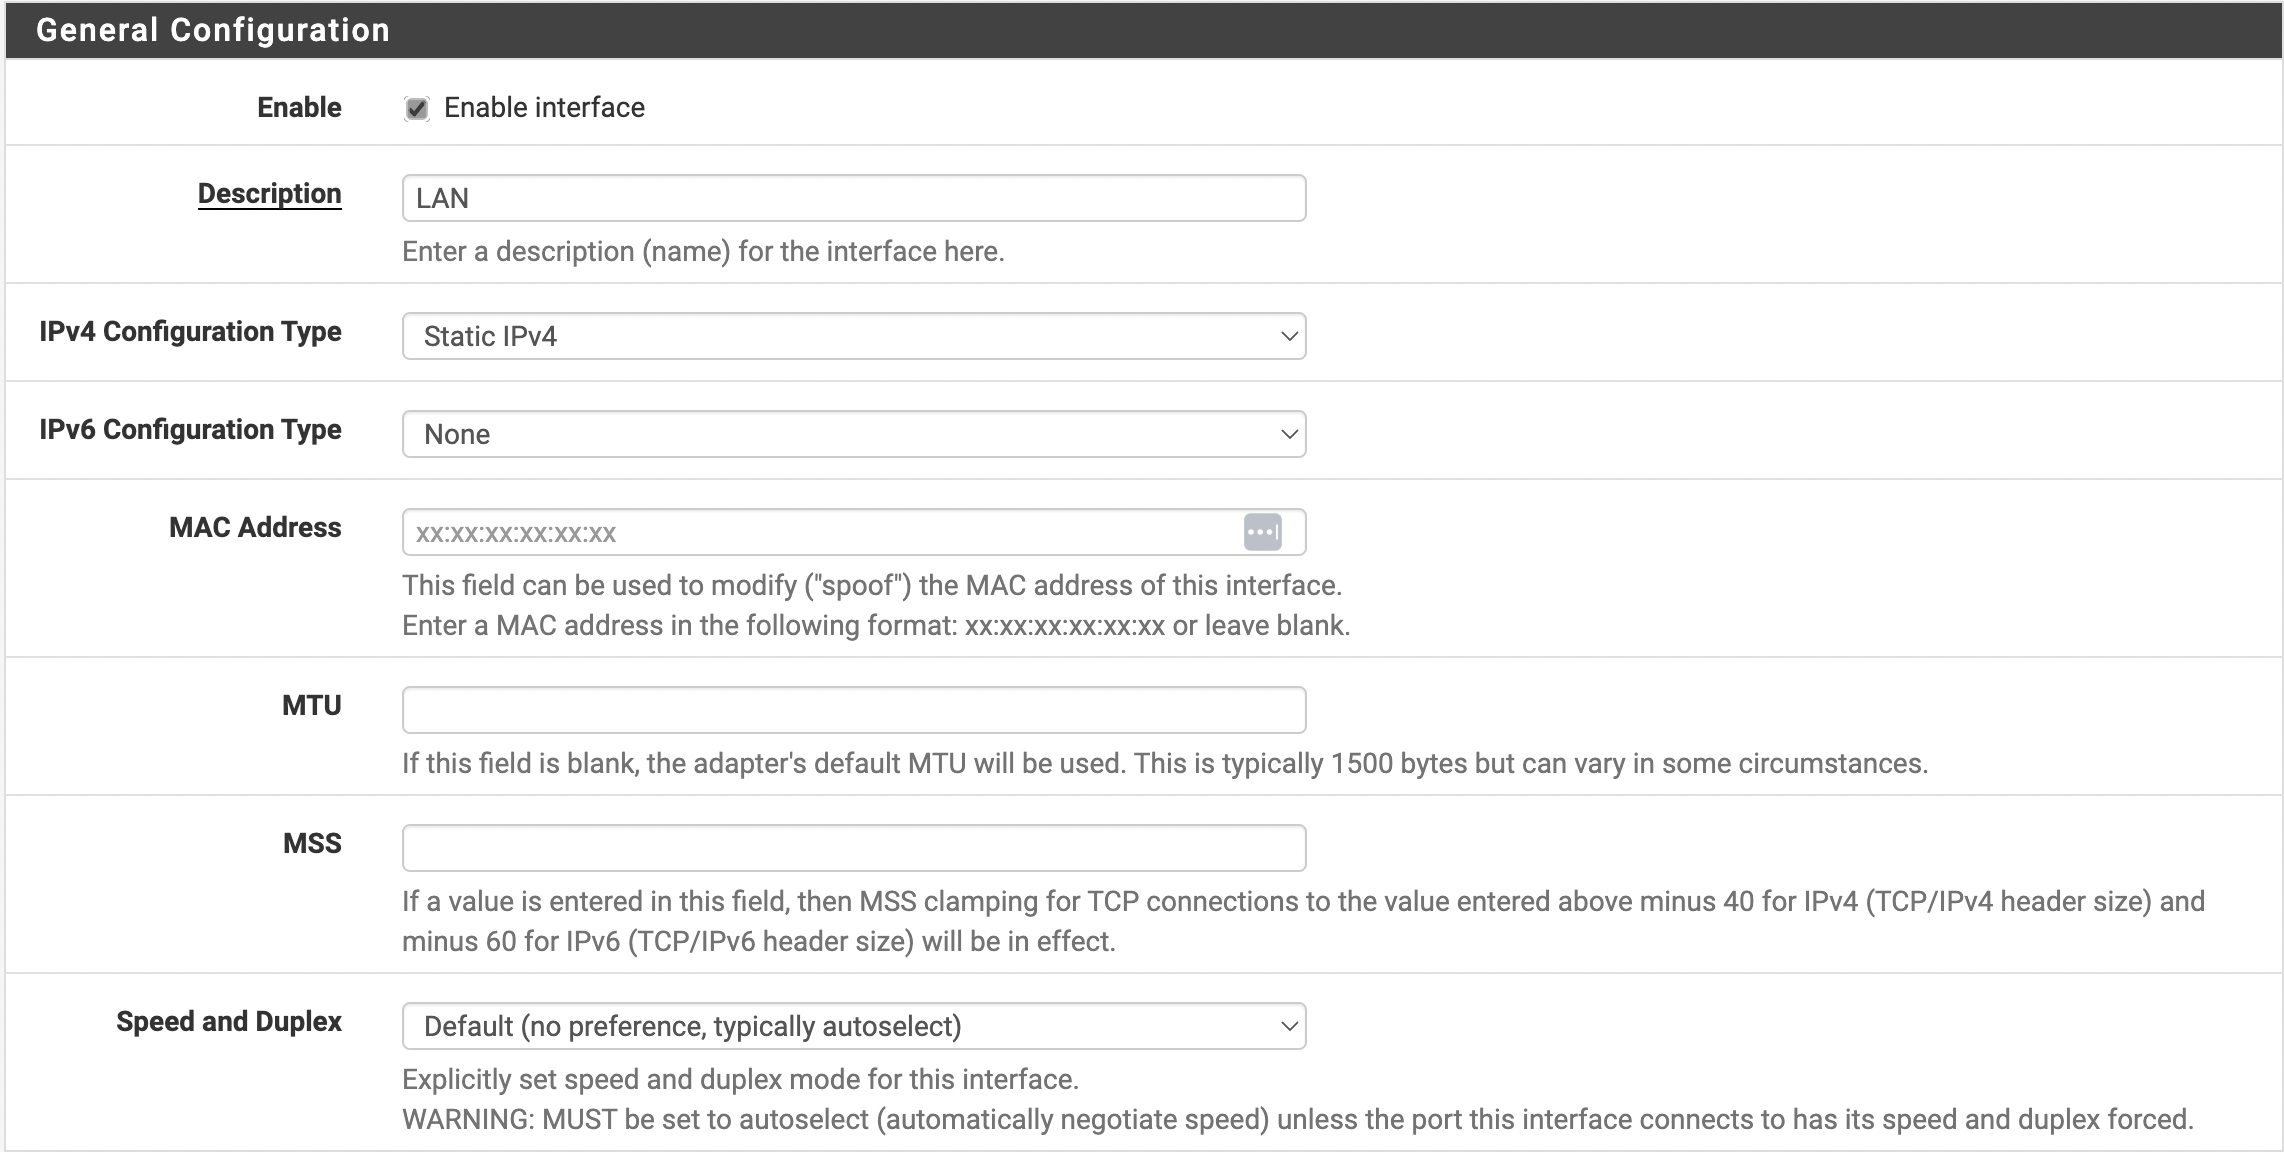
Write the IP address and select and choose the subnet mask.

Click save and then Apply changes
After that, configure static routing for the virtual machines on your private network