Integration of pfSense with SecurityOnion
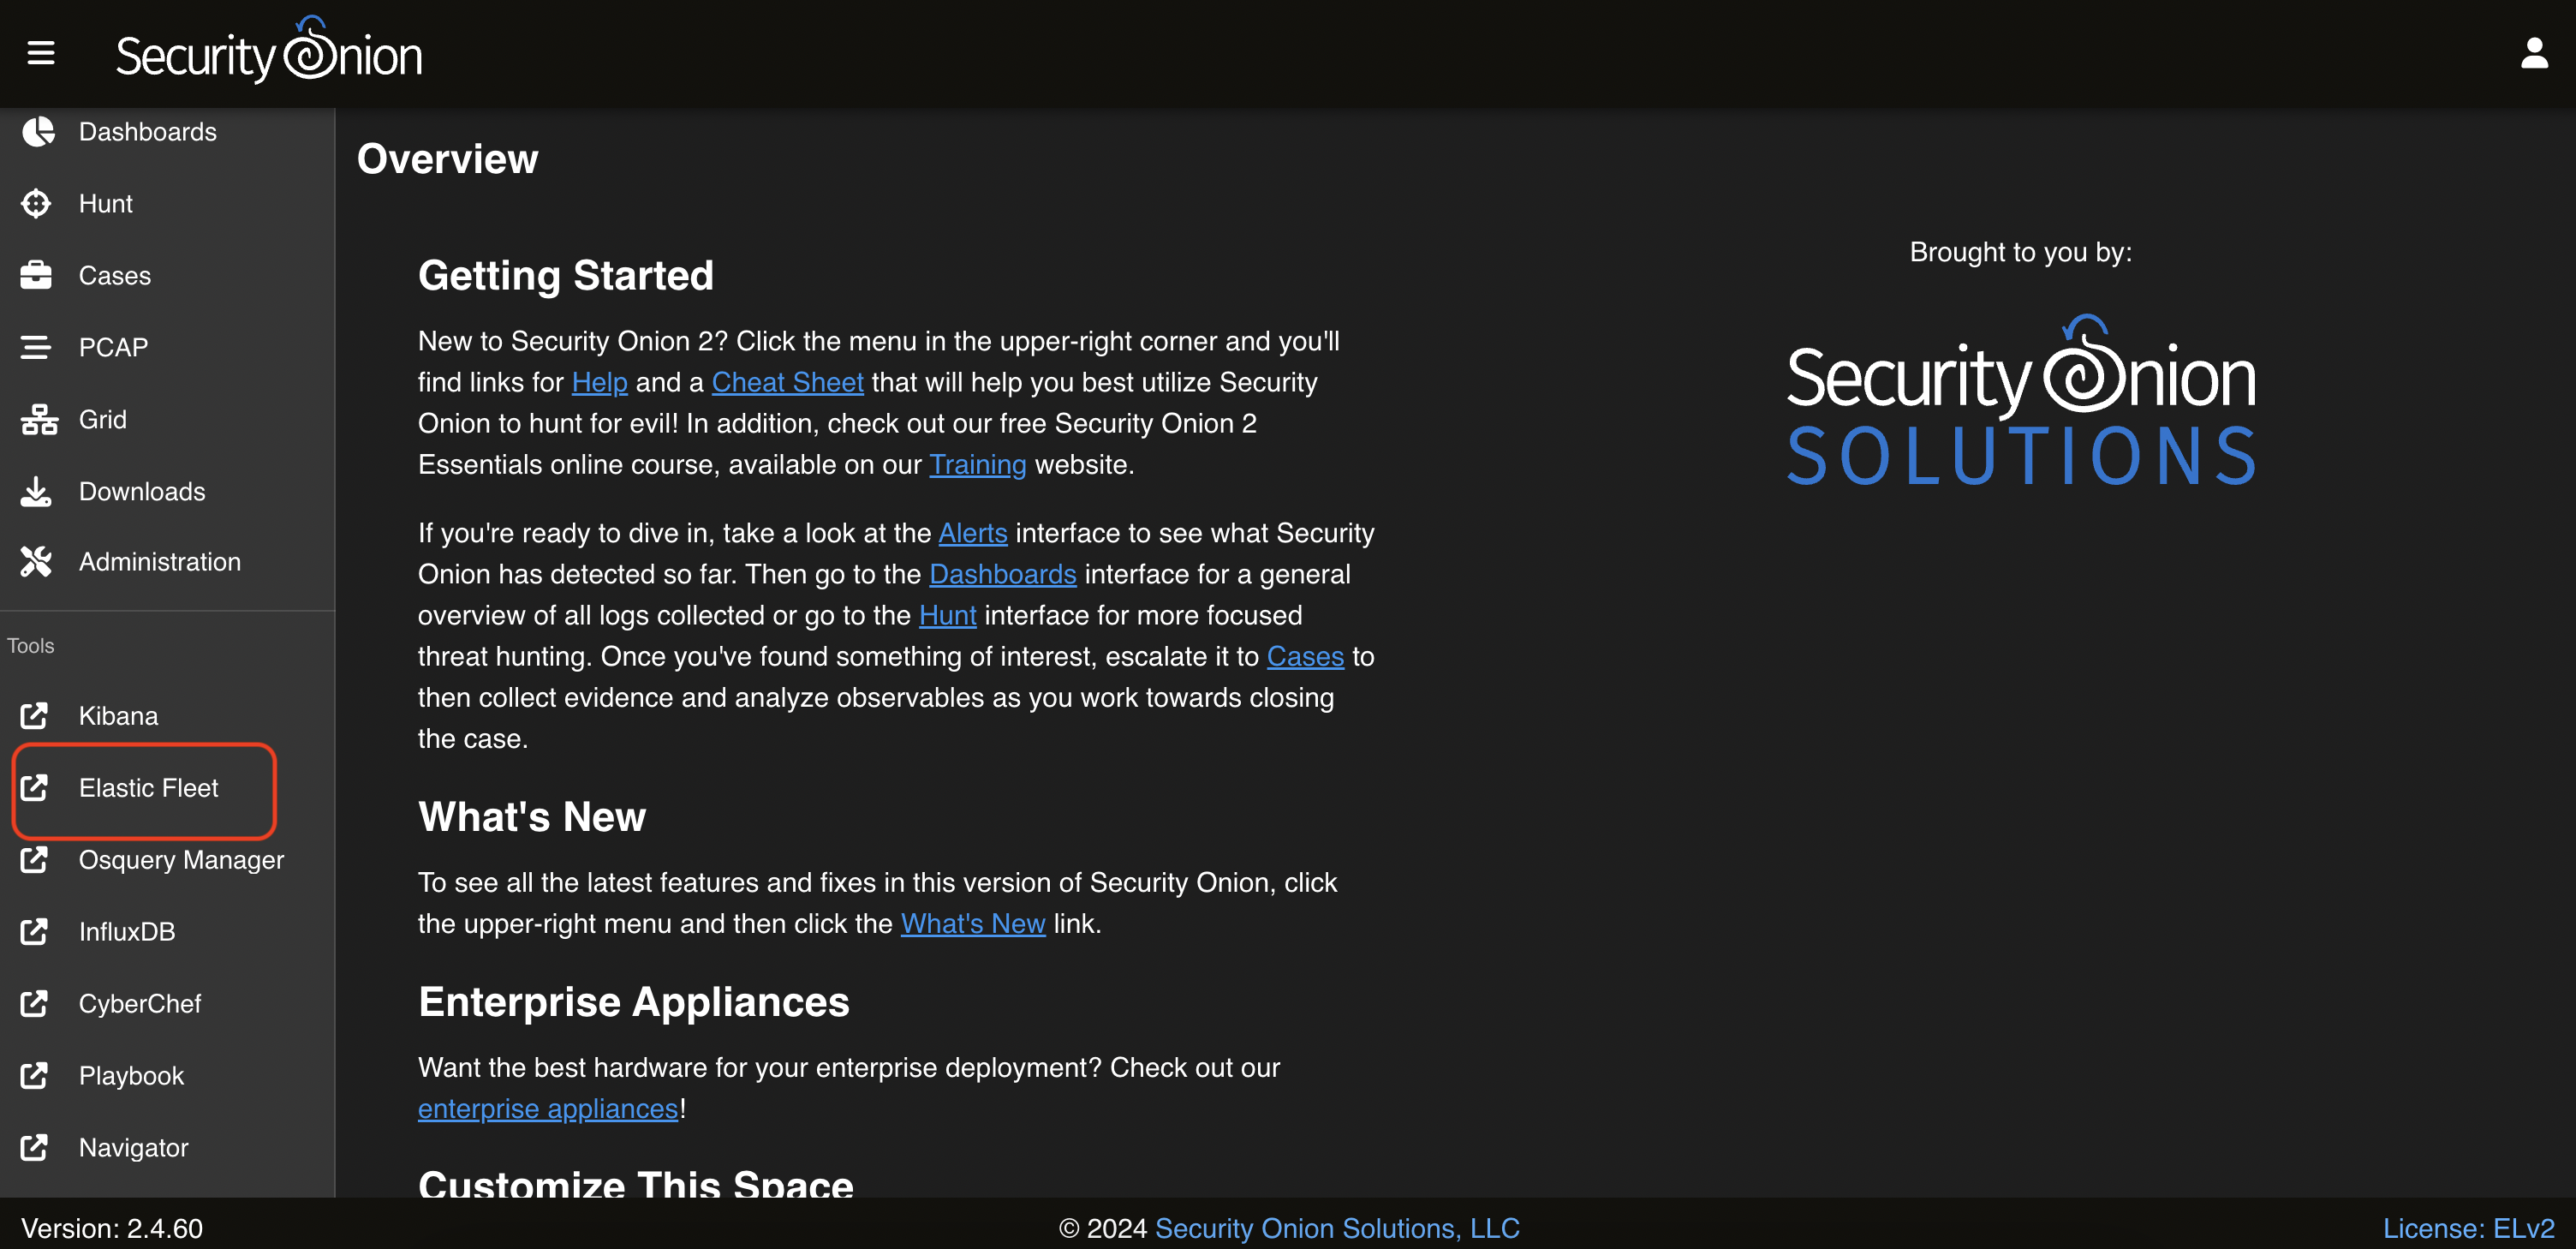
To integrate and analyze traffic with pfSense, you need to integrate. Open the SecurityOnion web interface and select Elastic Fleet
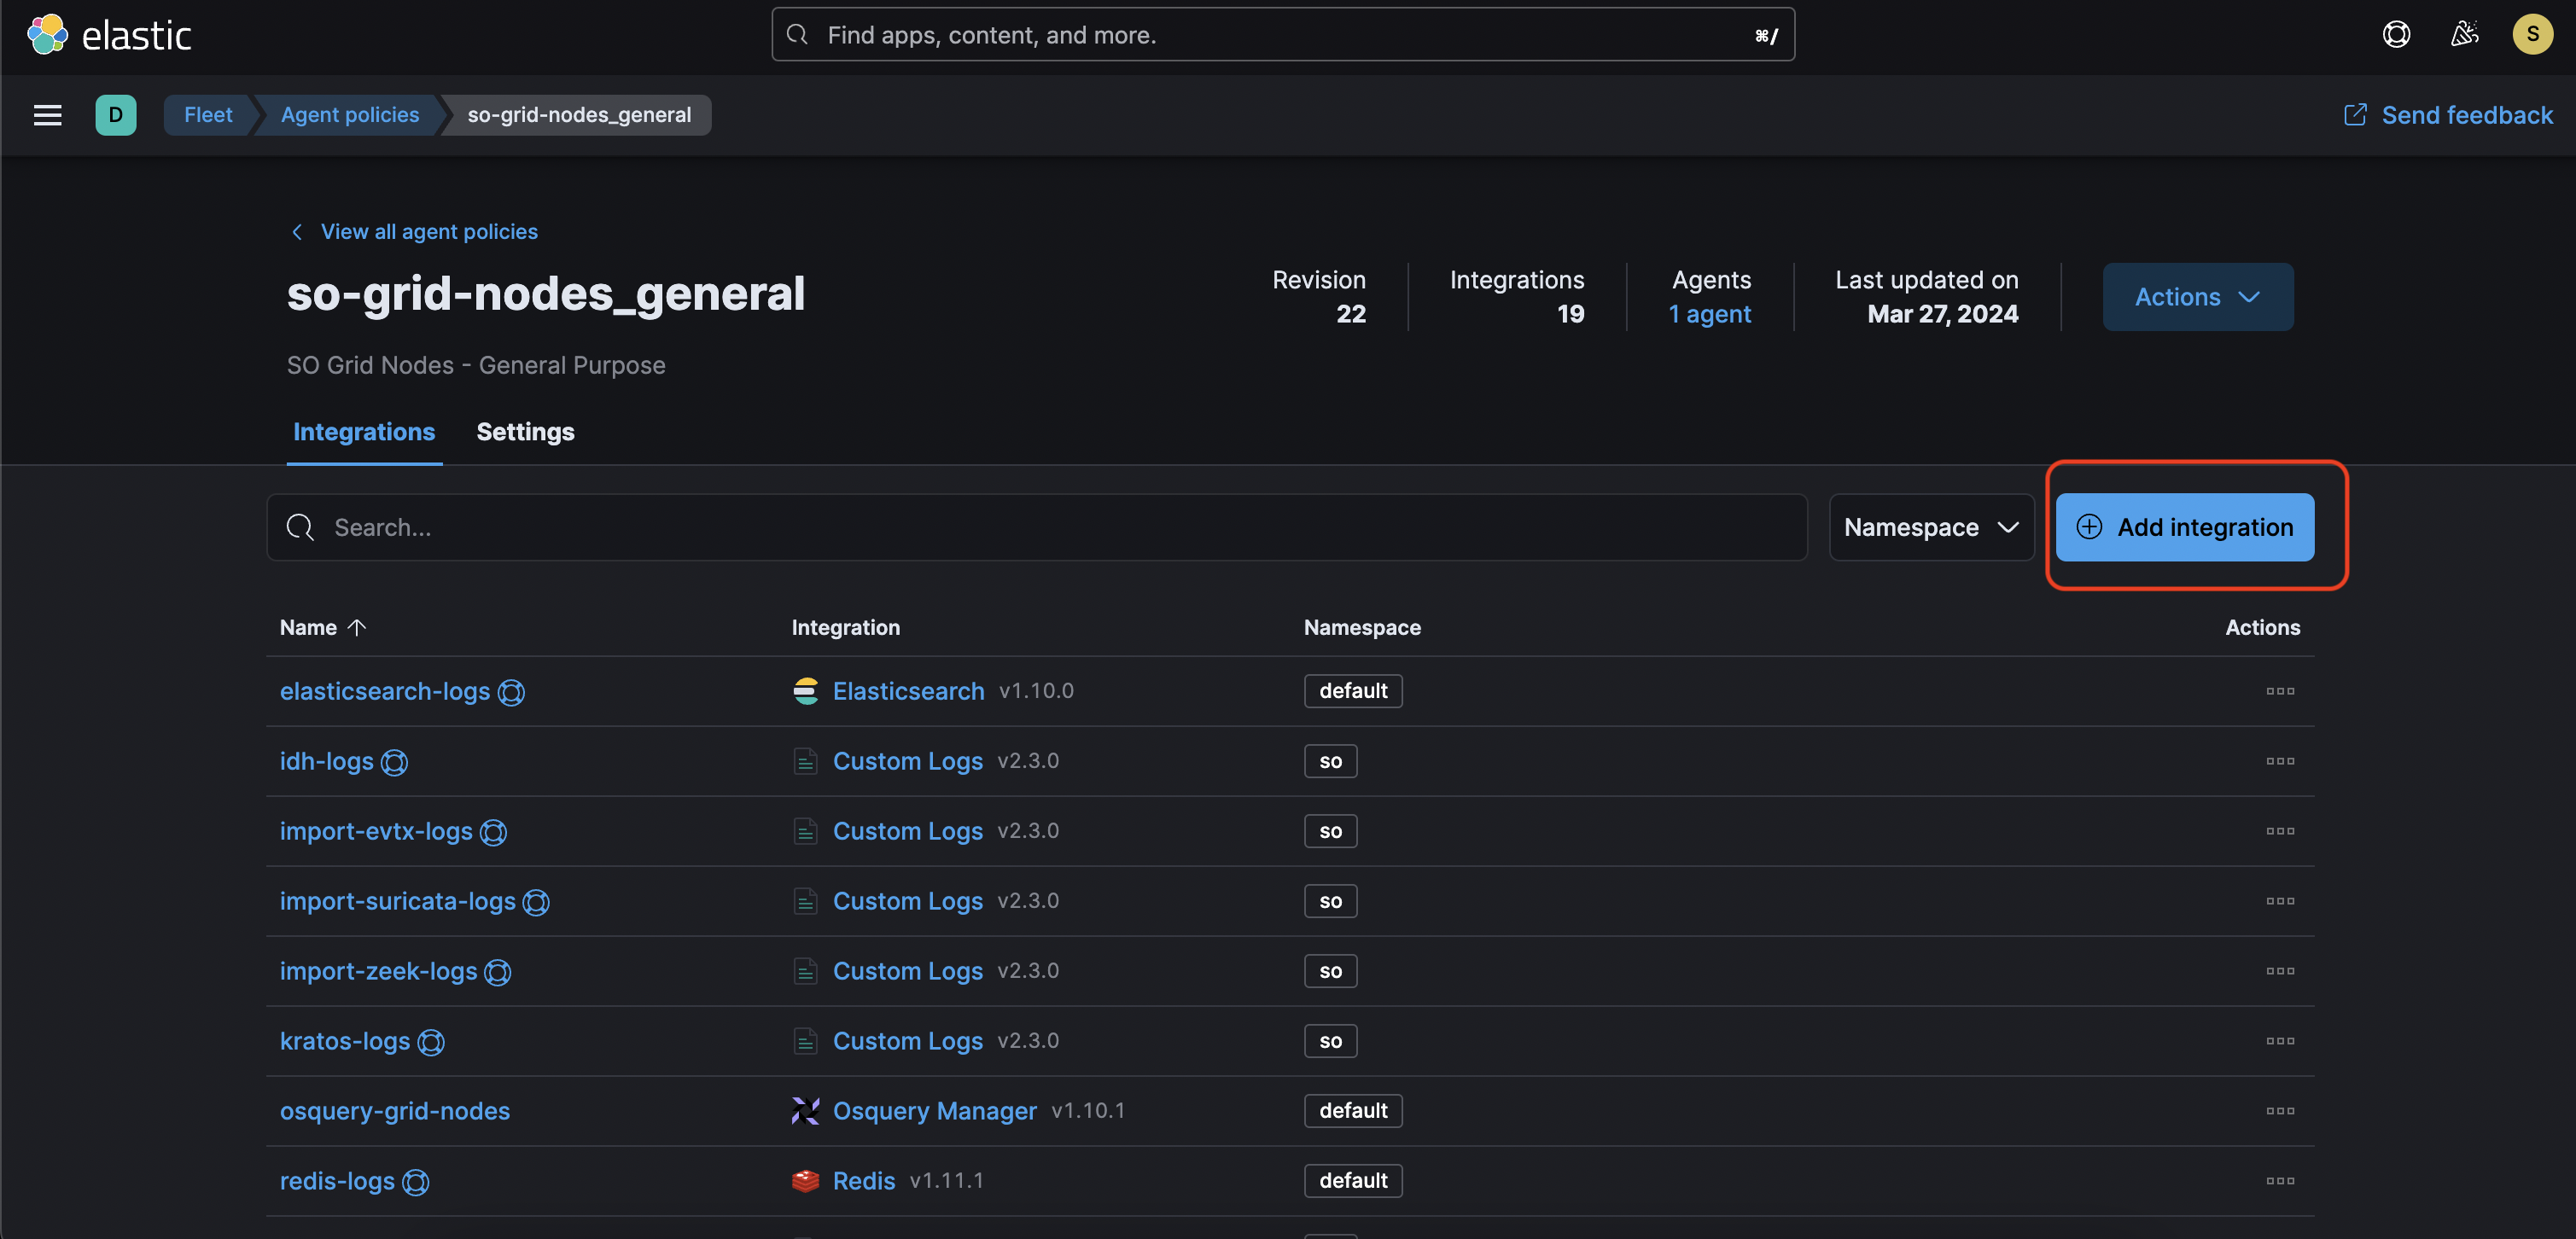
In the opened window go to the “Agent policies” tab and select “so-grid-nodes_general”, then add select Add integration
In the search box, type pfsense
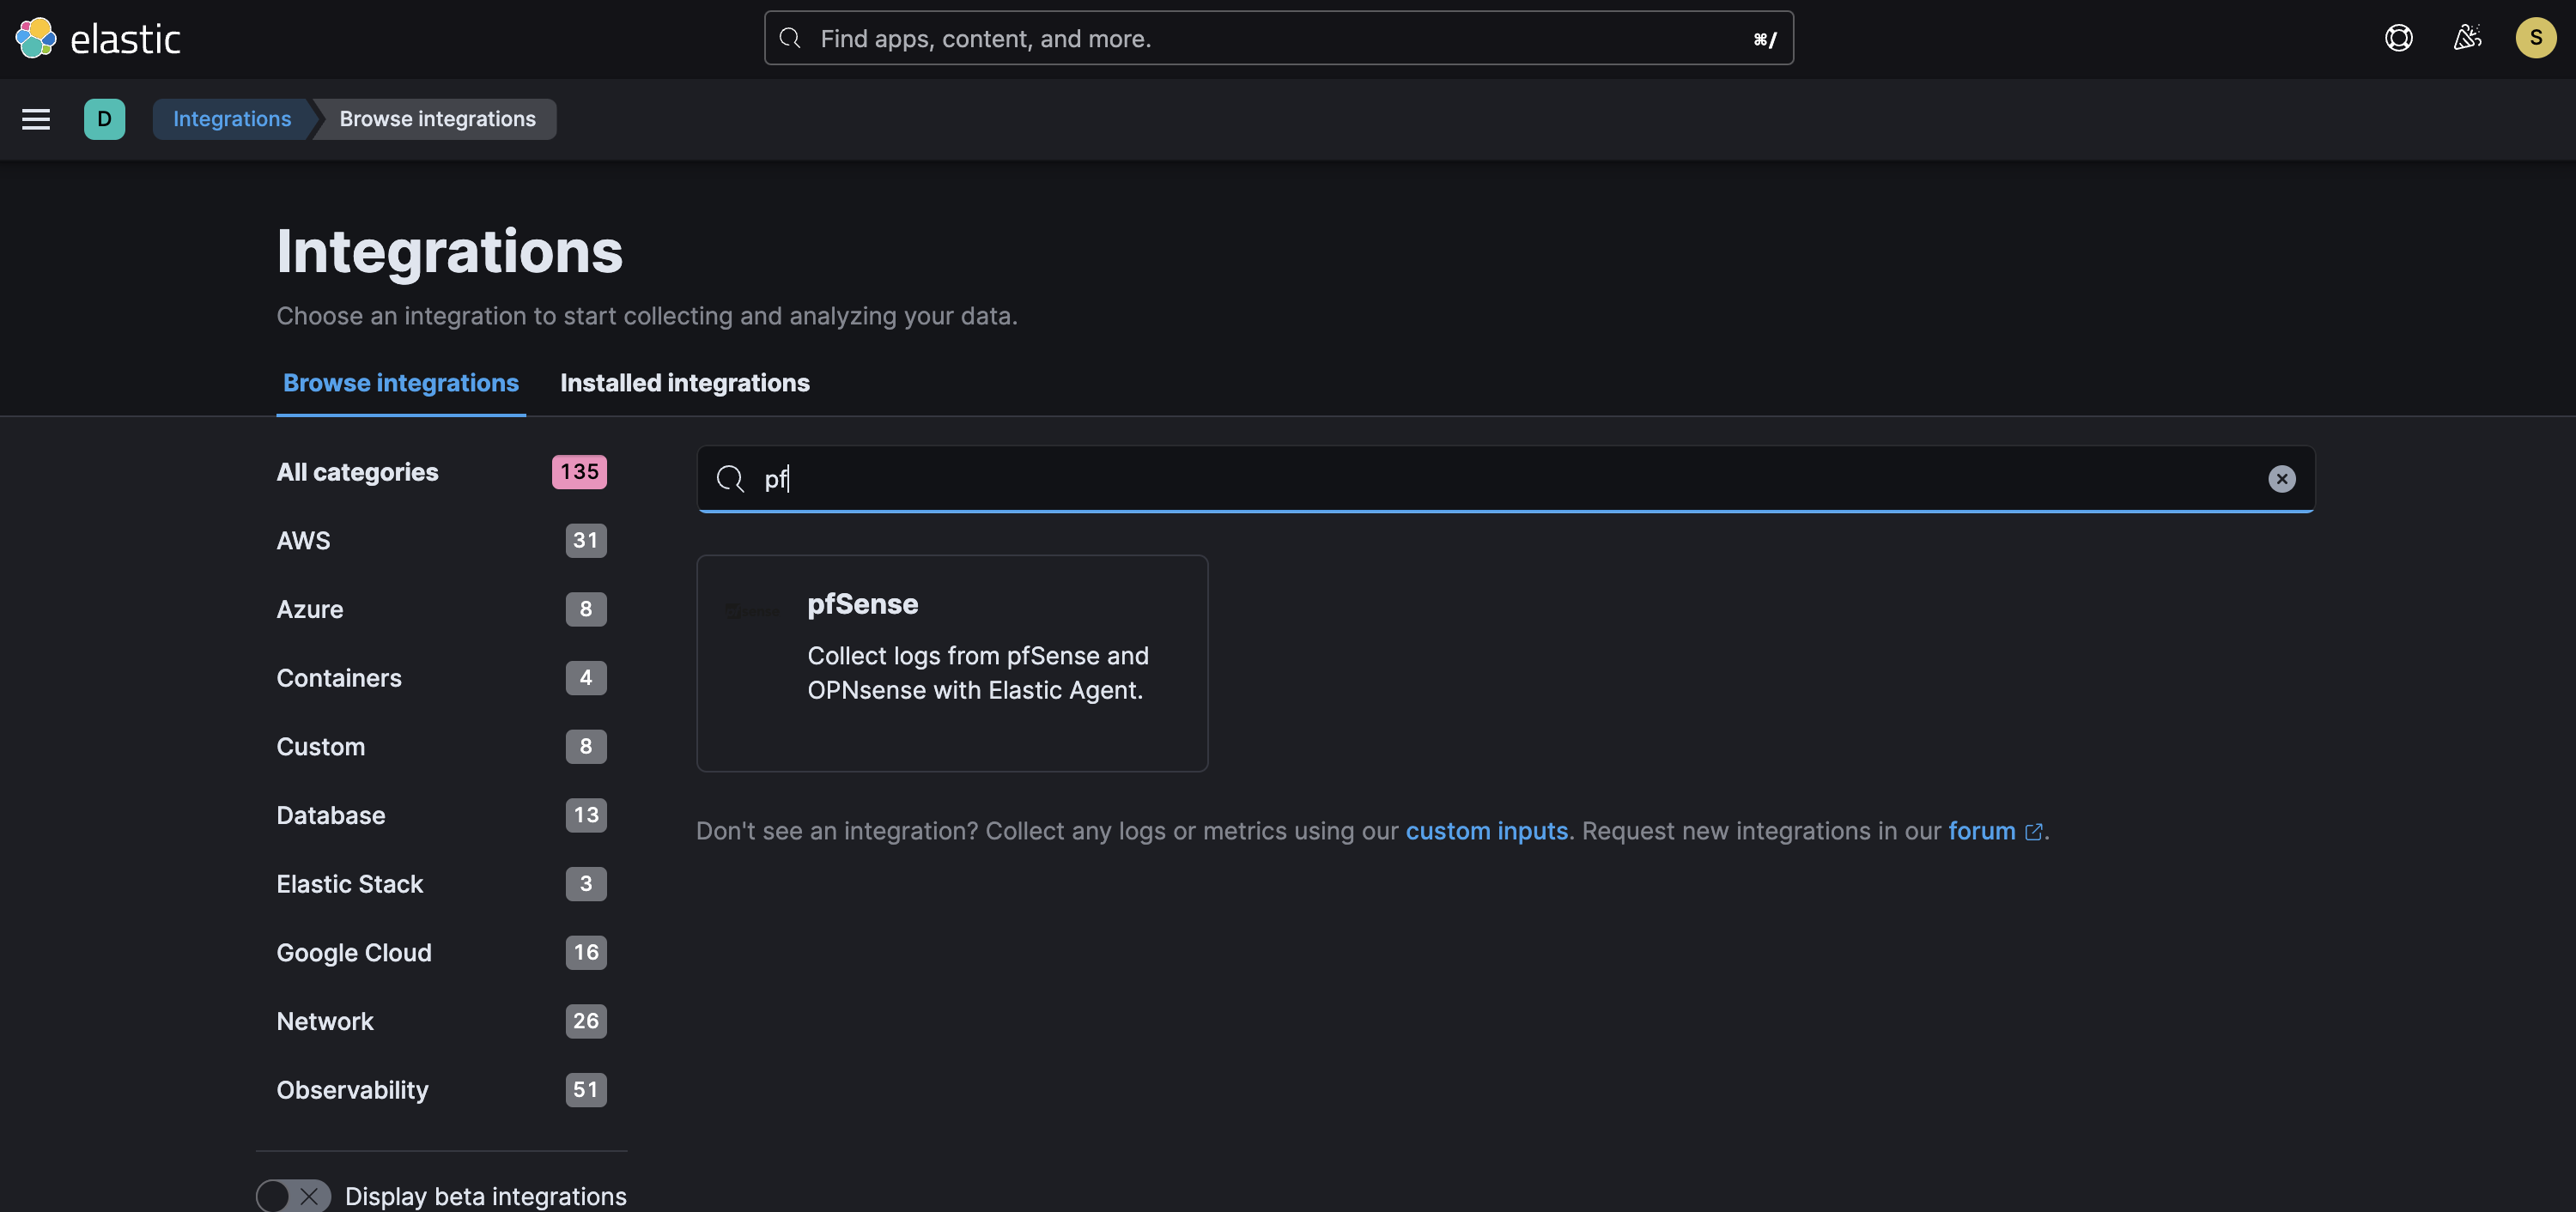
and select, in the window that appears, click “Add pfSense.”
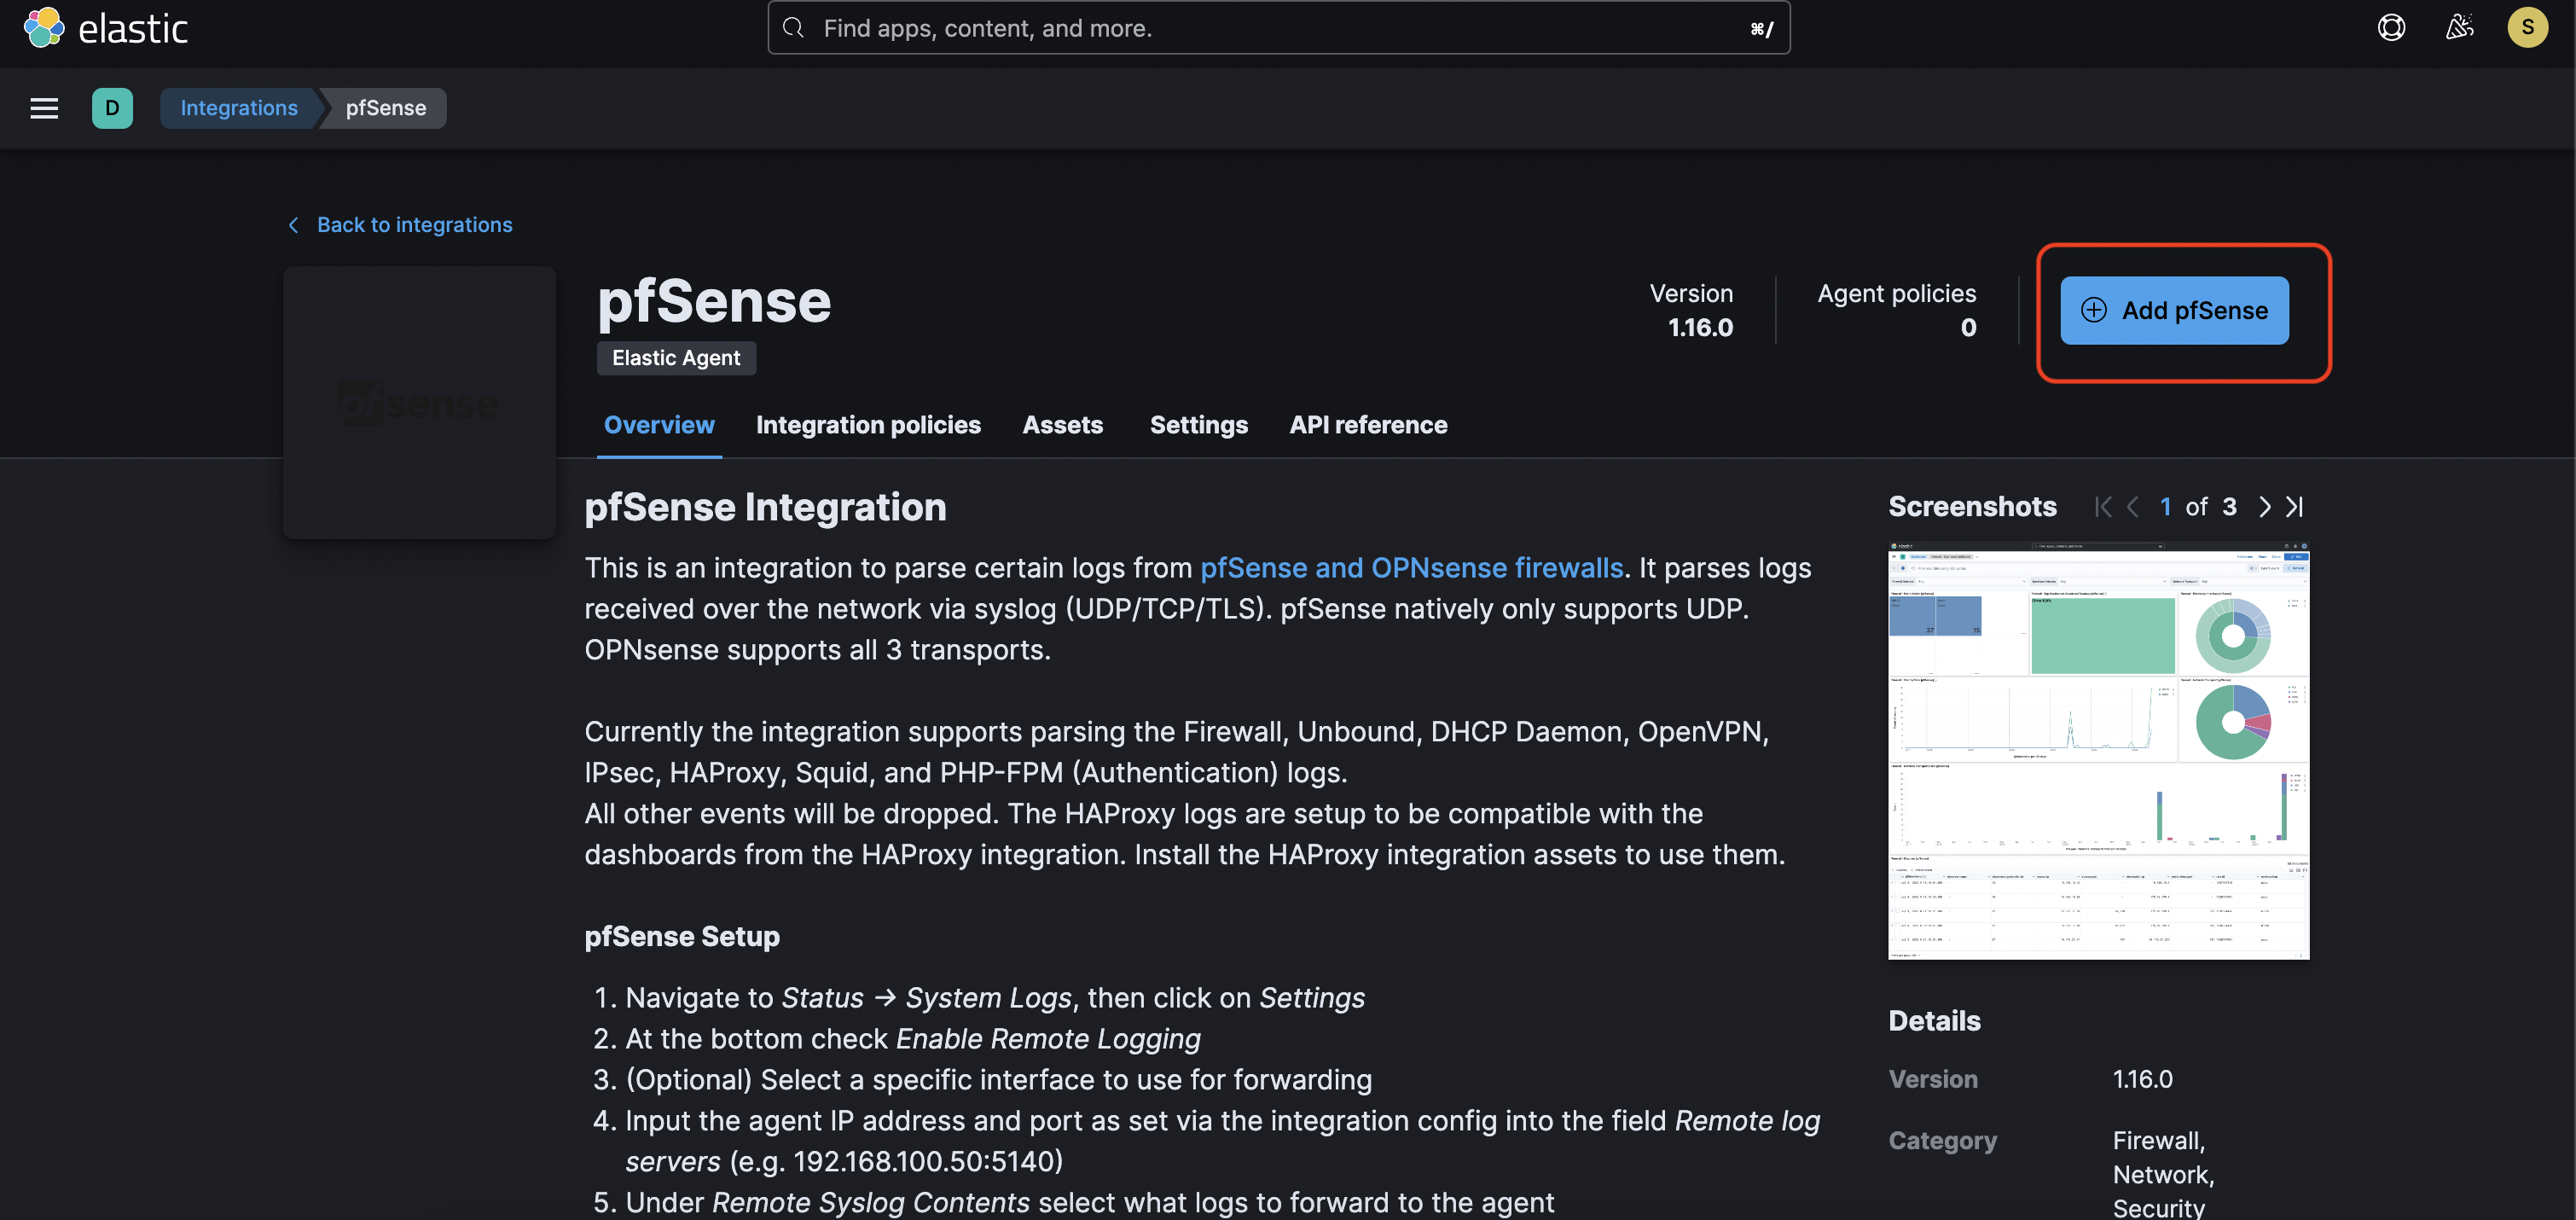
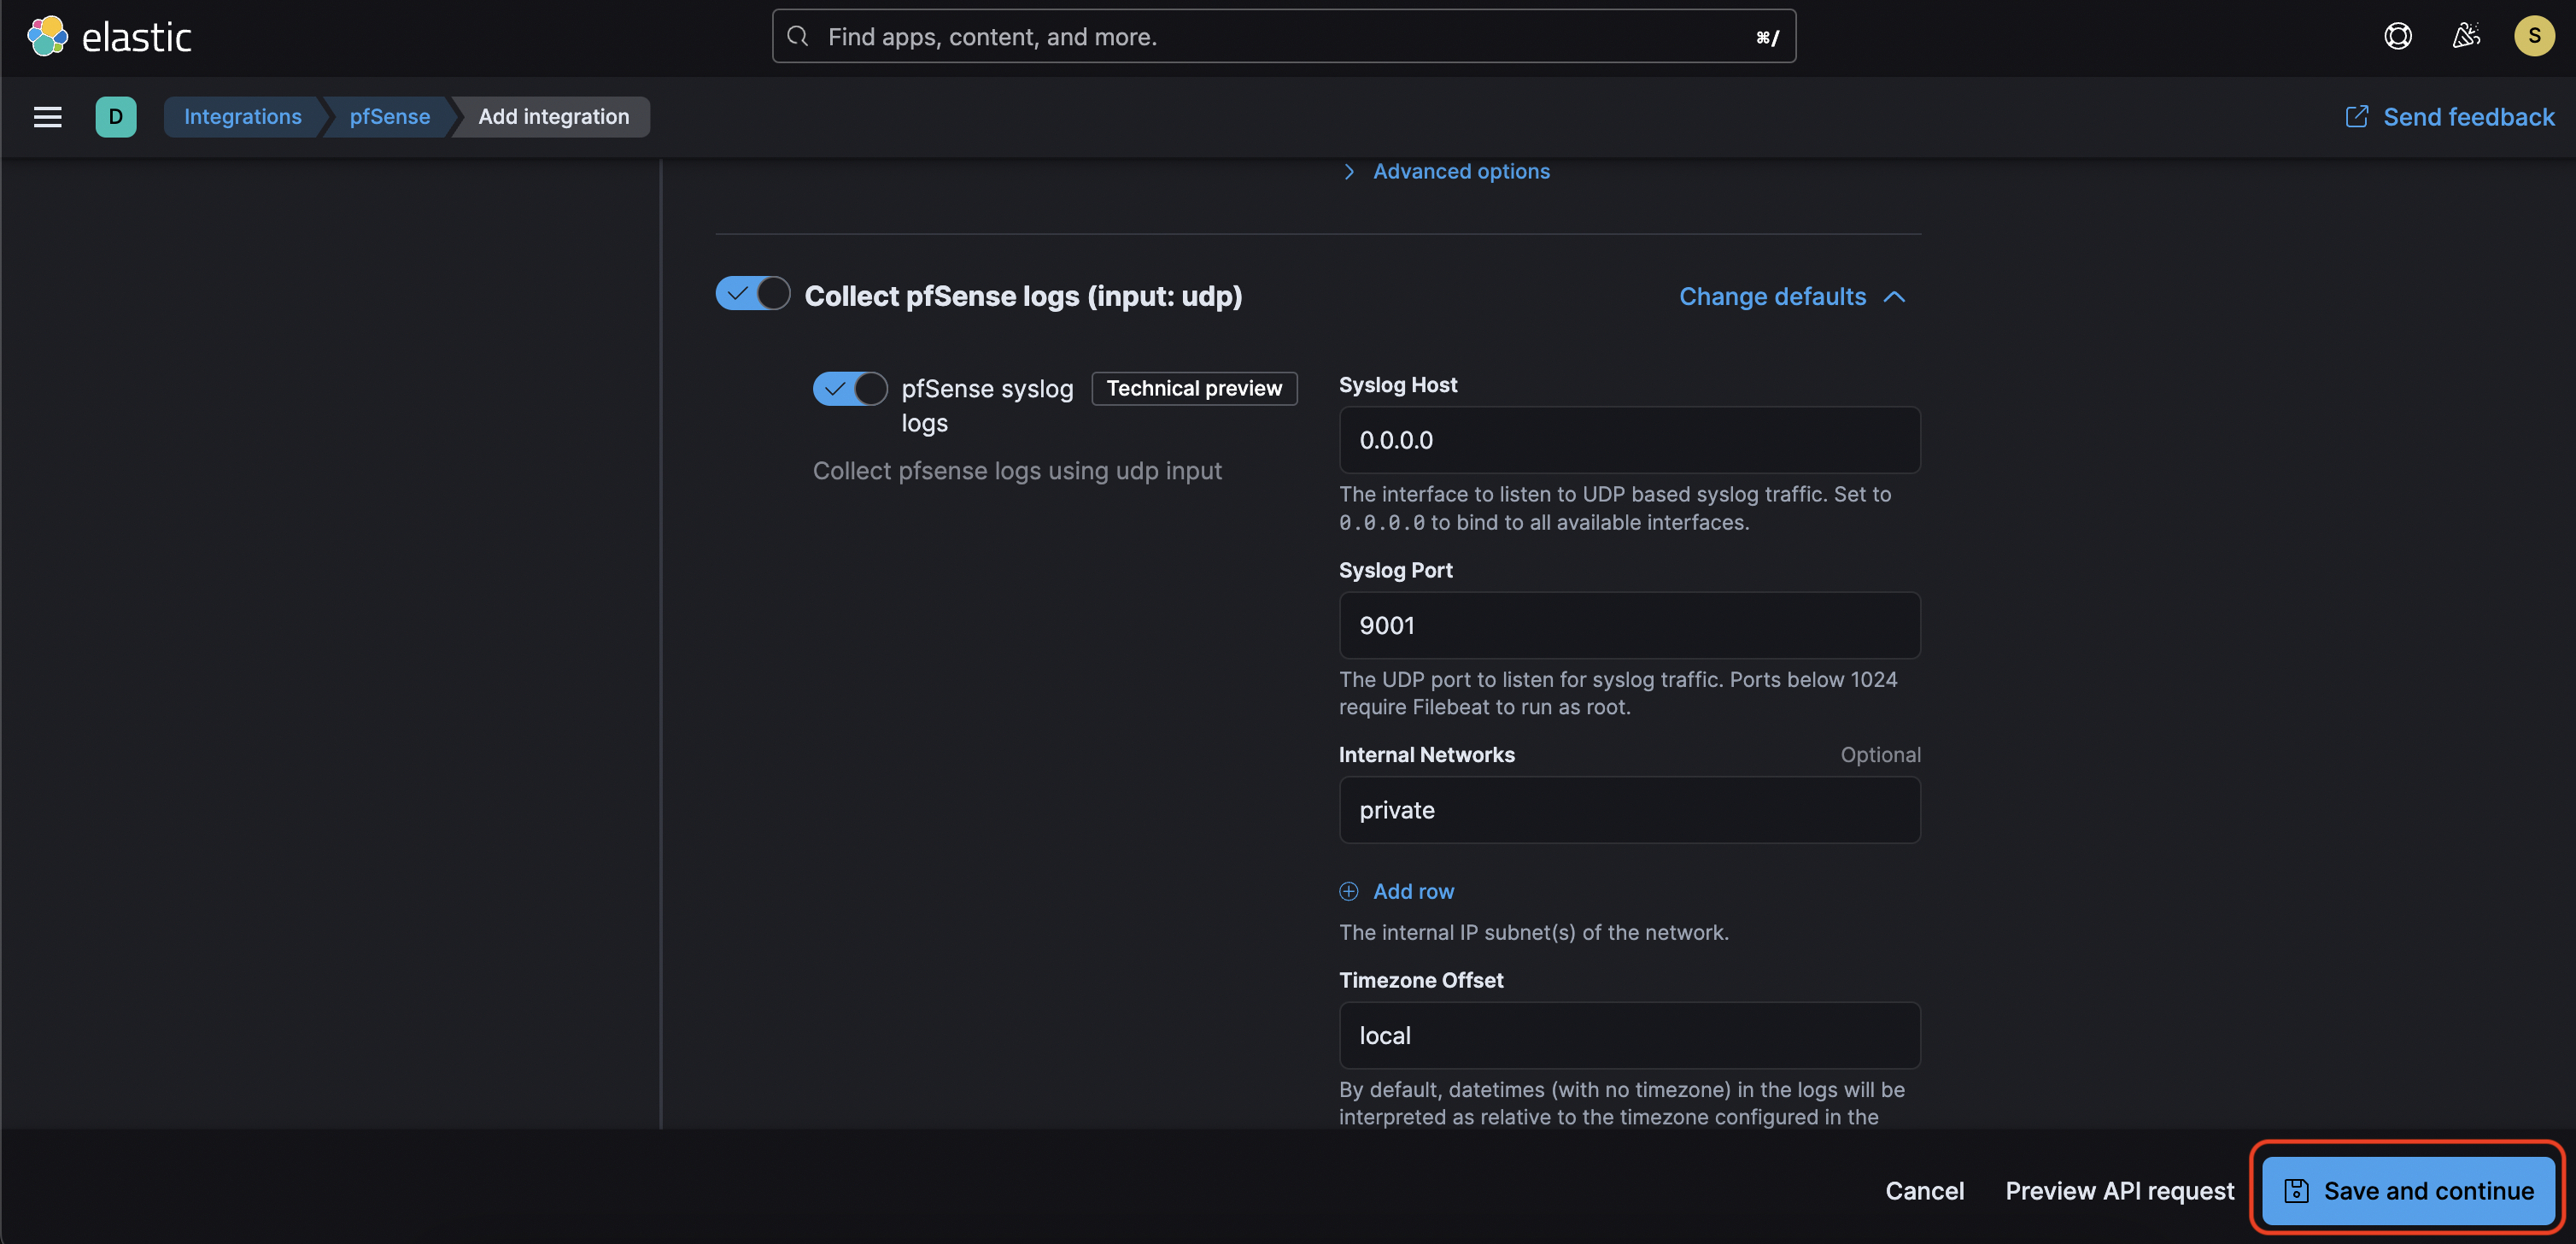
Fill in the necessary settings
Integration name - at your discretion e.g. yc-pfsense
Syslog host - 0.0.0.0.0
Other values can be left as they are and click Save and continue
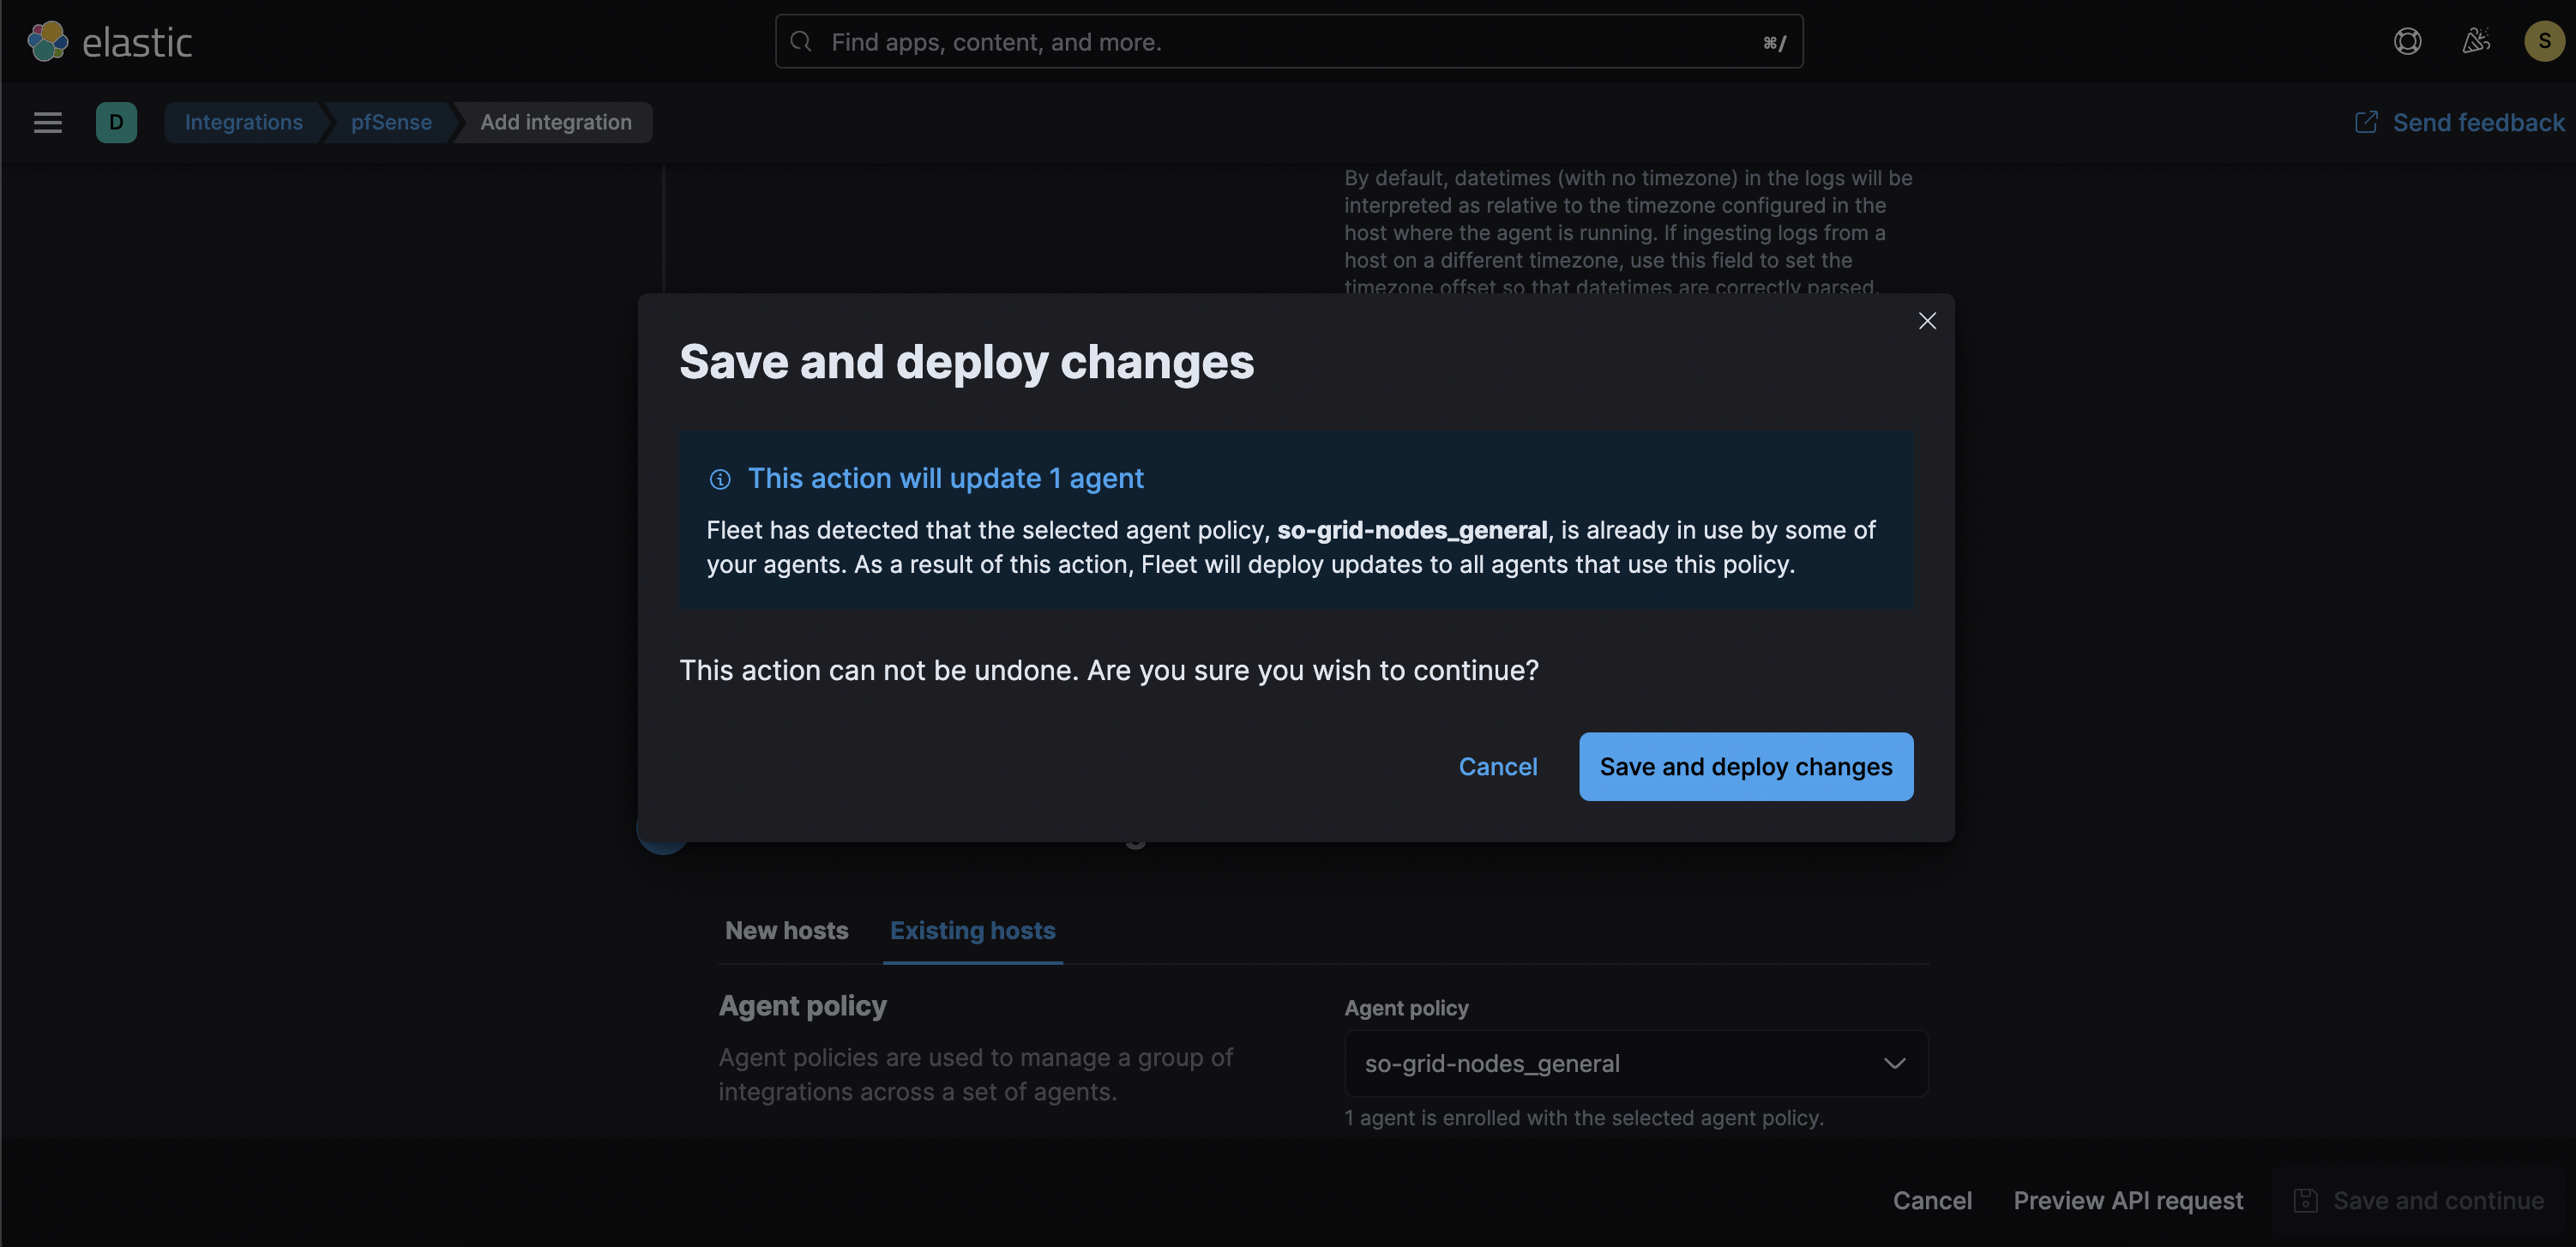
Next, click Save and Deploy changes
Go back to the SecurityOnion web interface and go to Administration -> Configuration.
Click on Option and select Show all configurable settings, including advanced settings.
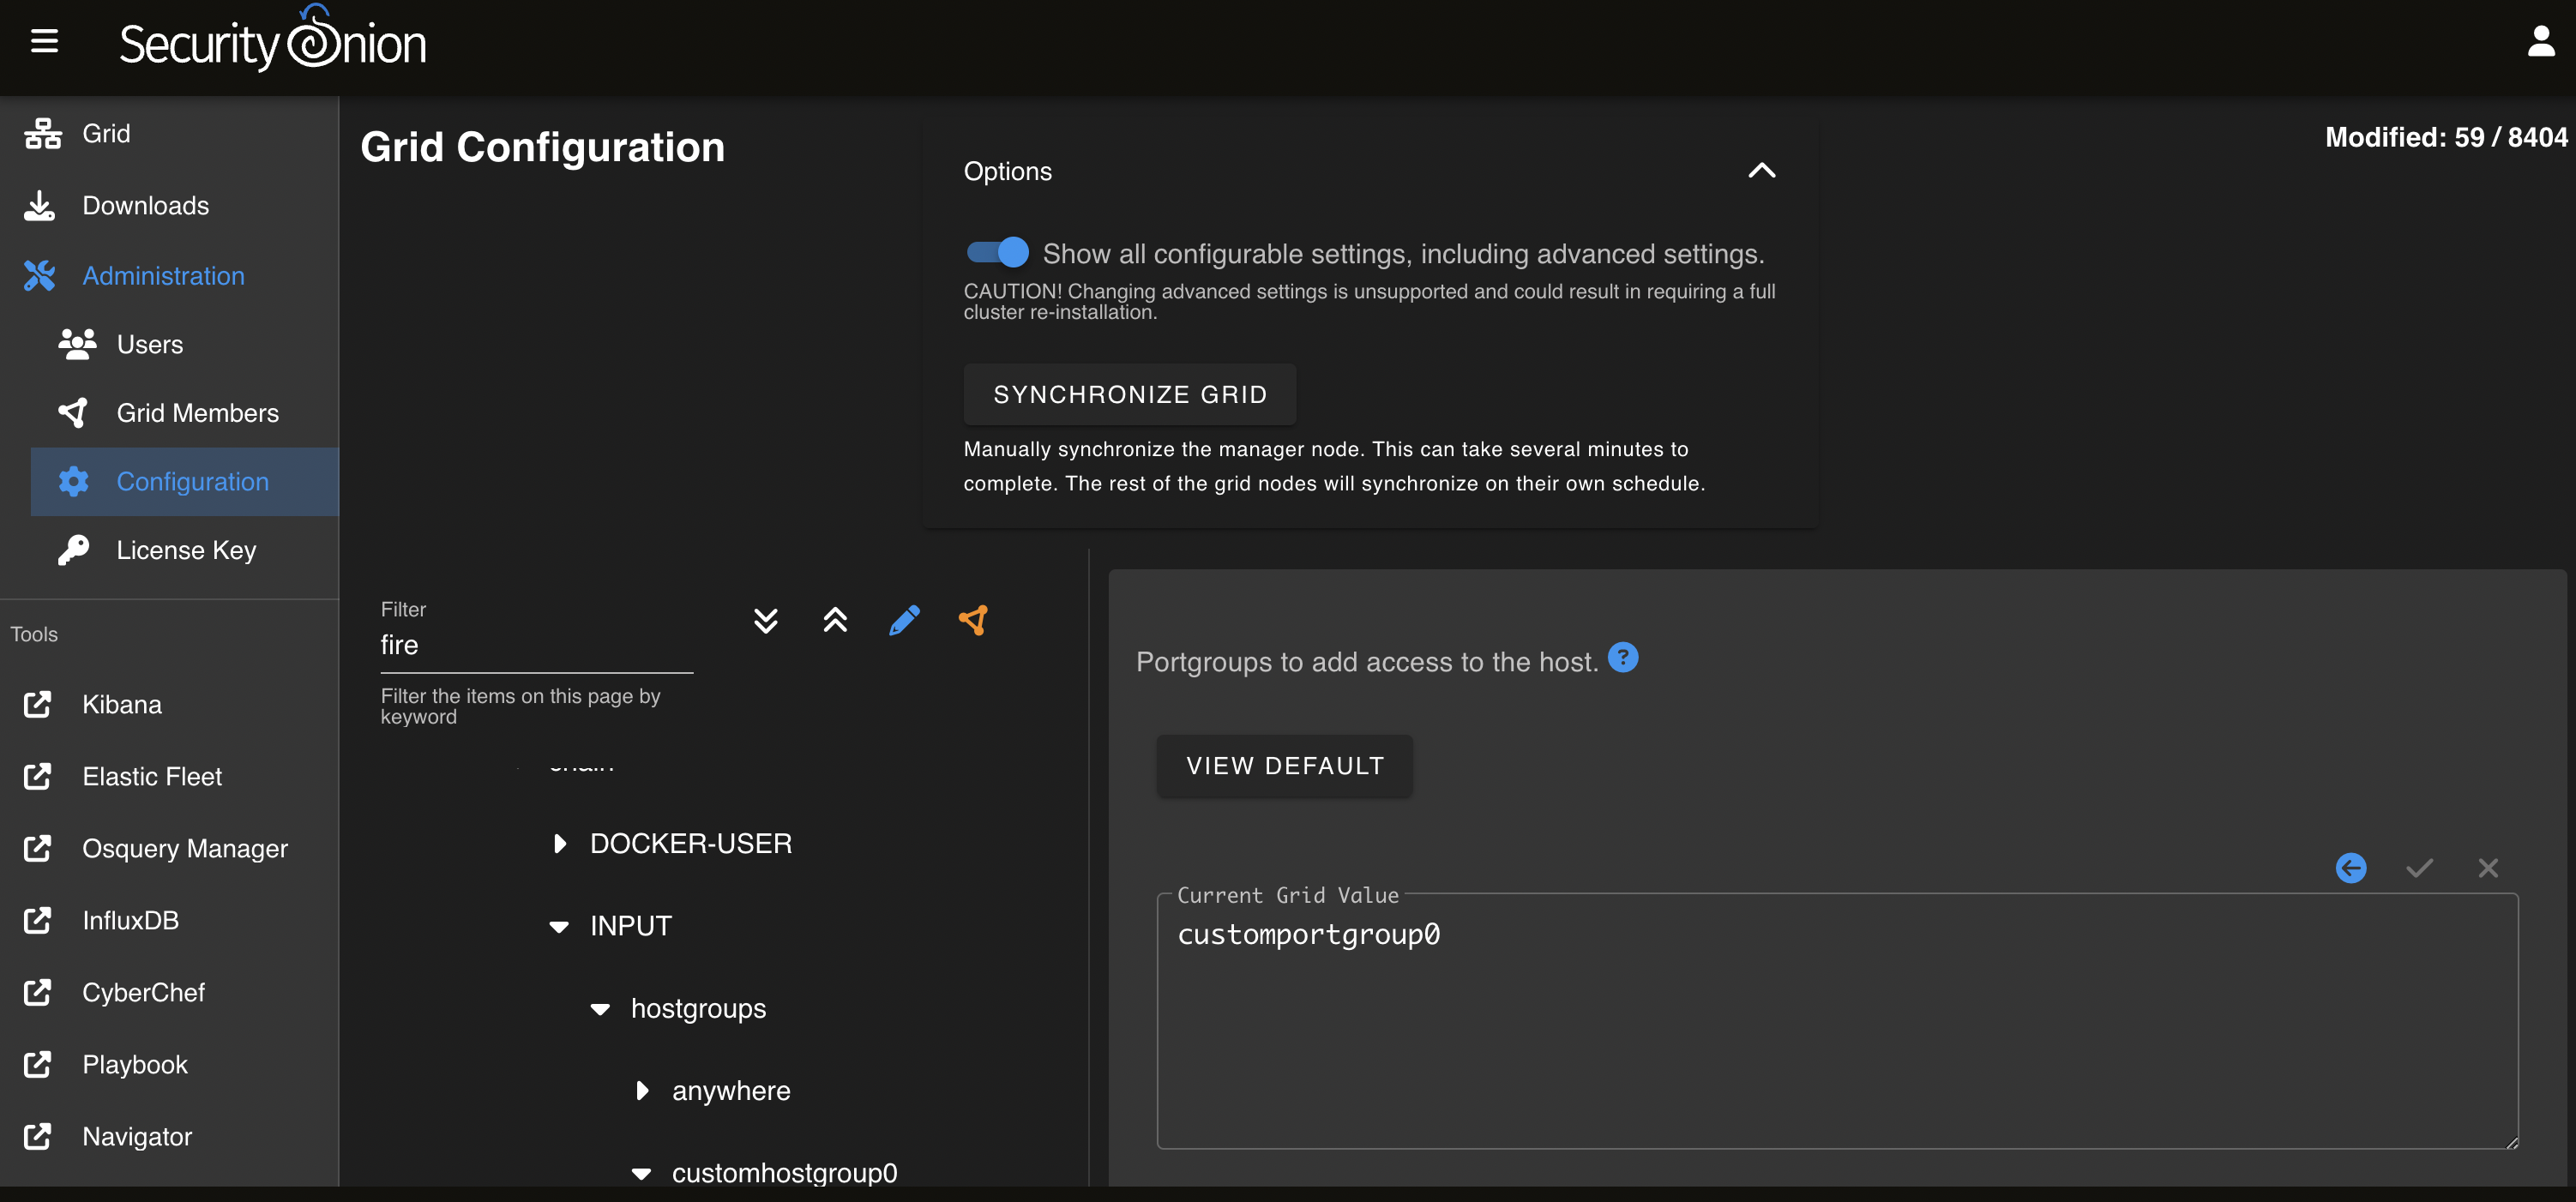
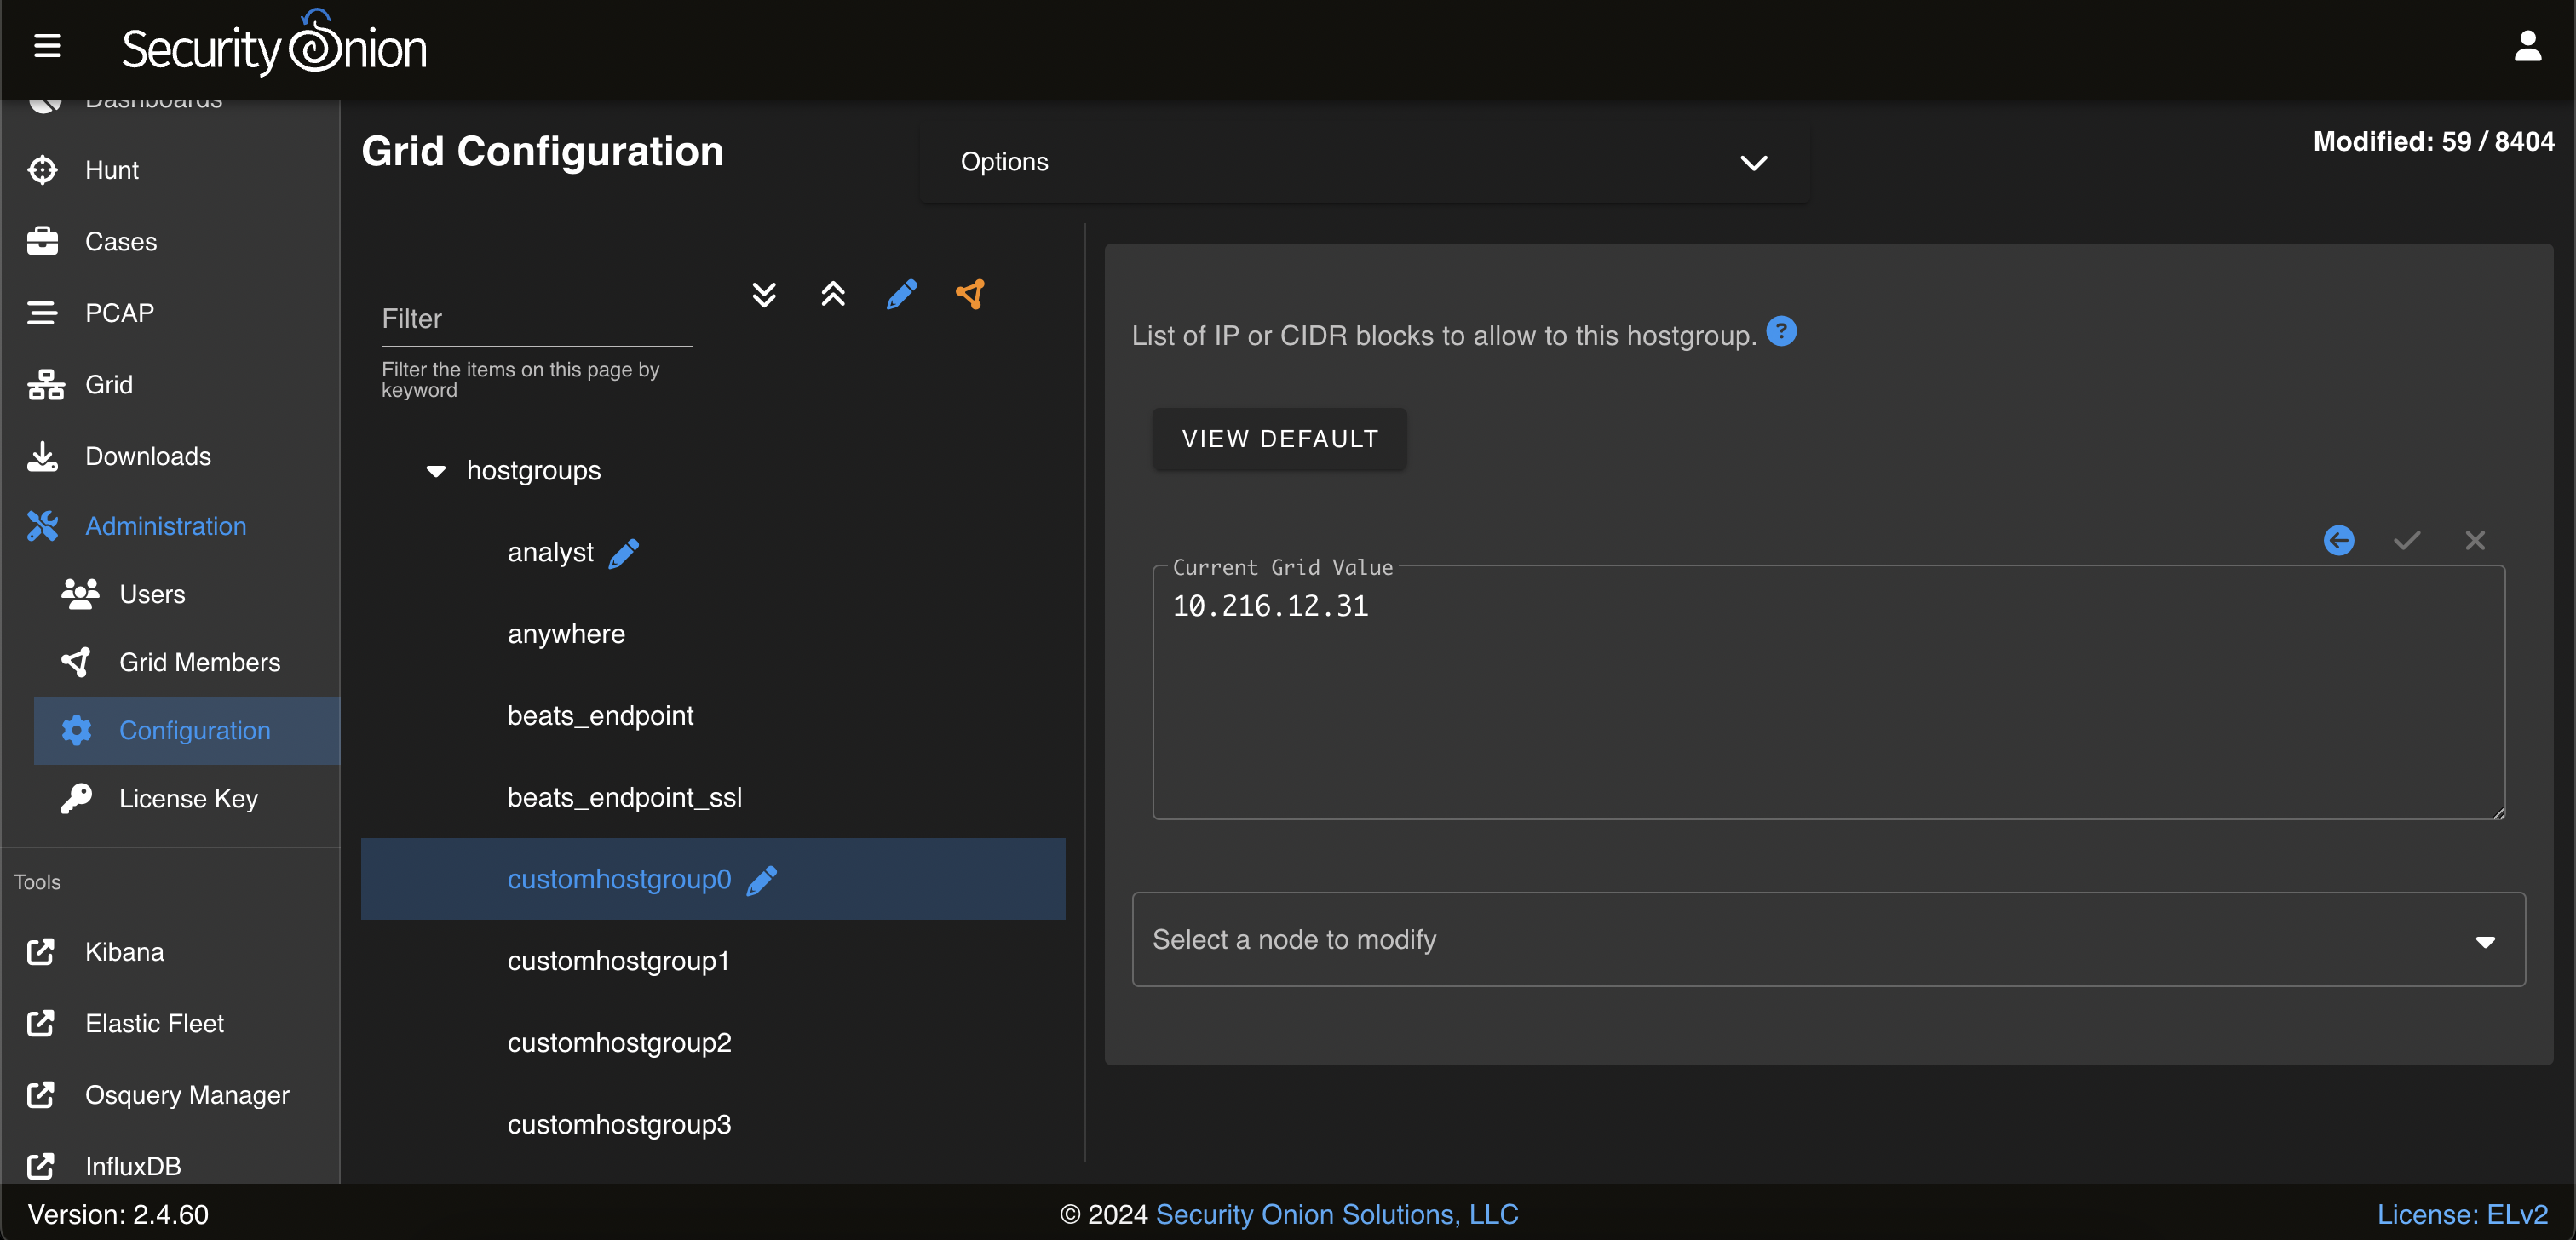
On the left side, go to firewall settings, select hostgroups and click on the customhostgroup0 group. On the right side, enter the IP address of the pfSense firewall and click the check mark to save.
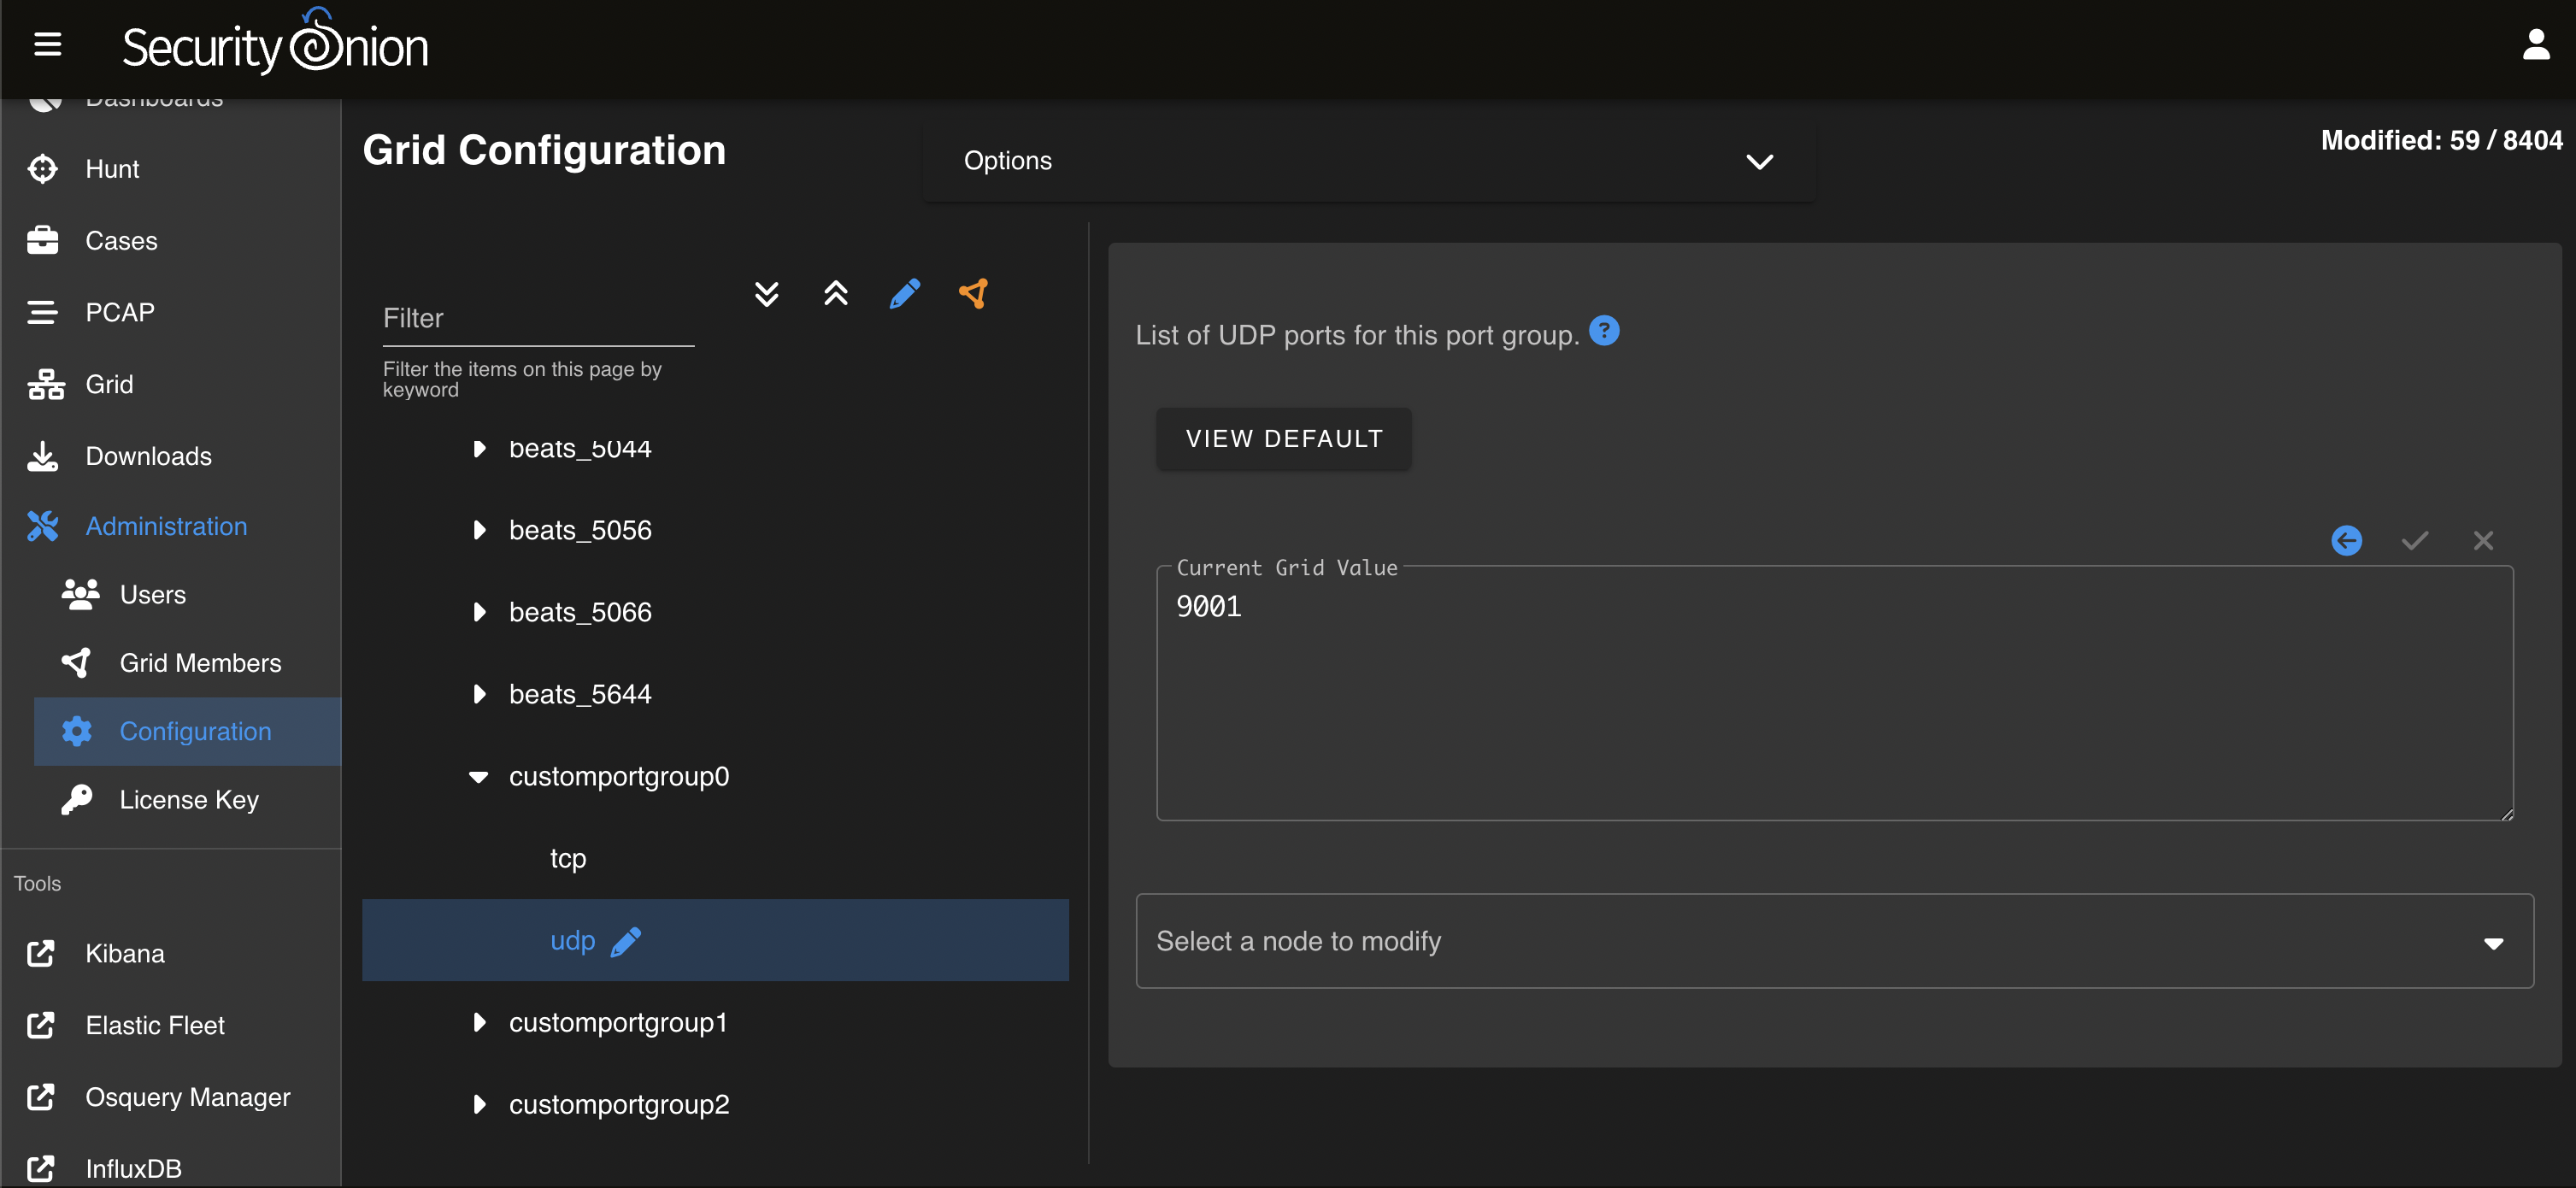
On the left side, go to firewall settings, select portgroups, select the customportgroup0 group, then click on UDP protocol. On the right side, enter 9001 and click the check mark to save.
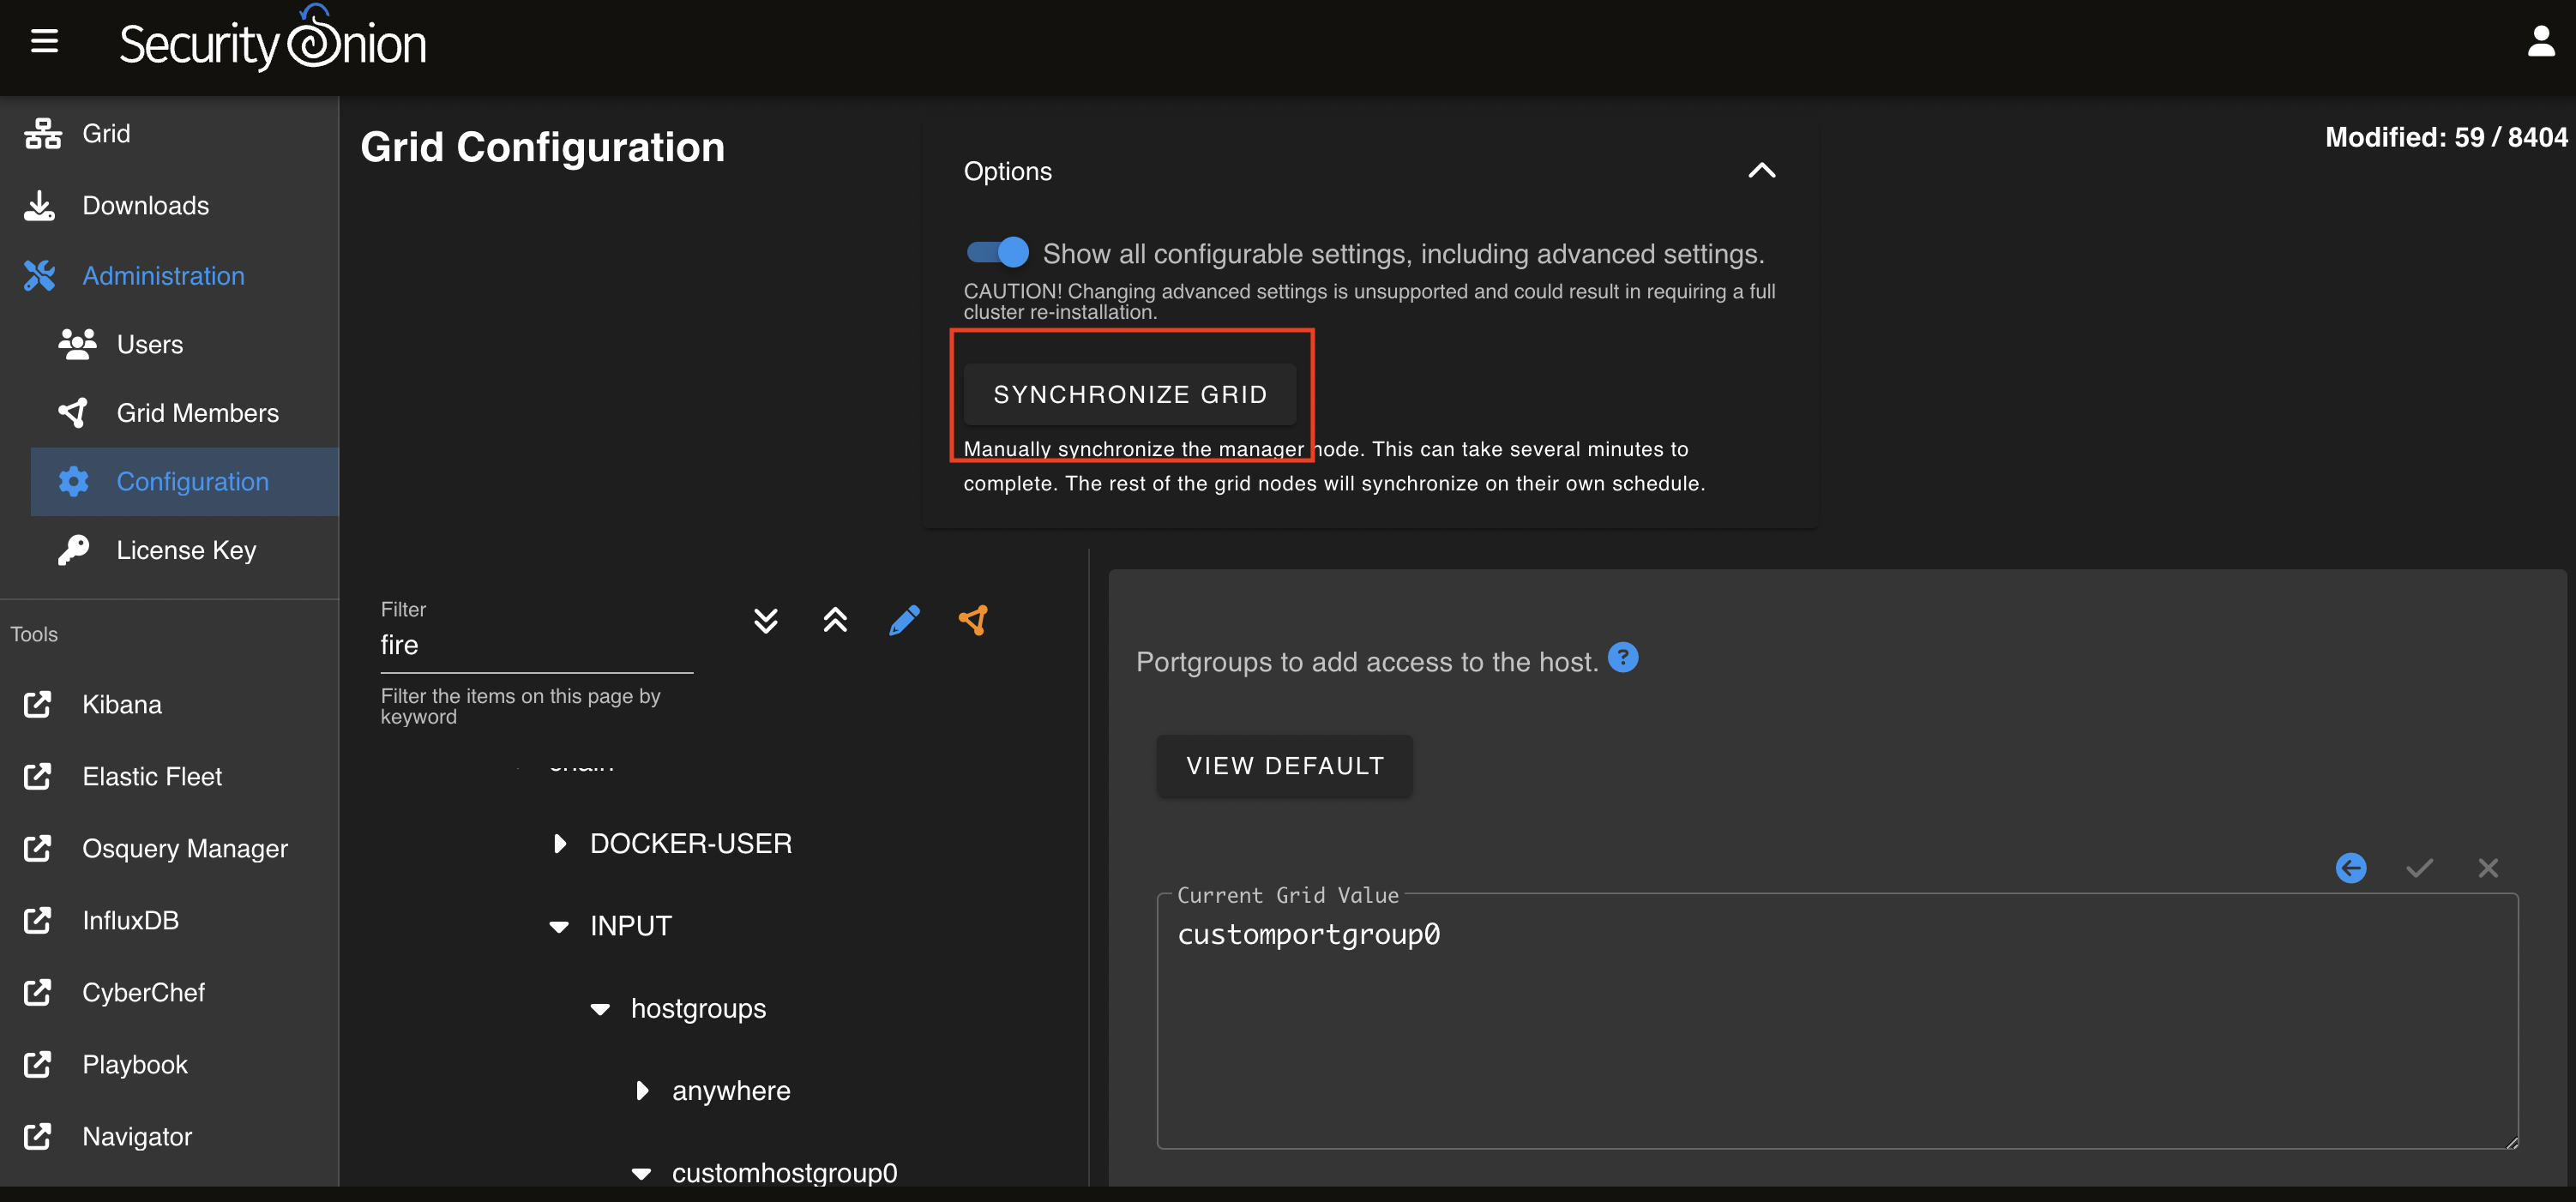
 On the left side go to
 firewall settings, select role, then select the type of node e.g. standalone that will receive pfSense logs. Then go to chain -> INPUT -> hostgroups -> customhostgroup0 -> portgroups. On the right side, type customportgroup0 and click the check mark to save.
If you want to apply the rules immediately, click the SYNCHRONIZE GRID button in the Option menu at the top of the page.
This completes the settings for SecurityOnion, now we need to configure sending logs from pfsense
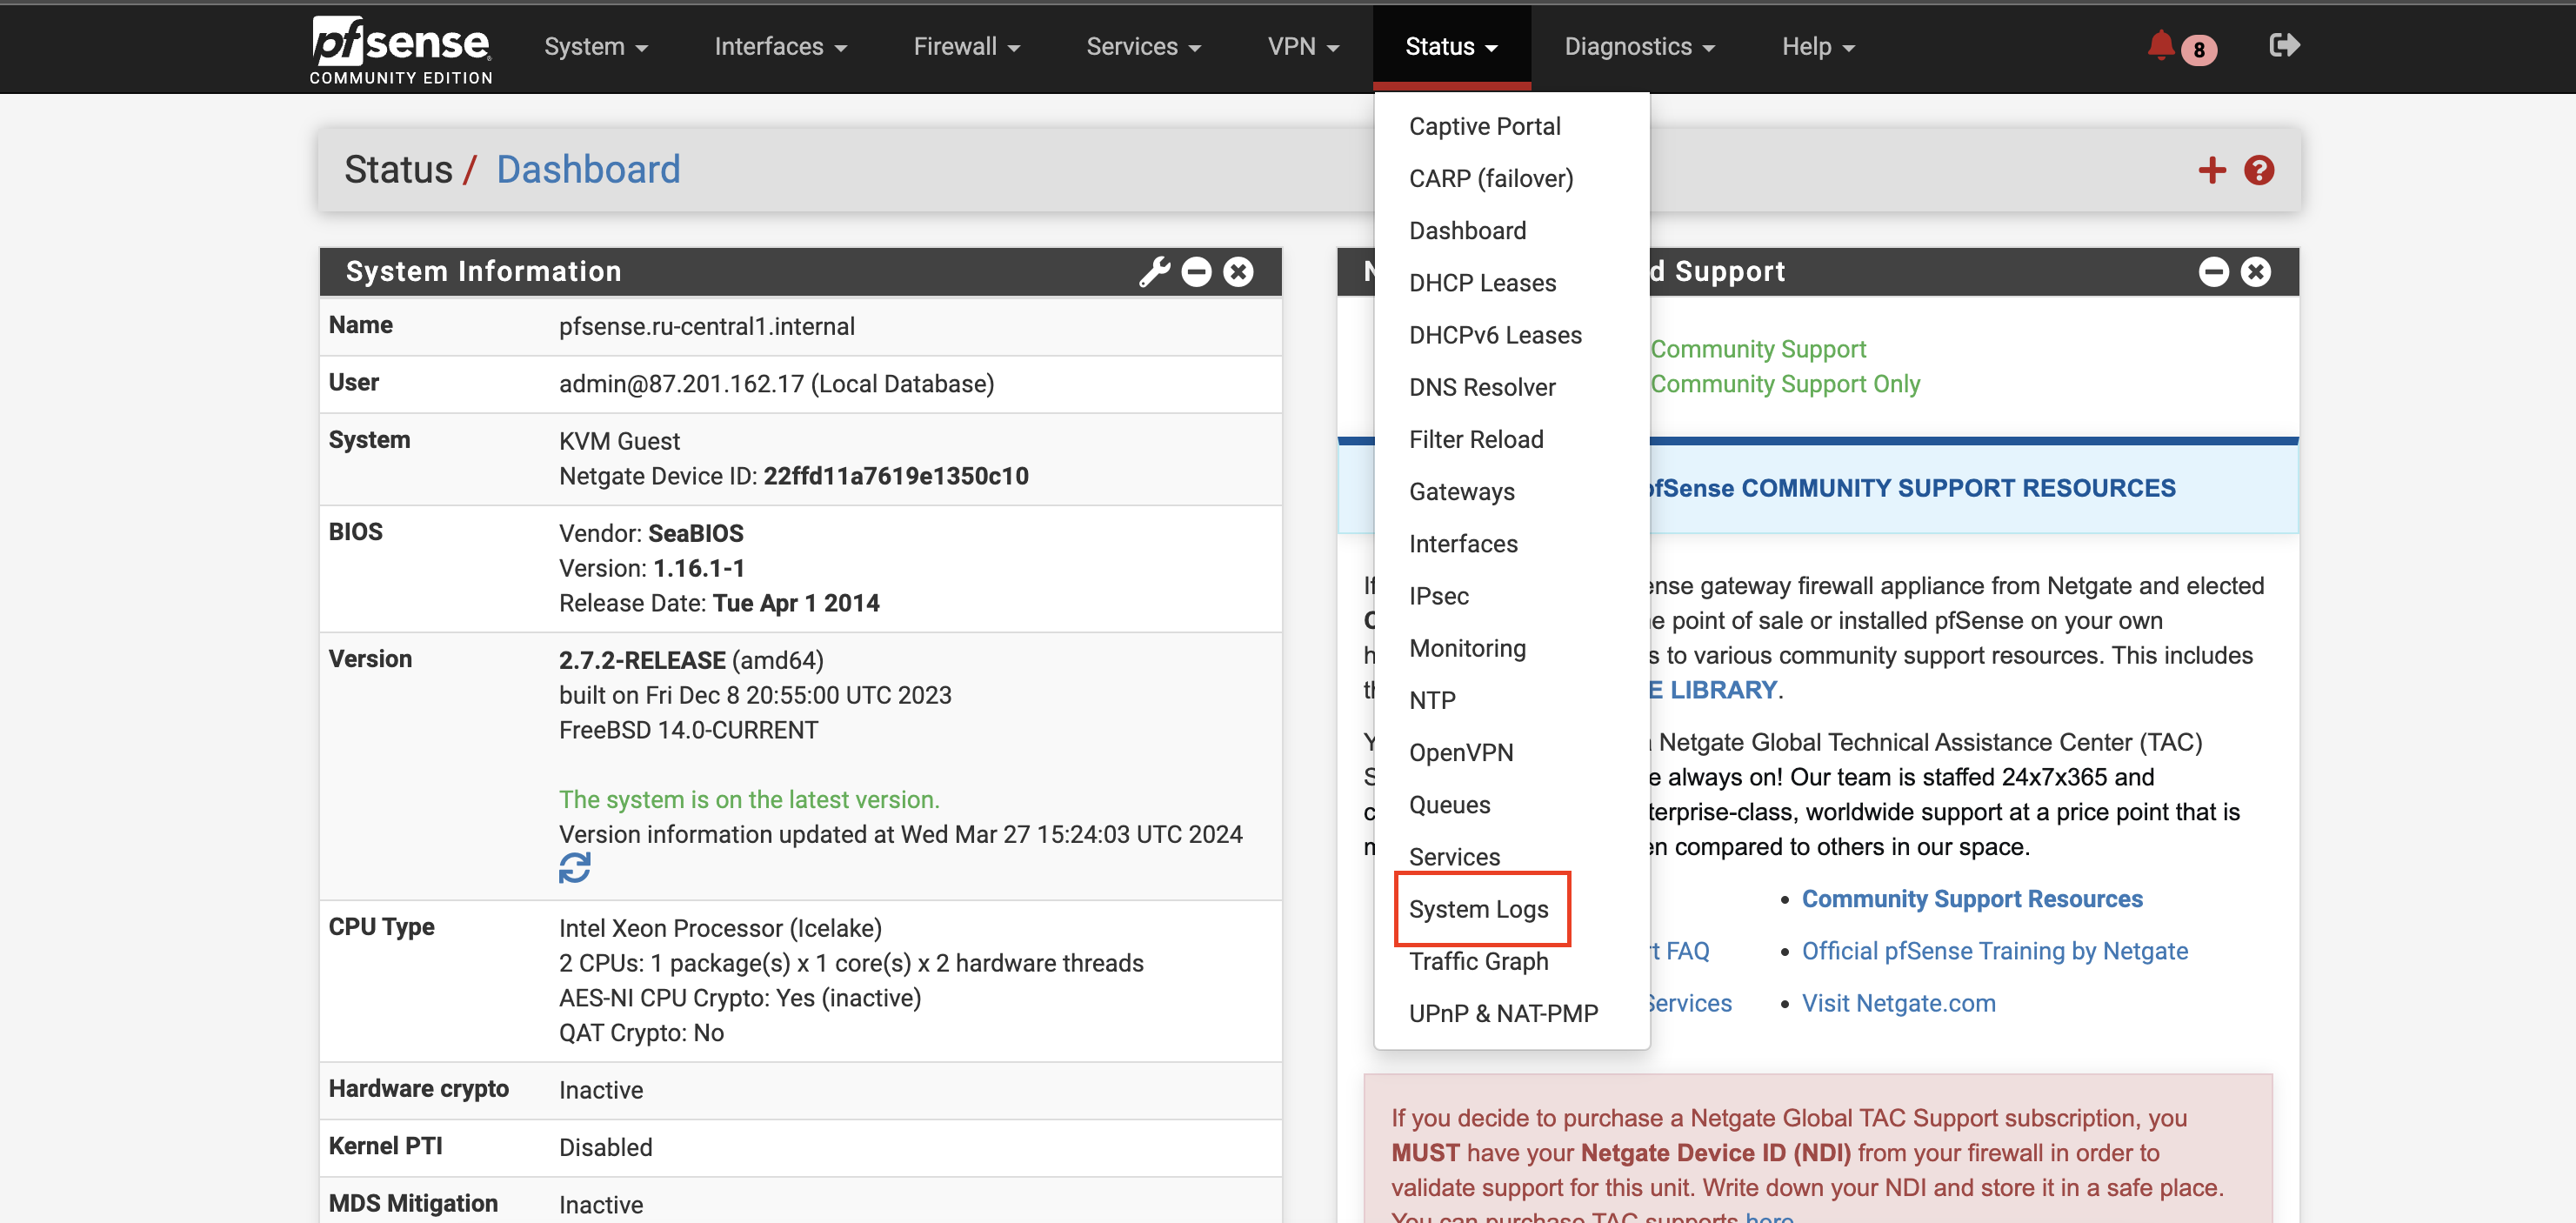
Open the pfsense web interface, select Status –> System Logs in the menu.
 On the page that opens, select
 Settings and scroll to the bottom of the page
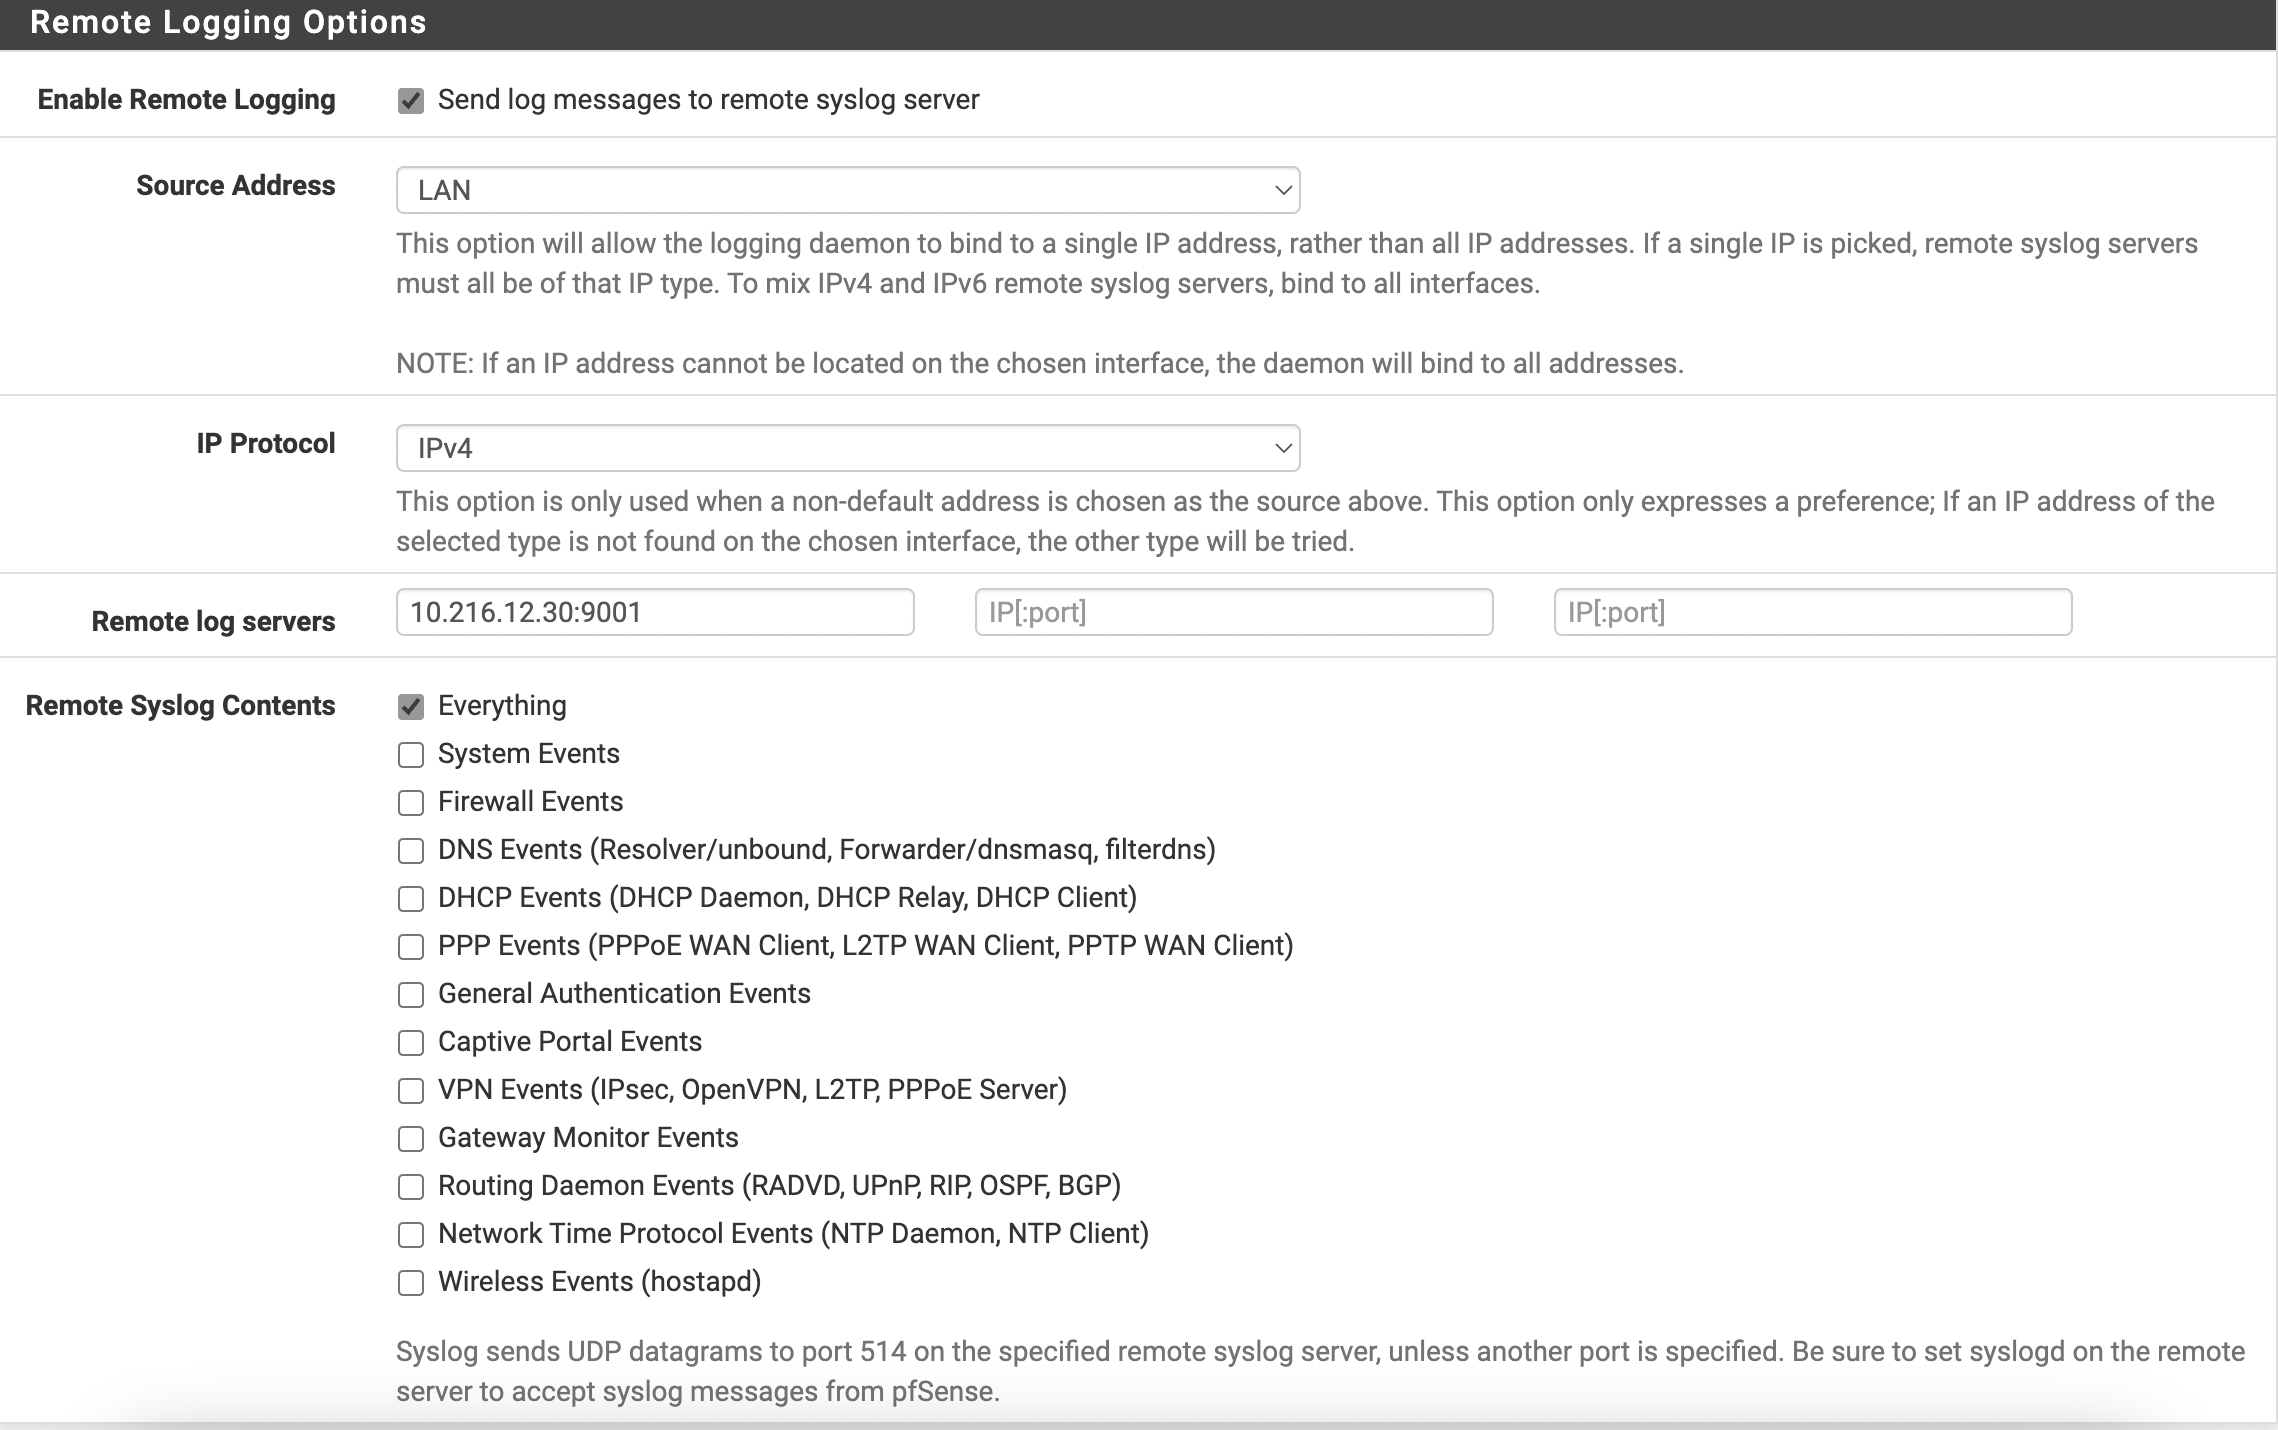
Check Enable Remote Logging, for Source Address select LAN, for IP Protocol select IPV4.
Write ip and port of SecurityOnion to Remote log servers.
For Remote Syslog Contents select Everything and click Save.
This completes the integration, after a couple of minutes we check that the events have appeared in SecurityOnion.
Open Hunt in the search query add * | groupby event.module* event.dataset, click HUNT, after the query works, scroll to the end of the page, you should see the pfsense
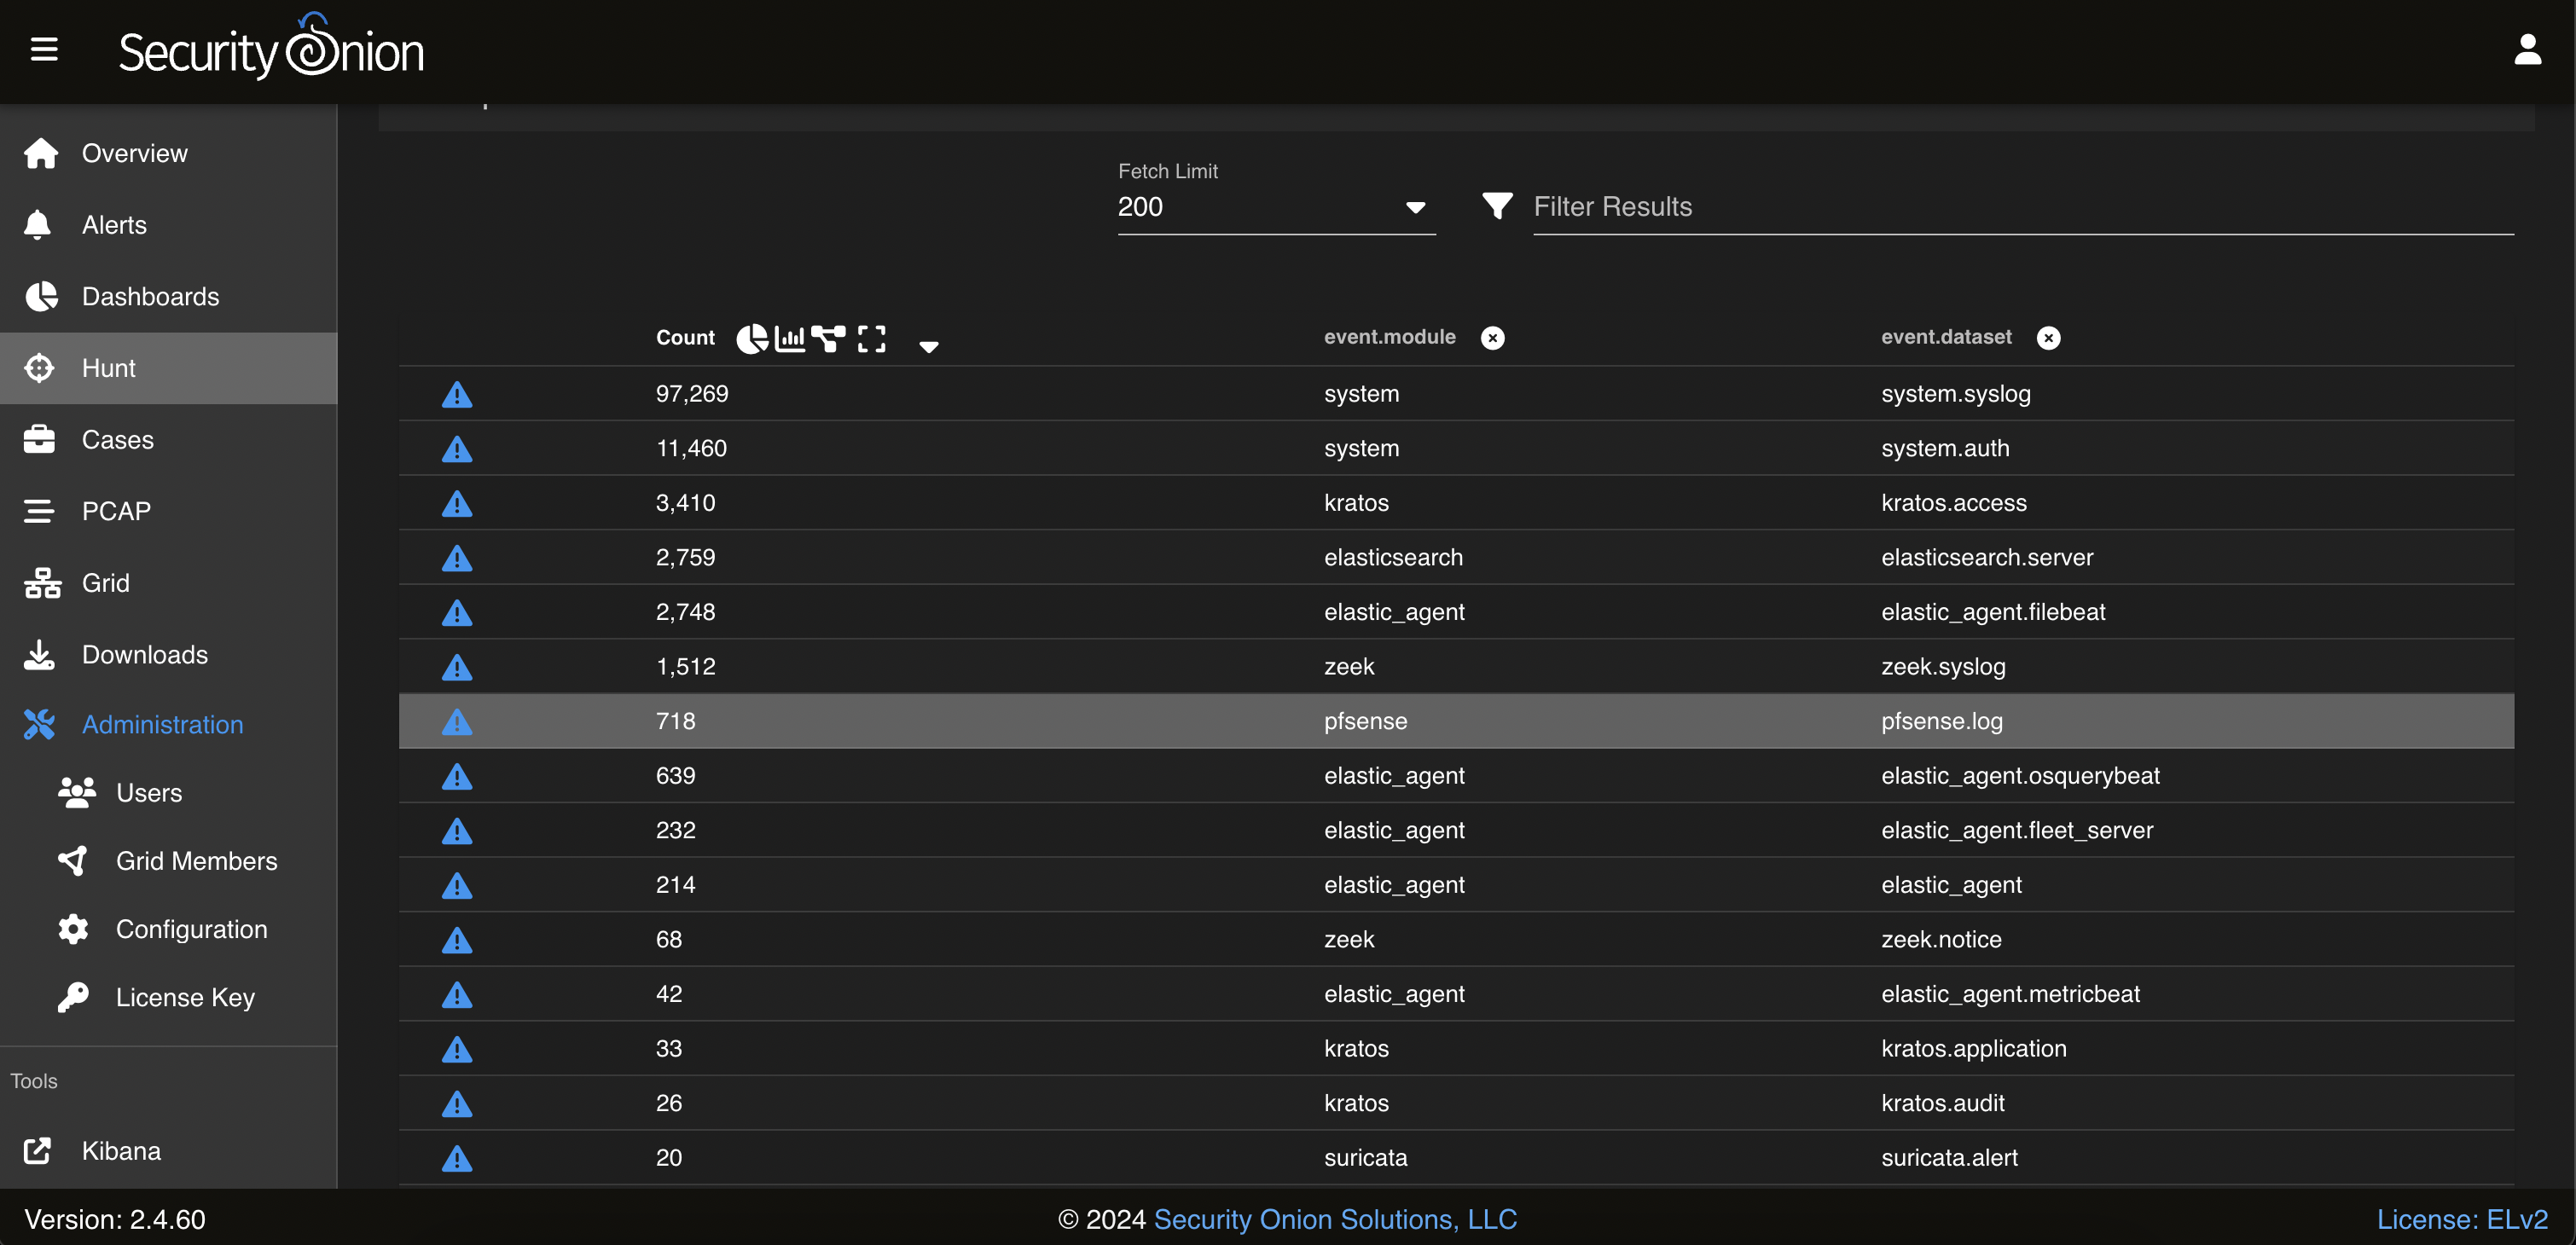
Example of events
